> ## Documentation Index
> Fetch the complete documentation index at: https://launchdarkly.com/docs/llms.txt
> Use this file to discover all available pages before exploring further.

# Using the advanced editor

<View title="Developer" />

<View title="Federal docs" />

<View title="EU docs" />

This topic explains how to access and use the advanced editor to create complex roles and policies. The advanced editor is a tool for experienced LaunchDarkly members who want to create their own roles. You can use it to create roles and policies that are more complex and detailed than those supported by the policy builder.

<Danger>
  **The advanced editor is powerful**

  The advanced editor can cause large permissions changes to sensitive or confidential resources. If you use the advanced editor incorrectly, it is possible to create a role that disables your LaunchDarkly project, locks yourself out of your account, or causes other irrevocable changes.

  It is critically important that you read all the documentation in the [Member role concepts](/docs/home/account/roles/role-concepts) section thoroughly before you use the advanced editor to create or modify any roles.

  To learn more, read [Member role concepts](/docs/home/account/roles/role-concepts).
</Danger>

## Create role policies with the advanced editor

To access the advanced editor:

1. Click the **gear** icon in the left sidebar to view Organization settings.

2. Click **Roles** in the left sidebar.

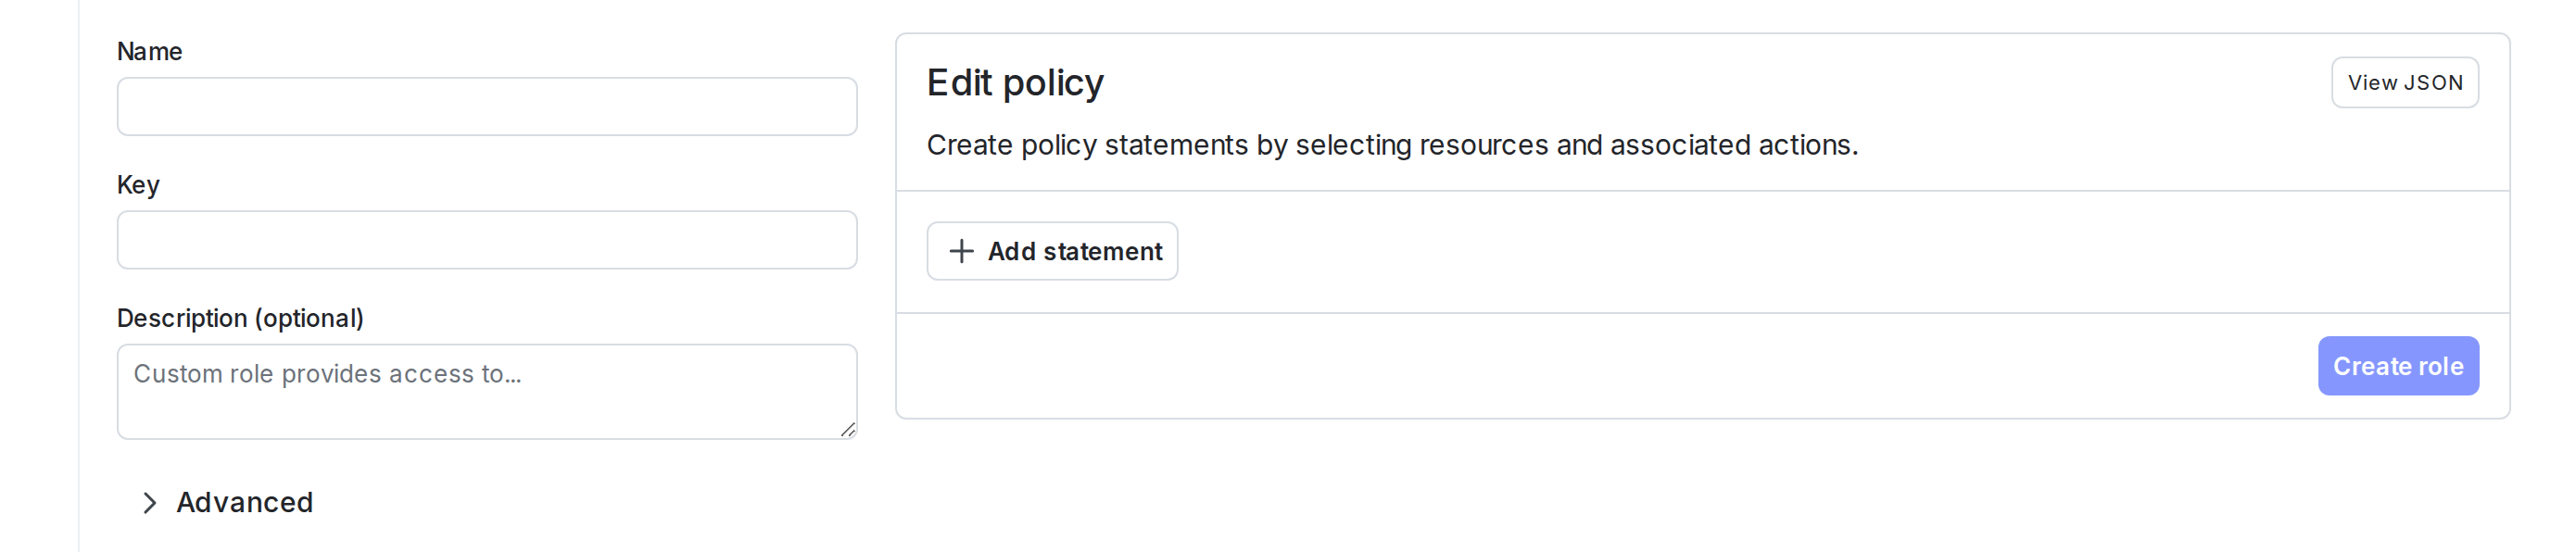
3. Click **Create role**. The New role page appears:

   <Frame caption="The New role page.">
     <img src="https://mintcdn.com/launchdarkly/-b7nPh0oyigf6iW7/images/auto/custom-roles-new-role.auto.png?fit=max&auto=format&n=-b7nPh0oyigf6iW7&q=85&s=748082d0bf357588e6eabbddad8cd1ca" alt="The New role page." width="2780" height="596" data-path="images/auto/custom-roles-new-role.auto.png" />
   </Frame>

4. In the "Edit Policy" panel, click **View JSON**.

5. (Optional) If you do not wish to use the advanced editor, click **Policy builder** to return to the graphical policy builder. Continue with the procedure [Create policies for roles](/docs/home/account/roles/role-create#create-policies-for-roles).

6. Specify the effects, resources, and actions you wish. You can also specify inverse action and resource sets using `notActions` and `notResources` respectively.

7. Click **Create role**.

## Syntax for the advanced editor

When you create a policy with the advanced editor, you use a JSON array to specify the policy. Each element in the policy array is a statement represented as a JSON object with three attributes:

<table>
  <thead>
    <tr>
      <th>Attribute name</th>
      <th>Description</th>
    </tr>
  </thead>

  <tbody>
    <tr>
      <td><code>effect</code></td>
      <td><code>allow</code> or <code>deny</code>.</td>
    </tr>

    <tr>
      <td><code>actions / notActions</code></td>
      <td>A list of action specifiers defining the actions to which the statement applies or does not apply. To review the available action specifiers, read [Using actions](/docs/home/account/roles/role-actions).</td>
    </tr>

    <tr>
      <td><code>resources / notResources</code></td>
      <td>A list of resource specifiers defining the resources to which the statement applies or does not apply. To review the available resource specifiers, read [About resource types and scopes](/docs/home/account/roles/role-resources#about-resource-types-and-scopes).</td>
    </tr>
  </tbody>
</table>

When you create a policy with the advanced editor, you can specify resources that the role can or cannot access in the following ways:

* All instances of the resource, for example, all projects:
  <CodeGroup>
    ```json title="All actions on all projects" lines wrap theme={null}
          [
            {
              "effect": "allow",
              "actions": ["*"],
              "resources": [ "proj/*"]
            }
          ]
    ```
  </CodeGroup>

* All instances of the resource with a few exceptions, for example, all projects except "Project A":
  <CodeGroup>
    ```json title="All actions on all projects except Project A" lines wrap theme={null}
          [
            {
              "effect": "allow",
              "actions": ["*"],
              "notResources": [ "proj/project-a"]
            }
          ]
    ```
  </CodeGroup>

* Only specific instances of the resource, for example, "Project A," "Project B," and "Project C":
  <CodeGroup>
    ```json title="All actions on Project A, Project B, Project C" lines wrap theme={null}
          [
            {
              "effect": "allow",
              "actions": ["*"],
              "resources": [ "proj/project-a", "proj/project-b", "proj/project-c"]
            }
          ]
    ```
  </CodeGroup>

* Only specific instances of the resource, where the instances are specified based on a parameter, called a [role attribute](/docs/home/getting-started/vocabulary#role-attribute). You specify the value of this parameter when you assign the role to a member or team. For example, all projects whose project key will be specified by the parameter `developerProjectKeys`:
  <CodeGroup>
    ```json title="All actions on project specified in developerProjectKeys" lines wrap theme={null}
          [
            {
              "effect": "allow",
              "actions": ["*"],
              "resources": ["proj/${roleAttribute/developerProjectKeys}"]
            }
          ]
    ```
  </CodeGroup>

* Only specific instances of the resource, where the instances have a particular tag. For example, all projects with the "example" tag:
  <CodeGroup>
    ```json title="All actions on projects with tag 'example'" lines wrap theme={null}
          [
            {
              "effect": "allow",
              "actions": ["*"],
              "resources": [ "proj/*;example"]
            }
          ]
    ```
  </CodeGroup>

* Only specific instances of the resource, where the instance properties match a particular value, for example, all environments that are marked as [critical](/docs/home/account/environment#critical-environments):
  <CodeGroup>
    ```json title="All actions on critical environments" lines wrap theme={null}
          [
            {
              "effect": "allow",
              "actions": ["*"],
              "resources": [ "proj/*:env/*;{critical:true}"]
            }
          ]
    ```
  </CodeGroup>

For the full list of properties you can select on, read [Property-based selectors](/docs/home/account/roles/role-concepts#property-based-selectors).

In the advanced editor, you must use resource keys, not display names. If you use names, the policies will not take effect. The resource keys are case-sensitive. For example, if the production environment of your default project has the key `production`, then referencing `proj/default:env/Production` in your policy will not work. Alternatively, you can use role attributes instead of specific resource keys in your policy. To learn more, read [Using role scope](/docs/home/account/roles/role-scope).

For advanced policy examples, read [Example roles and policies](/docs/home/account/roles/example-roles).

## Wildcards in policies

You can use an asterisk (`*`) as a wildcard in custom role policies. Use a wildcard in place of a list of actions when you want to match every action on a resource. This helps keeps a policy short. Using a wildcard also lets the role pick up any action LaunchDarkly adds to that resource later, without requiring a manual update to the policy.

<Warning>
  **A wildcard action grants approval bypass**

  If your environments require approvals, a role with `"actions": ["*"]` on flags can skip them. Review each role that uses a wildcard action before you assign it.
</Warning>

If you use a wildcard in a custom role, the role may allow actions that bypass your safeguards. For example, on the `flag` resource, `"actions": ["*"]` grants `bypassRequiredApproval`, which lets the member change flag targeting without going through the approval process your environment requires. The equivalent action for segments is `bypassRequiredSegmentApproval`.

To grant broad access while withholding approval bypass, pair the wildcard with a deny statement. A deny statement always overrides an allow statement for the same resource and action, whatever order they appear in:

<CodeGroup>
  ```json title="Allow all flag actions except approval bypass" lines wrap theme={null}
  [
    {
      "effect": "allow",
      "actions": ["*"],
      "resources": ["proj/*:env/*:flag/*"]
    },
    {
      "effect": "deny",
      "actions": ["bypassRequiredApproval"],
      "resources": ["proj/*:env/*:flag/*"]
    }
  ]
  ```
</CodeGroup>

To withhold the bypass in only some environments, read [Example: Deny bypassing approvals in critical environments](/docs/home/account/roles/example-roles#example-deny-bypassing-approvals-in-critical-environments). To learn more about what the bypass actions do, read [Bypass required approvals](/docs/home/releases/approval-config#bypass-required-approvals).
