> ## Documentation Index
> Fetch the complete documentation index at: https://launchdarkly.com/docs/llms.txt
> Use this file to discover all available pages before exploring further.
# Creating segments
This topic explains how to create rule-based, smaller list-based, larger list-based, and synced segments. To learn about the differences between these, read [Segment types](/docs/home/flags/segment-types).
## Create rule-based and smaller list-based segments
To create a new rule-based or smaller list-based segment:
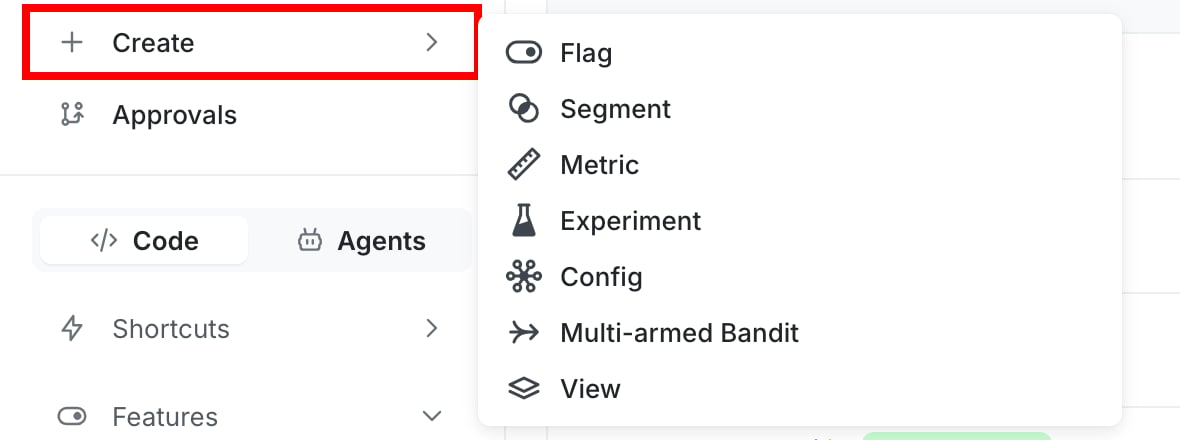
1. Click **Create** and choose **Segment**. The "Create a segment" dialog appears.
* If you're on an Enterprise plan, choose **Rule based-segments** or **List-based segments**.
* If you're on a Developer or Foundation plan, or on an older Pro plan, continue entering the segment's details.
 2. Give your segment a human-readable **Name**.
3. Enter a **Key** for your segment. This field auto-populates based on the segment name, but you can change it if you like.
4. (Optional) Add a **Description**.
5. (Optional) Select or create **Tags**. Tags help you identify segments used by different teams or for different purposes within your organization.
6. (Optional) Click **Add views** to link the segment to one or more views. If your project requires segments to be associated with a view, you must select at least one view. To learn more, read [Views](/docs/home/account/views).
7. If you chose **List-based segments** in step 2, under "How many individual targets will be in your list?" select **15,000 or fewer**:
2. Give your segment a human-readable **Name**.
3. Enter a **Key** for your segment. This field auto-populates based on the segment name, but you can change it if you like.
4. (Optional) Add a **Description**.
5. (Optional) Select or create **Tags**. Tags help you identify segments used by different teams or for different purposes within your organization.
6. (Optional) Click **Add views** to link the segment to one or more views. If your project requires segments to be associated with a view, you must select at least one view. To learn more, read [Views](/docs/home/account/views).
7. If you chose **List-based segments** in step 2, under "How many individual targets will be in your list?" select **15,000 or fewer**:
 8. Click **Save segment**. The segment's details page appears.
After you create the segment, you can add contexts in the following ways:
* To add targeting rules, read [Target contexts with rules](/docs/home/flags/rule-based-segments#target-contexts-with-rules).
* To add or change the individual targets one at a time, read [Target individual contexts](/docs/home/flags/rule-based-segments#target-individual-contexts).
* To add or change the individual targets in sets of up to 1500, read [Bulk edit individual contexts](/docs/home/flags/rule-based-segments#bulk-edit-individual-contexts).
## Create larger list-based segments
Before you create a larger list-based segment, you must create a comma-separated values (CSV) file containing the list of context keys you wish to include. The only data required for the CSV file is a list of context keys in the first column. You can add additional data in subsequent columns if you wish.
The CSV file has the following requirements:
* All of the contexts in the CSV file must be of the same context kind.
* The context keys must be in the first column of the CSV file. No other data is required.
* The CSV file must not contain a header row.
* The CSV file must not exceed 40MB in size.
* The CSV file must not contain more than 1 million contexts.
* If you want to add more than 1 million contexts, you can use the "Merge" option with multiple sequential file uploads. To learn more, read [Segments with existing contexts](/docs/home/flags/list-based-segments#segments-with-existing-contexts).
* You must upload multiple CSV files one at a time, as you cannot perform concurrent imports within a single environment.
To create a new larger list-based segment:
1. Click **Create** and choose **Segment**. The "Create a segment" dialog appears.
8. Click **Save segment**. The segment's details page appears.
After you create the segment, you can add contexts in the following ways:
* To add targeting rules, read [Target contexts with rules](/docs/home/flags/rule-based-segments#target-contexts-with-rules).
* To add or change the individual targets one at a time, read [Target individual contexts](/docs/home/flags/rule-based-segments#target-individual-contexts).
* To add or change the individual targets in sets of up to 1500, read [Bulk edit individual contexts](/docs/home/flags/rule-based-segments#bulk-edit-individual-contexts).
## Create larger list-based segments
Before you create a larger list-based segment, you must create a comma-separated values (CSV) file containing the list of context keys you wish to include. The only data required for the CSV file is a list of context keys in the first column. You can add additional data in subsequent columns if you wish.
The CSV file has the following requirements:
* All of the contexts in the CSV file must be of the same context kind.
* The context keys must be in the first column of the CSV file. No other data is required.
* The CSV file must not contain a header row.
* The CSV file must not exceed 40MB in size.
* The CSV file must not contain more than 1 million contexts.
* If you want to add more than 1 million contexts, you can use the "Merge" option with multiple sequential file uploads. To learn more, read [Segments with existing contexts](/docs/home/flags/list-based-segments#segments-with-existing-contexts).
* You must upload multiple CSV files one at a time, as you cannot perform concurrent imports within a single environment.
To create a new larger list-based segment:
1. Click **Create** and choose **Segment**. The "Create a segment" dialog appears.
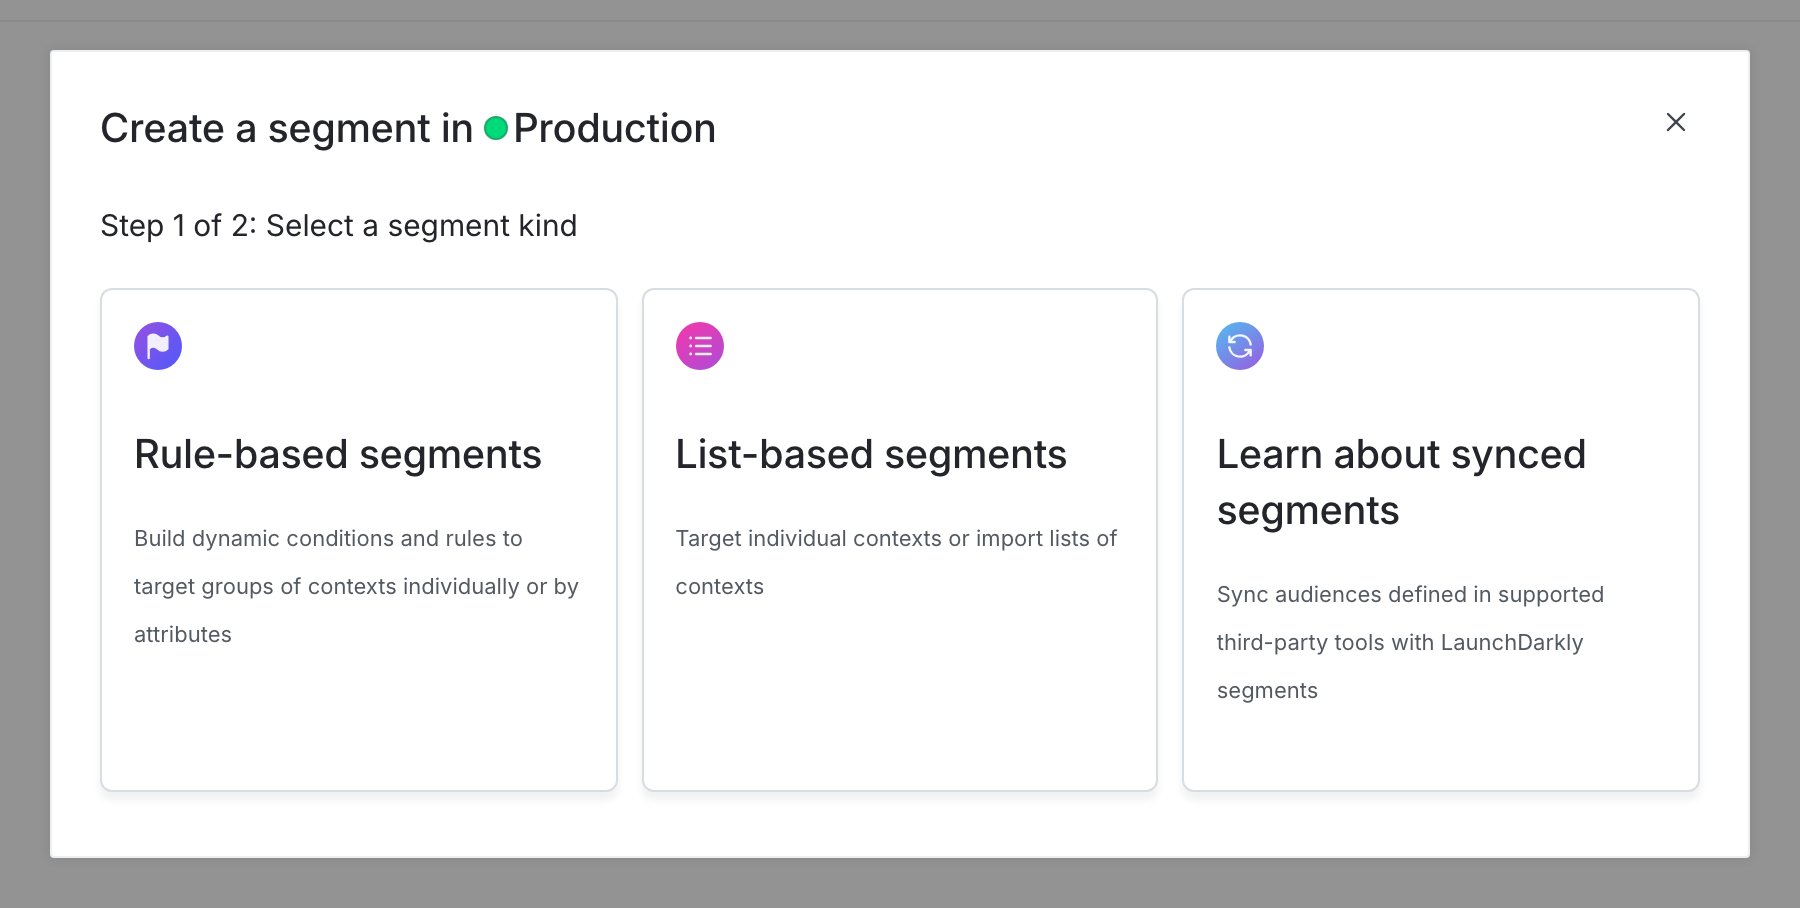 2. In the "Select a segment kind" step, choose **List-based segments**. The "Enter segment details" step appears.
3. Give your segment a human-readable **Name**.
4. Enter a **Key** for your segment. This field auto-populates based on the segment name, but you can change it if you like.
5. (Optional) Add a **Description**.
6. (Optional) Select or create **Tags**. Tags help you identify segments used by different teams or for different purposes within your organization.
7. (Optional) Click **Add views** to link the segment to one or more views. If your project requires segments to be associated with a view, you must select at least one view. To learn more, read [Views](/docs/home/account/views).
8. Under "How many individual targets will be in your list?", select "More than 15,000":
2. In the "Select a segment kind" step, choose **List-based segments**. The "Enter segment details" step appears.
3. Give your segment a human-readable **Name**.
4. Enter a **Key** for your segment. This field auto-populates based on the segment name, but you can change it if you like.
5. (Optional) Add a **Description**.
6. (Optional) Select or create **Tags**. Tags help you identify segments used by different teams or for different purposes within your organization.
7. (Optional) Click **Add views** to link the segment to one or more views. If your project requires segments to be associated with a view, you must select at least one view. To learn more, read [Views](/docs/home/account/views).
8. Under "How many individual targets will be in your list?", select "More than 15,000":
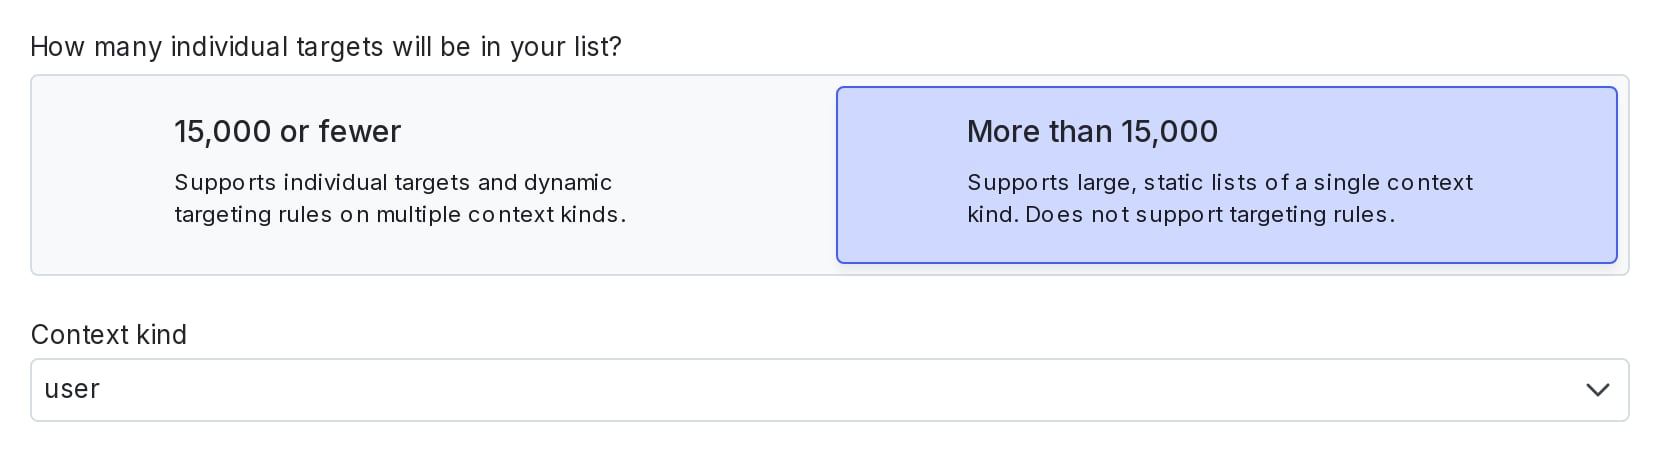 9. Select the **Context kind** from the menu.
10. Click **Save segment**. The segment's details page and the "Upload CSV" dialog appear.
11. In the "Upload CSV" dialog, click **Select file** to browse for a CSV file that lists context keys for the selected context kind in its first column.
12. In the "Upload CSV" dialog:
* To add the file immediately, click **Upload file**.
* To request approval, check the **Request approval** checkbox. Enter a **Comment** to add details that help your reviewers understand the changes you made. Next, choose one or more reviewers from the **Reviewers** menu. Then, click **Request approval**. To learn more about the approval process, read [Requesting approvals](/docs/home/releases/approval-requests).
The import process begins in the background. When the import completes successfully, you receive an email notification. Depending on the number of contexts in the CSV, this may take several minutes or hours.
Alternatively, you can click **Cancel** from the "Upload CSV" dialog and upload your CSV at a later time.
You can also use the REST API: [Create big segment import](/docs/api/segments/create-big-segment-import)
## Create synced segments
To learn how to create synced segments, read [Segments synced from external tools](/docs/home/flags/synced-segments).
9. Select the **Context kind** from the menu.
10. Click **Save segment**. The segment's details page and the "Upload CSV" dialog appear.
11. In the "Upload CSV" dialog, click **Select file** to browse for a CSV file that lists context keys for the selected context kind in its first column.
12. In the "Upload CSV" dialog:
* To add the file immediately, click **Upload file**.
* To request approval, check the **Request approval** checkbox. Enter a **Comment** to add details that help your reviewers understand the changes you made. Next, choose one or more reviewers from the **Reviewers** menu. Then, click **Request approval**. To learn more about the approval process, read [Requesting approvals](/docs/home/releases/approval-requests).
The import process begins in the background. When the import completes successfully, you receive an email notification. Depending on the number of contexts in the CSV, this may take several minutes or hours.
Alternatively, you can click **Cancel** from the "Upload CSV" dialog and upload your CSV at a later time.
You can also use the REST API: [Create big segment import](/docs/api/segments/create-big-segment-import)
## Create synced segments
To learn how to create synced segments, read [Segments synced from external tools](/docs/home/flags/synced-segments).