> ## Documentation Index
> Fetch the complete documentation index at: https://launchdarkly.com/docs/llms.txt
> Use this file to discover all available pages before exploring further.
# BigQuery native Experimentation
**Warehouse native Experimentation is not available in federal environments**
To learn more, read LaunchDarkly in federal environments.
**Contact us for help configuring BigQuery native Experimentation**
Access to BigQuery native Experimentation requires both [Data Export](/docs/integrations/data-export/bigquery) and [Experimentation](/docs/home/experimentation). If you do not have access or need help getting started, contact your LaunchDarkly representative or [start a Support ticket](https://support.launchdarkly.com/hc/en-us/requests/new).
This topic explains how to set up the BigQuery native Experimentation integration. BigQuery native Experimentation enables you to run experiments in LaunchDarkly using data directly from your Google Cloud BigQuery data warehouse. This lets LaunchDarkly experiments read and analyze your metrics data stored in BigQuery, without requiring you to send event data through LaunchDarkly SDKs.
Setting up the integration requires the following steps:
1. [Choosing an authentication method](#step-1-choose-an-authentication-method)
2. [Gathering your BigQuery project information](#step-2-gather-your-bigquery-project-information)
3. [Configuring the LaunchDarkly integration](#step-3-configure-the-launchdarkly-integration)
4. [Setting up Google Cloud resources](#step-4-set-up-google-cloud-resources)
5. [Adding your service account key](#step-5-add-your-service-account-key)
6. [Verifying the connection](#step-6-verify-the-connection)
## Prerequisites
Before setting up BigQuery native Experimentation, ensure that you have:
* The [BigQuery Data Export integration](/docs/integrations/data-export/bigquery) set up in LaunchDarkly for your selected project and environment.
* A Google Cloud Platform (GCP) project with [BigQuery enabled](https://cloud.google.com/bigquery/docs/enable-transfer-service).
* Permission to create service accounts, datasets, and IAM bindings in your GCP project.
* Access to [Google Cloud Shell](https://shell.cloud.google.com/), or the `gcloud` CLI and `bq` CLI installed locally.
* A [LaunchDarkly role](/docs/home/account/roles) of Owner or Admin, or a custom role that allows the following actions:
* [add and edit integrations](/docs/home/account/roles/role-actions#integration-actions)
* [add destinations](/docs/home/account/roles/role-actions#destination-actions)
* [add metric data sources](/docs/home/account/roles/role-actions#metric-data-source-actions)
* Metric event data in your BigQuery project that you want to use for Experimentation.
## Step 1: Choose an authentication method
**Workload identity federation authentication is in beta**
Development work on workload identity federation authentication is ongoing. Elements of this feature may change without notice.
LaunchDarkly supports two methods for authenticating the BigQuery native Experimentation integration to your Google Cloud project:
* **Service account key**: LaunchDarkly authenticates with the JSON key of a service account that the setup script creates. This is the default method. To use it, follow the numbered steps in this topic starting with [Step 2: Gather your BigQuery project information](#step-2-gather-your-bigquery-project-information).
* **Workload identity federation**: LaunchDarkly authenticates with an OAuth client from your own identity provider (IdP) and exchanges the credentials for short-lived Google Cloud credentials. LaunchDarkly does not store a service account key. To use it, read [Set up workload identity federation](#set-up-workload-identity-federation).
You select the authentication method when you create the integration. You cannot change it after you save the configuration.
If the "Authentication method" option does not appear in the configuration panel, workload identity federation is not enabled for your account.
### Set up workload identity federation
With workload identity federation, the setup script does not create a service account or a key file. Instead, it creates the results dataset, grants the required permissions to an existing service account that you provide, and adds the workload identity binding. If you are setting up workload identity federation in Google Cloud for the first time, read Google's [Workload identity federation](https://docs.cloud.google.com/iam/docs/workload-identity-federation) documentation.
### Prepare your identity provider and Google Cloud project
Before you configure the integration in LaunchDarkly, you need:
* An OAuth client in your identity provider for LaunchDarkly to use. Save the client ID, the client secret, and your identity provider's OAuth2 token endpoint URL.
* A [workload identity pool and provider](https://docs.cloud.google.com/iam/docs/workload-identity-federation) in your Google Cloud project, configured to trust your identity provider. Save the provider's full resource name.
* An existing service account to hold the BigQuery roles. The setup script grants the roles and adds the workload identity binding, `roles/iam.workloadIdentityUser`, for your workload identity principal, but it does not create the service account.
### Configure the integration with workload identity federation
To configure the integration with workload identity federation, complete steps 1 through 10 in [Step 3: Configure the LaunchDarkly integration](#step-3-configure-the-launchdarkly-integration). Then:
1. Under "Authentication method," select **Workload identity federation**.
2. Enter your **Identity provider token URL**. This is the OAuth2 token endpoint of your identity provider.
3. Enter your **Client ID**.
4. Enter your **Client secret**. LaunchDarkly stores the client secret encrypted.
5. Enter the **Workload identity provider resource name**. This is the full resource name of your workload identity pool provider, for example `//iam.googleapis.com/projects/123/locations/global/workloadIdentityPools/pool/providers/provider`. You can find it in the Google Cloud console under "Workload Identity Federation."
6. Enter your **Service account email**. This is the existing service account that holds the BigQuery roles.
7. (Optional) Enter an **STS endpoint override**. Leave it blank to use Google's standard Security Token Service (STS) endpoint.
8. (Optional) Enter **Identity provider scopes** if your identity provider requires scopes in the token request. Separate multiple scopes with spaces.
9. Click **Generate setup script**, then run the script as described in [Step 4: Set up Google Cloud resources](#step-4-set-up-google-cloud-resources). With workload identity federation, the script does not create a key file.
10. Return to the configuration screen. After reading the Integration Terms and Conditions, check the **I have read and agree to the Integration Terms and Conditions** checkbox.
11. Click **Save configuration**.
Skip [Step 5: Add your service account key](#step-5-add-your-service-account-key). That step only applies to the service account key method. Then [verify the connection](#step-6-verify-the-connection).
## Step 2: Gather your BigQuery project information
To begin, collect the following information about your Google Cloud project:
* **GCP project ID**: Available in the [GCP Console](https://console.cloud.google.com/), under the top project dropdown, labeled **Project ID**. This is the Google Cloud project that holds your BigQuery resources. Legacy domain-scoped project IDs are also supported.
* **Dataset location**: Available in BigQuery under your dataset labeled **Dataset info**. This is the BigQuery region where your datasets are located, for example `US`, `us-central1`, or `asia-south1`. All datasets must be in the same location. You cannot change this after saving.
* **Results dataset ID**: A name for the new dataset where LaunchDarkly will write computed experiment results. Use only letters, numbers, and underscores, for example `ld_experimentation_results`. The setup script will create this dataset for you.
* **Export dataset ID**: Available in BigQuery under your Data Export destination dataset. This is the dataset where your BigQuery Data Export destination writes evaluation events. This is the same dataset you configured in Data Export, for example `ld_data_export`.
* **Metrics dataset ID (optional)**: Available in BigQuery under your metrics dataset. This is the dataset containing your metric events table. If you omit this, the Google Cloud service account will have the **BigQuery Data Viewer** IAM role on your GCP project, rather than only on the metrics dataset. You cannot change this after saving.
## Step 3: Configure the LaunchDarkly integration
Now, you will configure the BigQuery native Experimentation integration in LaunchDarkly. This integration is a second LaunchDarkly integration that looks similar to the BigQuery Data Export integration, but requires a separate setup process.
To set up the integration:
1. Navigate to the [**Integrations**](https://app.launchdarkly.com/settings/integrations) page.
2. Search for and select **BigQuery Native Experimentation**.
3. Click **Add integration**. The [configuration panel](https://app.launchdarkly.com/settings/integrations/bigquery-experimentation/new) appears.
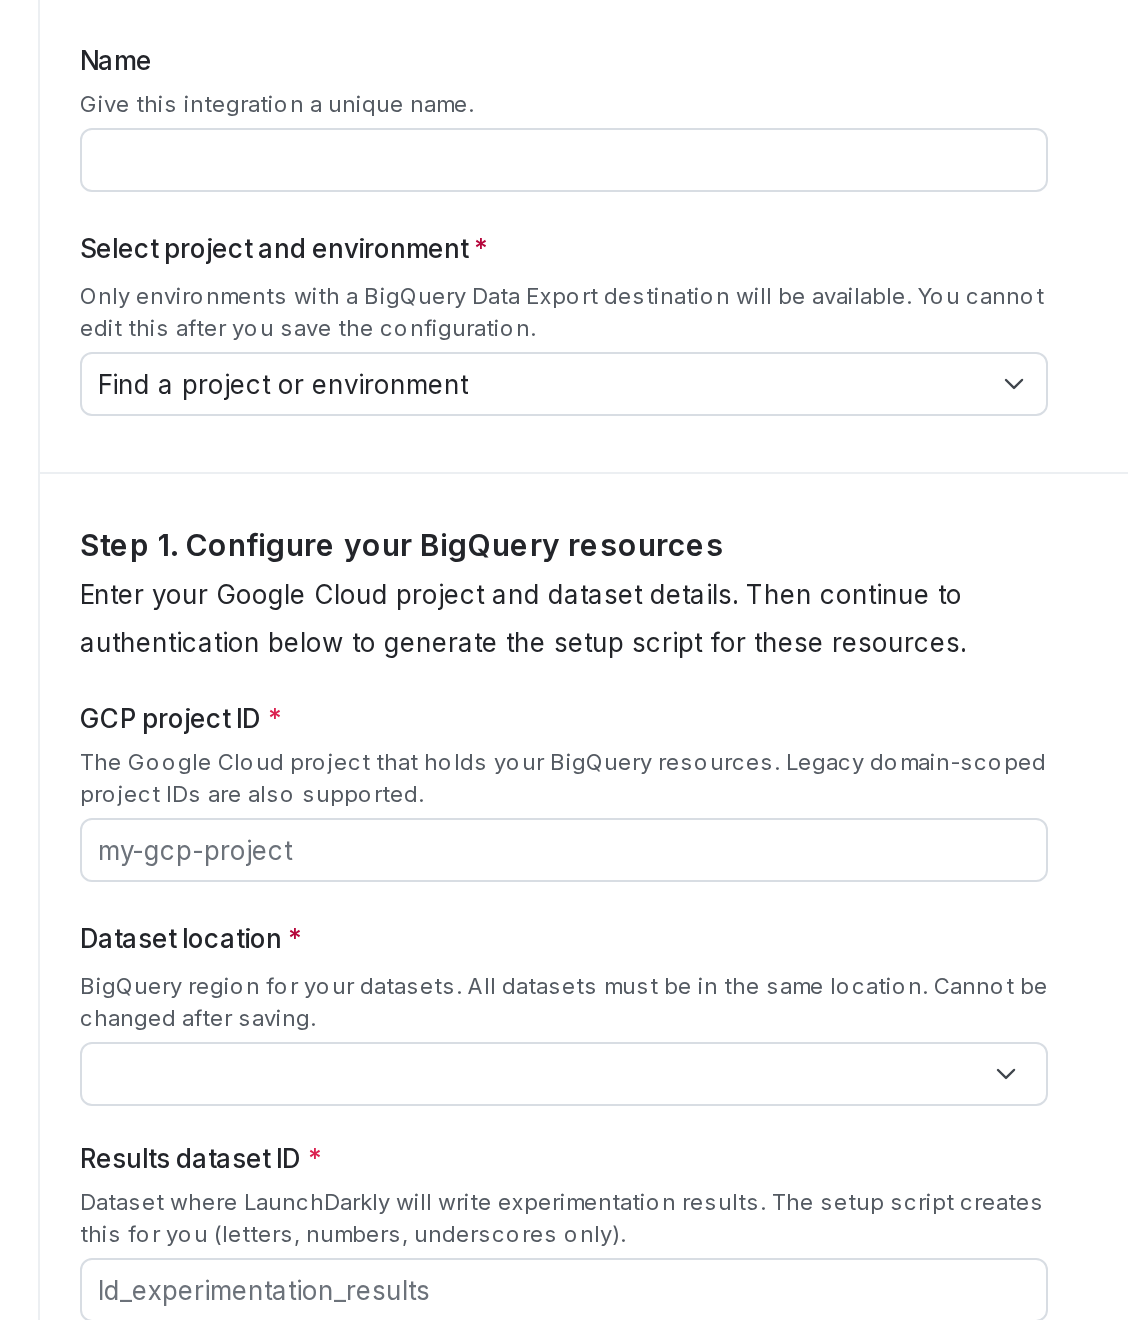 4. Enter an integration **Name**.
5. Select the LaunchDarkly **Project and environment** for this integration. Only environments with a BigQuery Data Export destination are available.
6. Enter your **GCP project ID**.
7. Select your **Dataset location**.
8. Enter your **Results dataset ID**.
9. Enter your **Export dataset ID**. This is the same dataset you configured when setting up BigQuery Data Export.
10. (Optional) Enter your **Metrics dataset ID**.
11. Click **Generate setup script**. LaunchDarkly generates a Google Cloud setup script. Copy and save this script for use in the next step.
Keep the configuration screen open, as you will return to it in a later step.
## Step 4: Set up Google Cloud resources
LaunchDarkly needs a GCP service account with permissions to take actions in your GCP project. You can either run the setup script you generated in the last section, or complete the steps manually in the Google Cloud Console.
### Option A: Run the setup script
Run the script using one of the following methods:
* **Google Cloud Shell** (no local install needed): Open the [Cloud Shell editor terminal](https://shell.cloud.google.com/) and paste the script from step 11 in the previous section.
* **Local terminal**: If you have `gcloud` and `bq` installed locally, paste and run the script in your terminal.
After the script completes, run `cat ld-experimentation-key.json` to print the JSON key file contents, then copy them to use in [Step 5](#step-5-add-your-service-account-key).
### Option B: Set up manually in the Google Cloud Console
If you prefer to use the Google Cloud Console UI instead of the script, expand the section below.
#### Create the service account
1. In the Google Cloud Console, navigate to [**IAM & Admin** > **Service Accounts**](https://console.cloud.google.com/iam-admin/serviceaccounts).
2. Click **Create service account**.
4. Enter an integration **Name**.
5. Select the LaunchDarkly **Project and environment** for this integration. Only environments with a BigQuery Data Export destination are available.
6. Enter your **GCP project ID**.
7. Select your **Dataset location**.
8. Enter your **Results dataset ID**.
9. Enter your **Export dataset ID**. This is the same dataset you configured when setting up BigQuery Data Export.
10. (Optional) Enter your **Metrics dataset ID**.
11. Click **Generate setup script**. LaunchDarkly generates a Google Cloud setup script. Copy and save this script for use in the next step.
Keep the configuration screen open, as you will return to it in a later step.
## Step 4: Set up Google Cloud resources
LaunchDarkly needs a GCP service account with permissions to take actions in your GCP project. You can either run the setup script you generated in the last section, or complete the steps manually in the Google Cloud Console.
### Option A: Run the setup script
Run the script using one of the following methods:
* **Google Cloud Shell** (no local install needed): Open the [Cloud Shell editor terminal](https://shell.cloud.google.com/) and paste the script from step 11 in the previous section.
* **Local terminal**: If you have `gcloud` and `bq` installed locally, paste and run the script in your terminal.
After the script completes, run `cat ld-experimentation-key.json` to print the JSON key file contents, then copy them to use in [Step 5](#step-5-add-your-service-account-key).
### Option B: Set up manually in the Google Cloud Console
If you prefer to use the Google Cloud Console UI instead of the script, expand the section below.
#### Create the service account
1. In the Google Cloud Console, navigate to [**IAM & Admin** > **Service Accounts**](https://console.cloud.google.com/iam-admin/serviceaccounts).
2. Click **Create service account**.
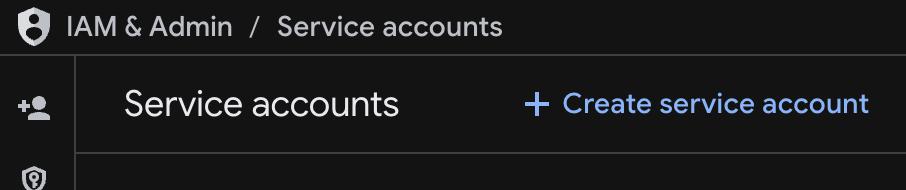 3. Enter a name that meets [GCP naming requirements](https://cloud.google.com/iam/docs/service-accounts-create). For example, `launchdarkly-experimentation`.
4. Click **Done**. Do not grant any roles at this step.
#### Create the results dataset
1. In the Google Cloud Console, navigate to [**BigQuery**](https://console.cloud.google.com/bigquery).
2. Select your project and click **Create dataset**.
3. Enter a name that meets [GCP naming requirements](https://cloud.google.com/iam/docs/service-accounts-create). For example, `launchdarkly-experimentation`.
4. Click **Done**. Do not grant any roles at this step.
#### Create the results dataset
1. In the Google Cloud Console, navigate to [**BigQuery**](https://console.cloud.google.com/bigquery).
2. Select your project and click **Create dataset**.
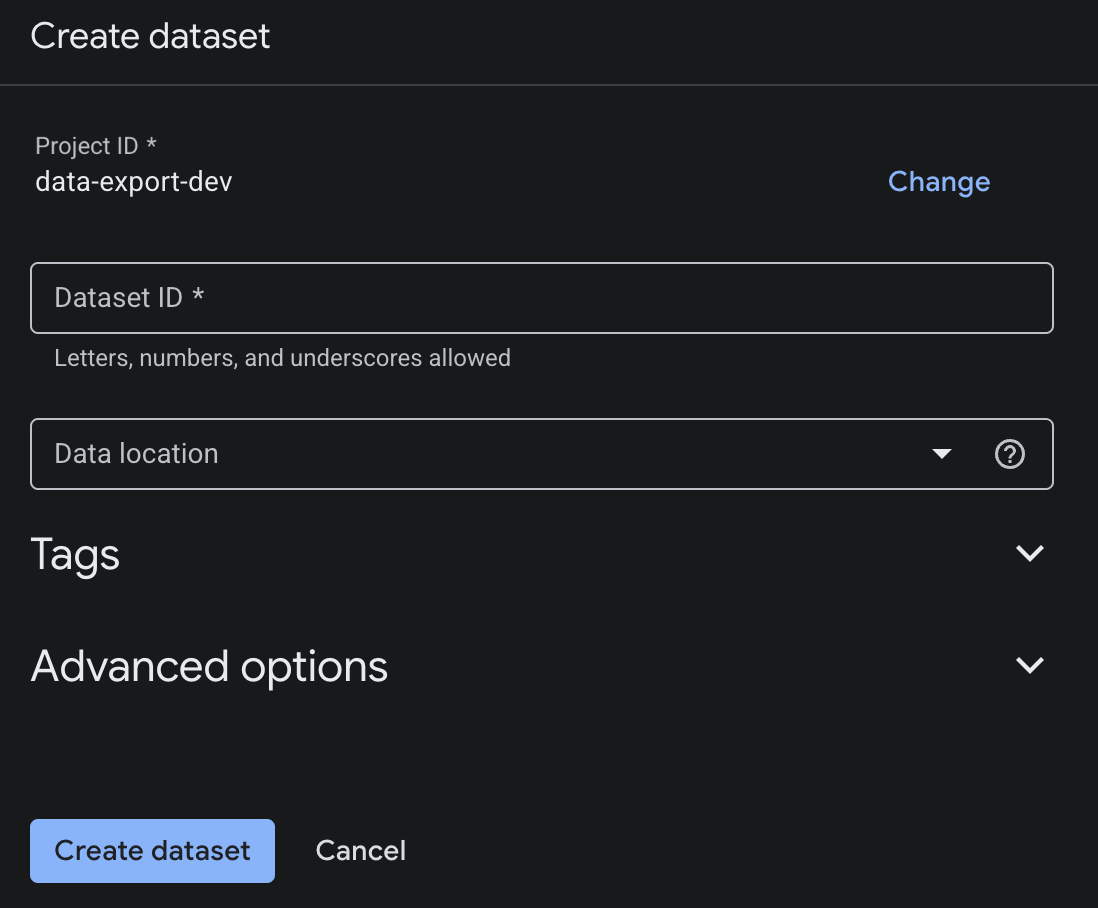 3. Enter your results dataset ID.
4. Select the same location as your other datasets.
5. Click **Create dataset**.
#### Grant the BigQuery Job User role at the GCP project level
1. Navigate to [**IAM & Admin** > **IAM**](https://console.cloud.google.com/iam-admin/iam).
2. Click **Grant Access**.
3. Enter your results dataset ID.
4. Select the same location as your other datasets.
5. Click **Create dataset**.
#### Grant the BigQuery Job User role at the GCP project level
1. Navigate to [**IAM & Admin** > **IAM**](https://console.cloud.google.com/iam-admin/iam).
2. Click **Grant Access**.
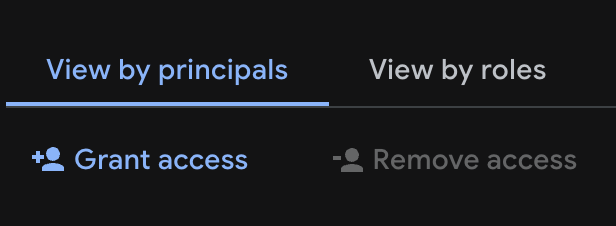 3. Enter the full service account email, for example `YOUR_SA_NAME@YOUR_PROJECT_ID.iam.gserviceaccount.com`.
4. Select the role **BigQuery Job User**.
3. Enter the full service account email, for example `YOUR_SA_NAME@YOUR_PROJECT_ID.iam.gserviceaccount.com`.
4. Select the role **BigQuery Job User**.
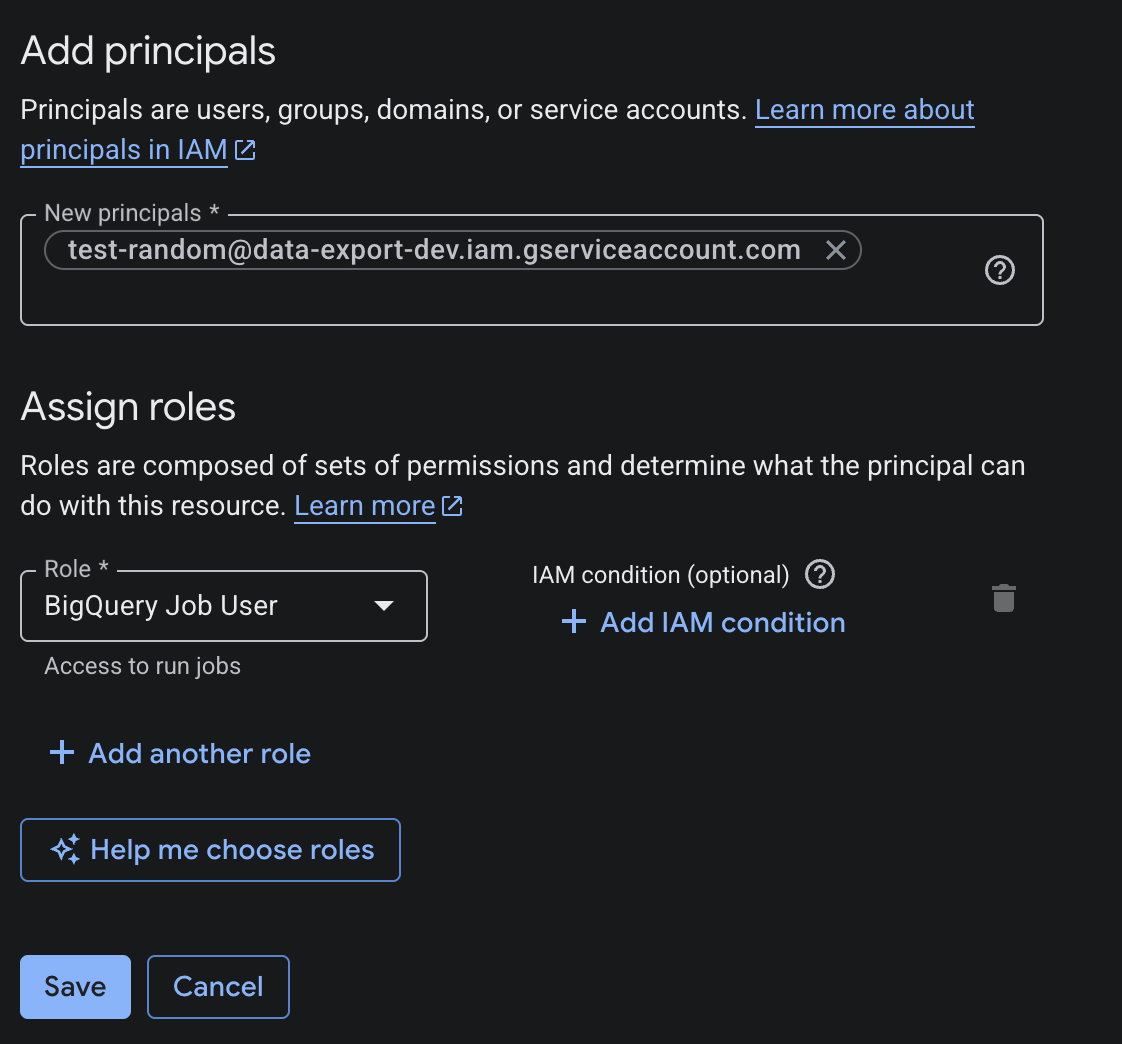 5. Click **Save**.
#### Grant dataset-level permissions
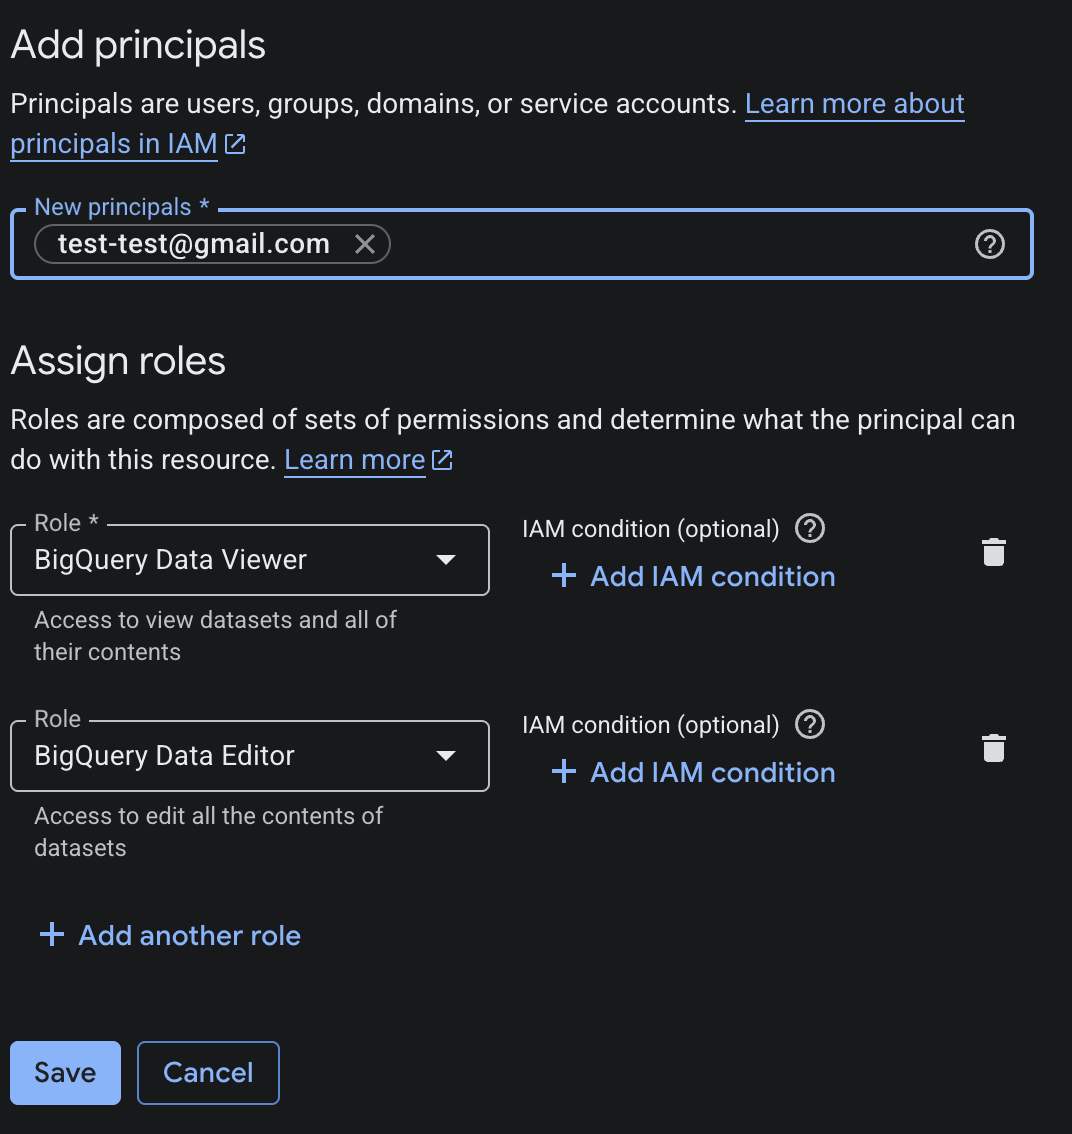
Grant the service account **BigQuery Data Editor** on the results dataset:
1. In BigQuery, select the results dataset.
2. Click **Share** > **Manage permissions** > **Add Principal**.
3. Enter the service account email, select **BigQuery Data Editor**, and click **Save**.
Grant the service account **BigQuery Data Viewer** on the export dataset:
1. In BigQuery, select the export dataset.
2. Click **Share** > **Manage permissions** > **Add Principal**.
5. Click **Save**.
#### Grant dataset-level permissions
Grant the service account **BigQuery Data Editor** on the results dataset:
1. In BigQuery, select the results dataset.
2. Click **Share** > **Manage permissions** > **Add Principal**.
3. Enter the service account email, select **BigQuery Data Editor**, and click **Save**.
Grant the service account **BigQuery Data Viewer** on the export dataset:
1. In BigQuery, select the export dataset.
2. Click **Share** > **Manage permissions** > **Add Principal**.
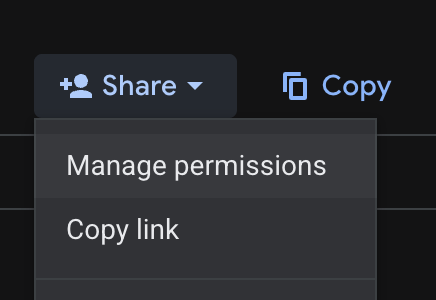 3. Enter the service account email, select **BigQuery Data Viewer**, and click **Save**.
 #### Grant read access for metrics
If you specified a metrics dataset:
1. In BigQuery, select the metrics dataset.
2. Click **Share** > **Manage permissions** > **Add Principal**.
3. Enter the service account email, select **BigQuery Data Viewer**, and click **Save**.
If you did not specify a metrics dataset:
1. Navigate to [**IAM & Admin** > **IAM**](https://console.cloud.google.com/iam-admin/iam).
2. Click **Grant Access**.
3. Enter the service account email, select **BigQuery Data Viewer** at the GCP project level, and click **Save**.
#### Create and download the JSON key
1. Navigate to [**IAM & Admin** > **Service Accounts**](https://console.cloud.google.com/iam-admin/serviceaccounts).
2. Select your service account.
3. Click the **Keys** tab > **Add Key** > **Create new key**.
#### Grant read access for metrics
If you specified a metrics dataset:
1. In BigQuery, select the metrics dataset.
2. Click **Share** > **Manage permissions** > **Add Principal**.
3. Enter the service account email, select **BigQuery Data Viewer**, and click **Save**.
If you did not specify a metrics dataset:
1. Navigate to [**IAM & Admin** > **IAM**](https://console.cloud.google.com/iam-admin/iam).
2. Click **Grant Access**.
3. Enter the service account email, select **BigQuery Data Viewer** at the GCP project level, and click **Save**.
#### Create and download the JSON key
1. Navigate to [**IAM & Admin** > **Service Accounts**](https://console.cloud.google.com/iam-admin/serviceaccounts).
2. Select your service account.
3. Click the **Keys** tab > **Add Key** > **Create new key**.
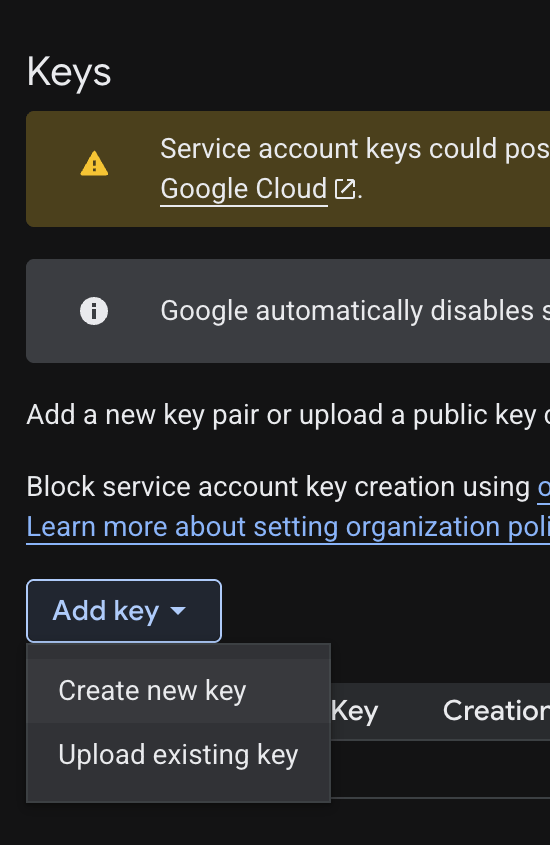 4. Select **JSON** and click **Create**. The browser downloads a key file.
## Step 5: Add your service account key
If you use workload identity federation, skip this step. LaunchDarkly does not store a service account key for that method.
After completing the setup process:
1. Return to the LaunchDarkly configuration screen.
2. Paste the full contents of the JSON key file you downloaded from Google Cloud into the **Service account key (JSON)** field.
3. After reading the Integration Terms and Conditions, check the **I have read and agree to the Integration Terms and Conditions** checkbox.
4. Click **Save configuration**.
## Step 6: Verify the connection
Finally, verify the connection. On the integration configuration page, check the "Connection status" indicator. A green **Healthy** status confirms LaunchDarkly can connect to your BigQuery project and has the correct permissions.
If the connection is not healthy, verify that:
* You completed all setup steps without errors.
* The dataset location you entered matches the region your datasets are actually in.
* The Data Export destination and the BigQuery native Experimentation integration are configured for the same LaunchDarkly environment.
## Next steps
After your integration is connected, complete the following steps to start running experiments:
1. [Create a metric data source](/docs/home/warehouse-native/metric-data-sources#create-data-sources): point LaunchDarkly at your metric events table so it can read conversion and numeric event data.
2. [Create metrics](/docs/home/metrics/create-metrics): define what you want to measure using your BigQuery data.
3. [Create an experiment](/docs/home/experimentation/create): when setting up your experiment, select **Warehouse native (BigQuery)** as the data source.
To learn how to analyze your results, read [Analyzing experiments](/docs/home/experimentation/analyze).
The results page for a warehouse native experiment displays the date and time the results were last updated from BigQuery. The initial load of experiment results can take up to 60 minutes to appear, and further results updates appear within 15–30 minutes.
4. Select **JSON** and click **Create**. The browser downloads a key file.
## Step 5: Add your service account key
If you use workload identity federation, skip this step. LaunchDarkly does not store a service account key for that method.
After completing the setup process:
1. Return to the LaunchDarkly configuration screen.
2. Paste the full contents of the JSON key file you downloaded from Google Cloud into the **Service account key (JSON)** field.
3. After reading the Integration Terms and Conditions, check the **I have read and agree to the Integration Terms and Conditions** checkbox.
4. Click **Save configuration**.
## Step 6: Verify the connection
Finally, verify the connection. On the integration configuration page, check the "Connection status" indicator. A green **Healthy** status confirms LaunchDarkly can connect to your BigQuery project and has the correct permissions.
If the connection is not healthy, verify that:
* You completed all setup steps without errors.
* The dataset location you entered matches the region your datasets are actually in.
* The Data Export destination and the BigQuery native Experimentation integration are configured for the same LaunchDarkly environment.
## Next steps
After your integration is connected, complete the following steps to start running experiments:
1. [Create a metric data source](/docs/home/warehouse-native/metric-data-sources#create-data-sources): point LaunchDarkly at your metric events table so it can read conversion and numeric event data.
2. [Create metrics](/docs/home/metrics/create-metrics): define what you want to measure using your BigQuery data.
3. [Create an experiment](/docs/home/experimentation/create): when setting up your experiment, select **Warehouse native (BigQuery)** as the data source.
To learn how to analyze your results, read [Analyzing experiments](/docs/home/experimentation/analyze).
The results page for a warehouse native experiment displays the date and time the results were last updated from BigQuery. The initial load of experiment results can take up to 60 minutes to appear, and further results updates appear within 15–30 minutes.