> ## Documentation Index
> Fetch the complete documentation index at: https://launchdarkly.com/docs/llms.txt
> Use this file to discover all available pages before exploring further.

# AppDynamics

<View title="Developer" />

<View title="Federal docs" />

<View title="EU docs" />

<Note>
  **The AppDynamics integration is available to customers on select plans**

  The AppDynamics integration is only available to customers on select plans. To learn more, [read about our pricing](https://launchdarkly.com/pricing/). To upgrade your plan, [contact Sales](https://launchdarkly.com/contact-sales/).
</Note>

This topic explains how to use the LaunchDarkly AppDynamics integration to view LaunchDarkly events in AppDynamics. [AppDynamics](https://www.appdynamics.com/) is an [application performance management (APM)](https://en.m.wikipedia.org/wiki/Application_performance_management) tool. It allows customers to monitor the operational health of their application and infrastructure.

<Note>
  **This integration is for AppDynamics APM SaaS customers**

  This integration is not configured to work with AppDynamic's End User Monitoring products or on-premises deployments
  of AppDynamics.
</Note>

## Prerequisites

To configure the integration successfully, you will need to create an [API Client](https://help.splunk.com/en/appdynamics-saas/extend-splunk-appdynamics/26.1.0/extend-splunk-appdynamics/splunk-appdynamics-apis/api-clients) with [Create Events permissions](https://help.splunk.com/en/appdynamics-saas/accounts/splunk-appdynamics-saas-user-management/manage-custom-roles-for-splunk-appdynamics/create-custom-roles) correctly on your AppDynamics account.

## Configure LaunchDarkly to work with AppDynamics

To configure LaunchDarkly to start sending events to AppDynamics:

1. Click the **gear** icon in the left sidebar to view Organization settings.
2. Click **Integrations** and find "AppDynamics."
3. Click **Add integration**. The "Create AppDynamics configuration" panel appears.
4. Give the integration a human-readable **Name**.
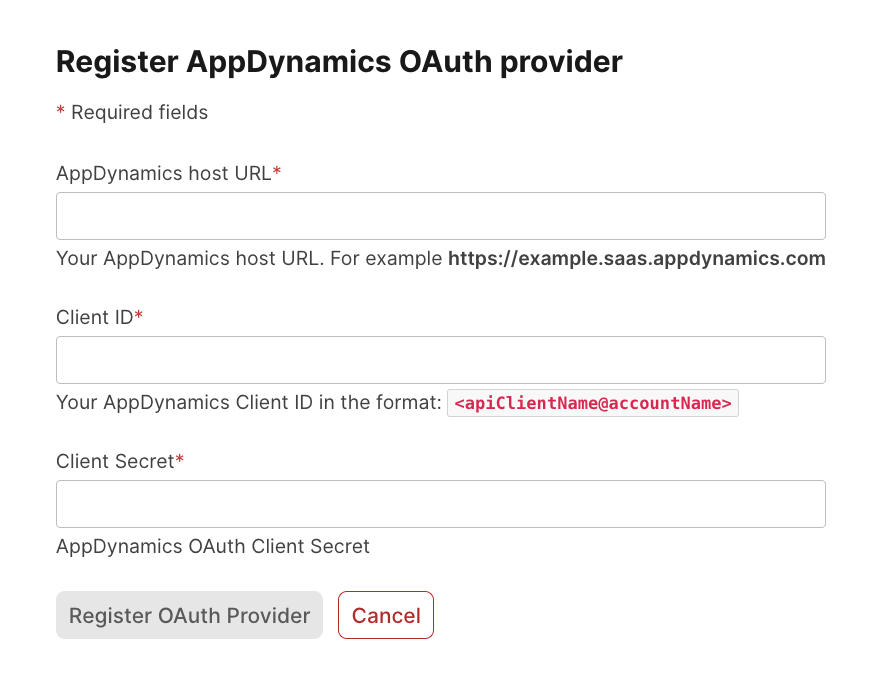
5. Click **Connect to AppDynamics** to authenticate in. A popup window appears.

<Frame caption="The AppDynamics OAuth2 popup window.">
  <img src="https://mintcdn.com/launchdarkly/unfRSXbmQkdGxJjN/images/__third_party/appdynamics-oauth.png?fit=max&auto=format&n=unfRSXbmQkdGxJjN&q=85&s=39e034ff3032279de8c47ace8b573564" alt="The AppDynamics OAuth2 popup window." width="880" height="678" data-path="images/__third_party/appdynamics-oauth.png" />
</Frame>

6. Enter your **AppDynamics host URL**. The format should resemble `https://example.saas.appdynamics.com`.
7. Enter your AppDynamics **Client ID**. Your client ID is the name of your newly created API client combined with your account name in the format `<apiClientName>@<accountName>`.
8. Enter the **Client Secret** you received when you configured your [AppDynamics API client](https://help.splunk.com/en/appdynamics-saas/extend-splunk-appdynamics/26.1.0/extend-splunk-appdynamics/splunk-appdynamics-apis/api-clients).
9. Once you have successfully authenticated, return to the integrations page and enter your AppDynamics **Account name** in the configuration panel.
10. Input your AppDynamics application ID or **Application Name**. The application name can be found on the "Applications" tab within AppDynamics.
11. (Optional) Configure a custom policy to control which flag information LaunchDarkly sends to AppDynamics. To learn more, read [Add custom policies to the AppDynamics integration](#add-custom-policies-to-the-appdynamics-integration).
12. After reading the Integration Terms and Conditions, check the **I have read and agree to the Integration Terms and Conditions** checkbox.
13. Click **Save configuration**. The new integration appears on the Integrations page.

Your AppDynamics application now receives events from LaunchDarkly.

### Add custom policies to the AppDynamics integration

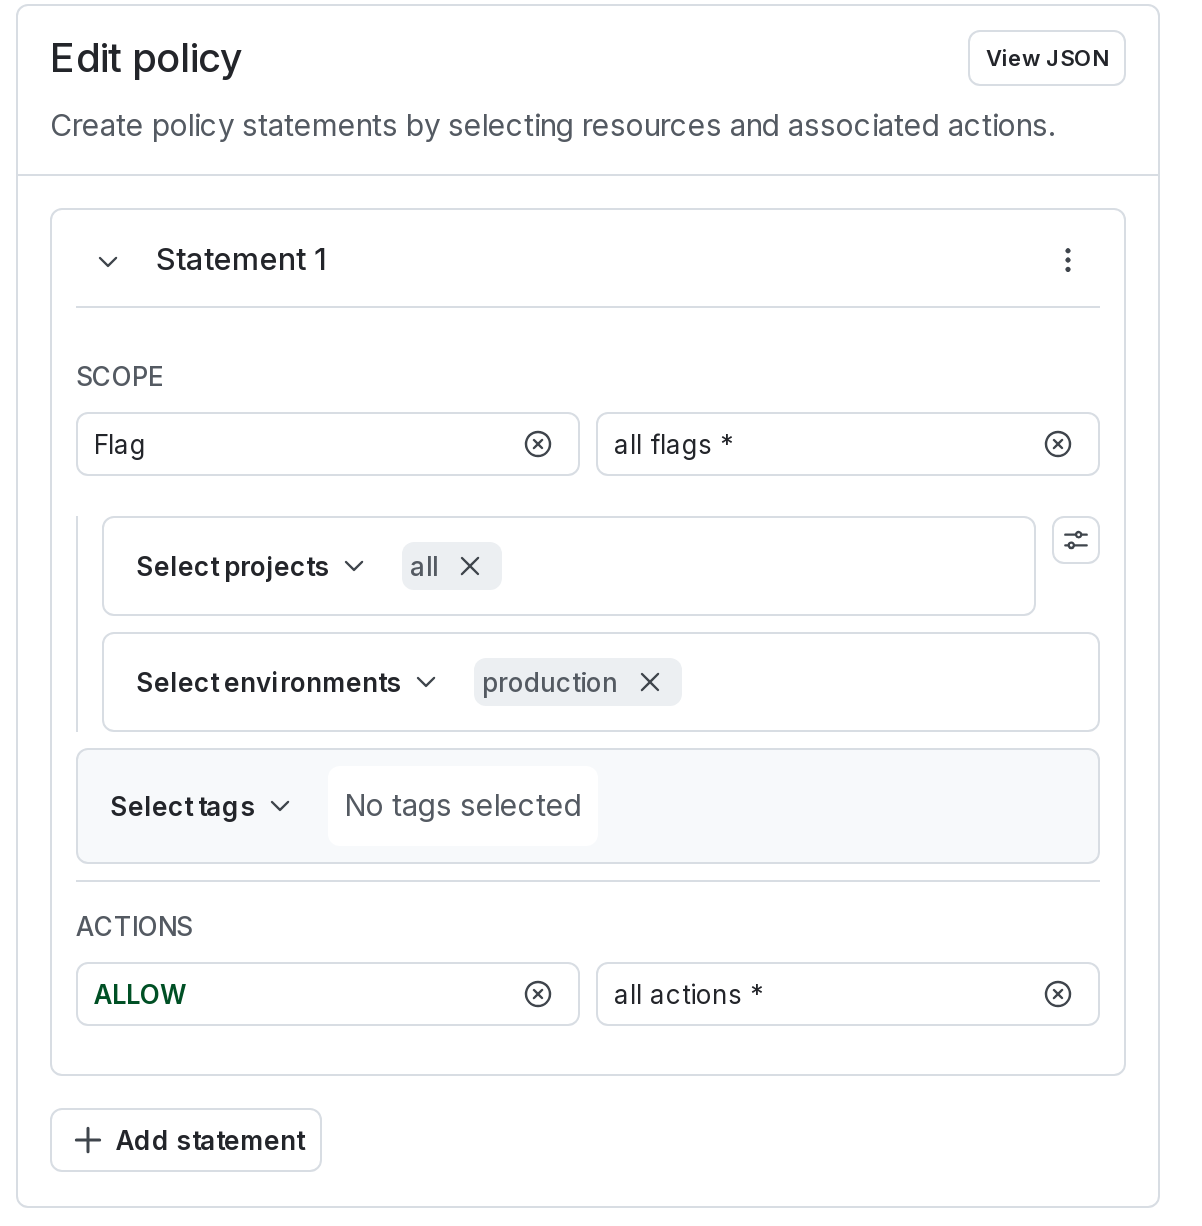
LaunchDarkly sends all flag change events in the production environment to AppDynamics by default. To customize the events LaunchDarkly sends to AppDynamics, use the policy editor. To learn more about creating a policy, read [Example roles and policies](/docs/home/account/roles/example-roles).

<Frame caption="The policy editor.">
  <img src="https://mintcdn.com/launchdarkly/A4UXoRTW8ATNw4yq/images/auto/policy-editor.auto.png?fit=max&auto=format&n=A4UXoRTW8ATNw4yq&q=85&s=7cb1801626f9a4ea7a6d6b3a9206af3f" alt="The policy editor." width="1202" height="1226" data-path="images/auto/policy-editor.auto.png" />
</Frame>

## Access LaunchDarkly events in AppDynamics

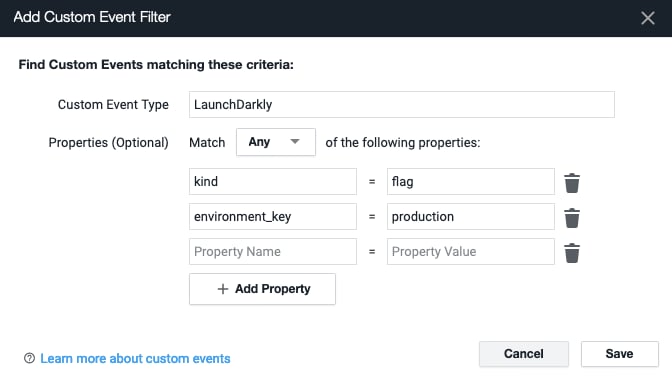
To view events, navigate to the "Events" tab within your application dashboard. From there, modify the default event filter so it displays "Custom" events. All LaunchDarkly events are sent with a "Custom Event Type" of "LaunchDarkly" and the following properties can be used to further filter events in AppDynamics:

<table>
  <thead>
    <tr>
      <th>Property name</th>
      <th>Property value</th>
    </tr>
  </thead>

  <tbody>
    <tr>
      <td>
        <code>kind</code>
      </td>

      <td>Flag, project, environment, etc.</td>
    </tr>

    <tr>
      <td>
        <code>flag\_name</code>
      </td>

      <td>The name of the flag. Sent only with flag events.</td>
    </tr>

    <tr>
      <td>
        <code>flag\_key</code>
      </td>

      <td>The flag's key. Sent only with flag events.</td>
    </tr>

    <tr>
      <td>
        <code>project\_name</code>
      </td>

      <td>The resource's project name.</td>
    </tr>

    <tr>
      <td>
        <code>project\_key</code>
      </td>

      <td>The resource's project key.</td>
    </tr>

    <tr>
      <td>
        <code>environment\_name</code>
      </td>

      <td>The resource's environment name.</td>
    </tr>

    <tr>
      <td>
        <code>environment\_key</code>
      </td>

      <td>The resource's environment key.</td>
    </tr>
  </tbody>
</table>

<Frame caption="AppDynamics Custom Event Filter">
  <img src="https://mintcdn.com/launchdarkly/unfRSXbmQkdGxJjN/images/__third_party/appdynamics-custom-event-filter.png?fit=max&auto=format&n=unfRSXbmQkdGxJjN&q=85&s=fb67b26ab38d2dad1014999f0d20bbc4" alt="AppDynamics Custom Event Filter" width="672" height="383" data-path="images/__third_party/appdynamics-custom-event-filter.png" />
</Frame>

You can now view LaunchDarkly events in AppDynamics.
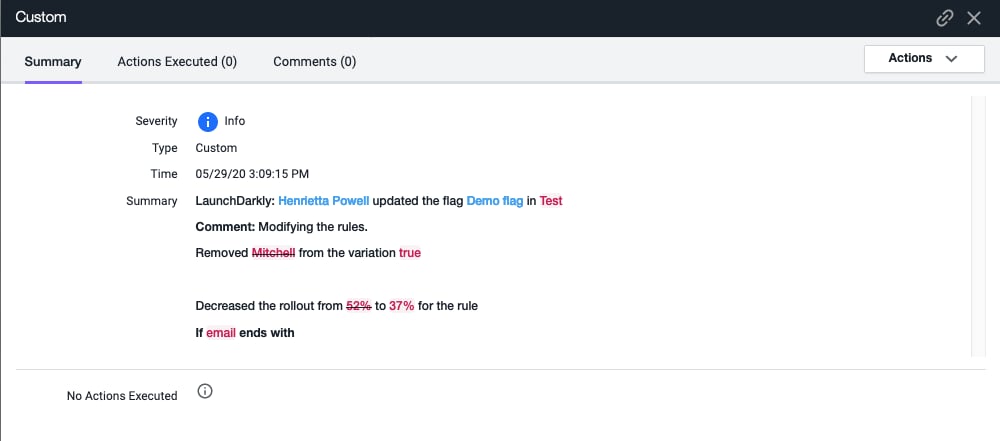
<Frame caption="View LaunchDarkly events in AppDynamics">
  <img src="https://mintcdn.com/launchdarkly/unfRSXbmQkdGxJjN/images/__third_party/appdynamics-view-event.png?fit=max&auto=format&n=unfRSXbmQkdGxJjN&q=85&s=395225bc8771c73e6a66f464aa508512" alt="View LaunchDarkly events in AppDynamics" width="1000" height="441" data-path="images/__third_party/appdynamics-view-event.png" />
</Frame>