> ## Documentation Index
> Fetch the complete documentation index at: https://launchdarkly.com/docs/llms.txt
> Use this file to discover all available pages before exploring further.
# Configuring environments to use a custom approvals integration
**This integration is not available in federal environments**
To learn more, read LaunchDarkly in federal environments.
This topic describes how to configure LaunchDarkly environments to use a custom approvals integration configuration for flag and experiment changes. This is the final step required in configuring a [custom approvals integration](/docs/integrations/custom-approvals).
## Configure a LaunchDarkly environment to use the custom approvals integration configuration
By default, LaunchDarkly's approvals request feature only creates approval requests in LaunchDarkly. You can change this behavior so that LaunchDarkly creates change requests in your approvals application.
Before you complete this configuration, you must [create your own approval application](/docs/integrations/custom-approvals/custom-app) and [add a custom approvals integration configuration](/docs/integrations/custom-approvals/add-integration-config).
Then, to create change requests in your approvals application, you must update your chosen LaunchDarkly environment's approval settings to reference your custom approvals integration configuration.
Here's how:
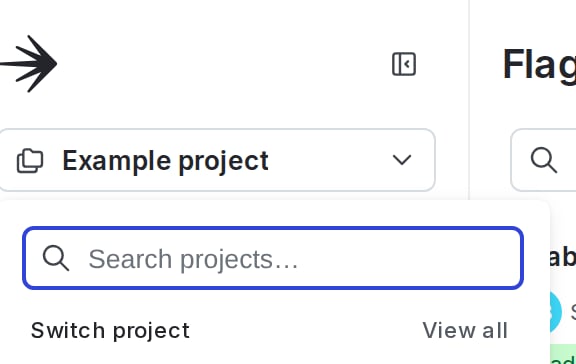
1. Click the project dropdown. The project menu appears:
 2. Select **Project settings**. The list of project settings appears.
3. Click **Approval settings**.
4. In the "Flag and experiment approvals" section, select an environment.
5. Click **Edit approval setting**. The "Approval settings for \[environment]" dialog appears.
6. Change the **Approval system** from "LaunchDarkly" to your custom approvals integration configuration.
7. (Optional) Select the **Require approvals for this environment** checkbox to require approval for flag and experiment targeting changes in this environment. If you select this, then you must also choose:
* **All flags and experiments**: Select to require approval for all flag targeting and experiment changes.
* **Flags and experiments matching the following tags**: Select to require approval only for flag targeting and experiment changes on flags and experiments with the listed tags. While tags are global across environments, this setting applies only to flags and experiments in the current environment.
* **Allow deleting scheduled changes without approval**: Select to allow scheduled changes for a flag or experiment to be deleted without approval in this environment.
8. Choose whether to **Automatically apply flag and experiment changes in LaunchDarkly when associated external change requests are approved**.
9. Click **Save changes**.
After you have configured your chosen LaunchDarkly environments to use the custom approvals integration, members of your organization in LaunchDarkly can request approval for flag and experiment changes within LaunchDarkly. Requests will then be sent to your approvals application whenever the state of the approval request changes in LaunchDarkly.
2. Select **Project settings**. The list of project settings appears.
3. Click **Approval settings**.
4. In the "Flag and experiment approvals" section, select an environment.
5. Click **Edit approval setting**. The "Approval settings for \[environment]" dialog appears.
6. Change the **Approval system** from "LaunchDarkly" to your custom approvals integration configuration.
7. (Optional) Select the **Require approvals for this environment** checkbox to require approval for flag and experiment targeting changes in this environment. If you select this, then you must also choose:
* **All flags and experiments**: Select to require approval for all flag targeting and experiment changes.
* **Flags and experiments matching the following tags**: Select to require approval only for flag targeting and experiment changes on flags and experiments with the listed tags. While tags are global across environments, this setting applies only to flags and experiments in the current environment.
* **Allow deleting scheduled changes without approval**: Select to allow scheduled changes for a flag or experiment to be deleted without approval in this environment.
8. Choose whether to **Automatically apply flag and experiment changes in LaunchDarkly when associated external change requests are approved**.
9. Click **Save changes**.
After you have configured your chosen LaunchDarkly environments to use the custom approvals integration, members of your organization in LaunchDarkly can request approval for flag and experiment changes within LaunchDarkly. Requests will then be sent to your approvals application whenever the state of the approval request changes in LaunchDarkly.