Feature flags are a nifty tool to help developers build and change configurations at runtime.
In this tutorial, you will learn how to create a Flask application that changes the color of a flag on the Google Maps Platform, using a LaunchDarkly feature flag.
Tutorial requirements
- Python 3.6 or newer. If your operating system does not provide a Python interpreter, you can go to python.org to download an installer.
- Visual Studio Code or your favorite IDE.
- Google Maps API key from the Google Cloud Console. Be sure to create a free account.
- LaunchDarkly account. If you haven’t done so already, create a free account.
Create a feature flag
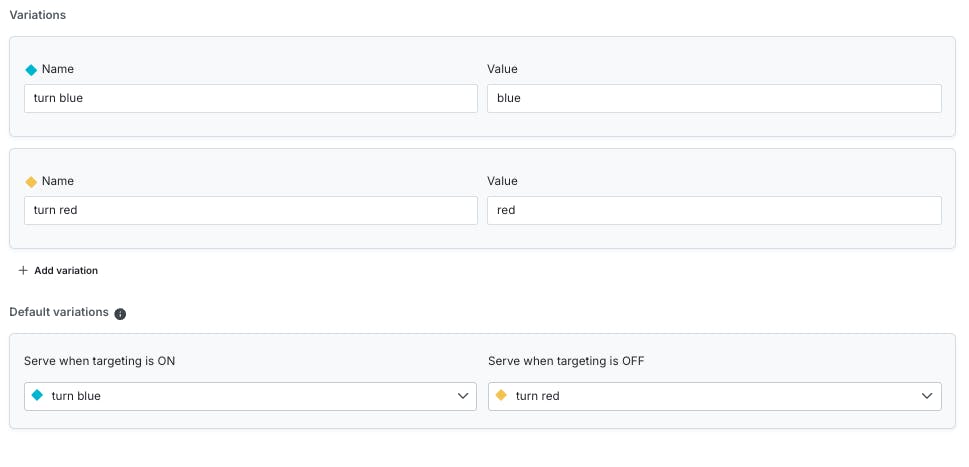
In the LaunchDarkly app, create a feature flag with the following configuration:
- Flag name: “googlemaps”
- Configuration: Custom
- Flag type: String
- Variants: turn blue
- Variants: turn red
- Serve when targeting is ON: turn blue
- Serve when targeting is OFF: turn red

Configuration
If you are using a Unix or Mac OS system, open a terminal and enter the following commands to do the tasks described below:
Make a file named requirements.txt and paste the following packages:
blinker==1.9.0
certifi==2025.1.31
click==8.1.8
expiringdict==1.2.2
Flask==3.1.0
Flask-GoogleMaps==0.2.6
itsdangerous==2.2.0
Jinja2==3.1.6
launchdarkly-eventsource==1.2.2
launchdarkly-server-sdk==9.10.0
MarkupSafe==3.0.2
pyRFC3339==2.0.1
python-dotenv==1.0.1
semver==3.0.4
urllib3==2.3.0
Werkzeug==3.1.3
Run pip3 install -r requirements.txt
Some of the packages we are going to use in this project are:
- The Flask framework, to create the web application.
- The flask-googlemaps package to include Google Maps in the project.
- The python-dotenv package, to read a configuration file.
- The LaunchDarkly SDK to evaluate feature flags on the server.
In order to use the flask-googlemaps package, you will have to monkey-patch the venv/lib/python3.13/site-packages/flask_googlemaps/__init__.py file. This is because the flask-googlemaps package uses an older version of Flask, so this process is necessary to run the application.
Locate this in your venv virtual environment folder. Make sure the top of the file has the following:
This allows us to dynamically change the behavior of the package at runtime because the package uses a much older version of Flask.
Set up the Google Cloud account
Navigate to the Google Cloud Console and create a project with a name such as “My LaunchDarkly GoogleMaps App”.
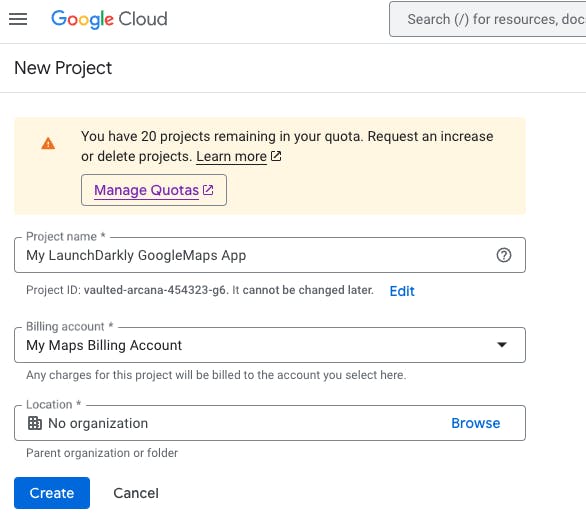
Add a billing account even though it will not be charged within the scope of this project.
Click on the Create button.
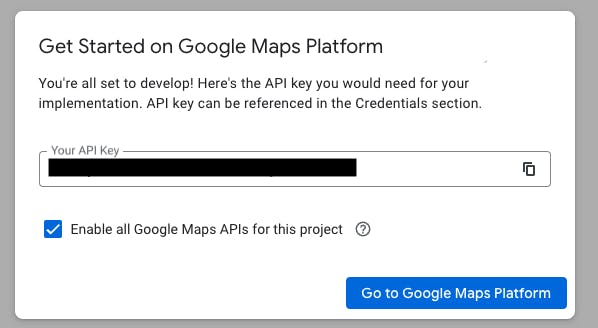
Copy the API key, as it will be required in the next section.
Click on the Go to Google Maps Platform button.
There is an option to restrict the API key. Feel free to skip the step for now.
Set up the developer environment for the Flask application
Make sure that you are currently in the virtual environment of your project’s directory in the terminal or command prompt.
Create a file named .env and add the following line to define the environment variable.
GOOGLE_MAPS_API_KEY="XXXXXXXXXXXXXX"
LAUNCHDARKLY_SDK_KEY="sdk-###############"
SECRET_KEY="RaNdOmStRiNg"
Paste the newly created Google Maps key from the section above for the GOOGLE_MAPS_API_KEY.
Navigate to the LaunchDarkly Organizations settings / Projects dashboard page to locate a list of projects in your account. Find the project you created your initial flag in.
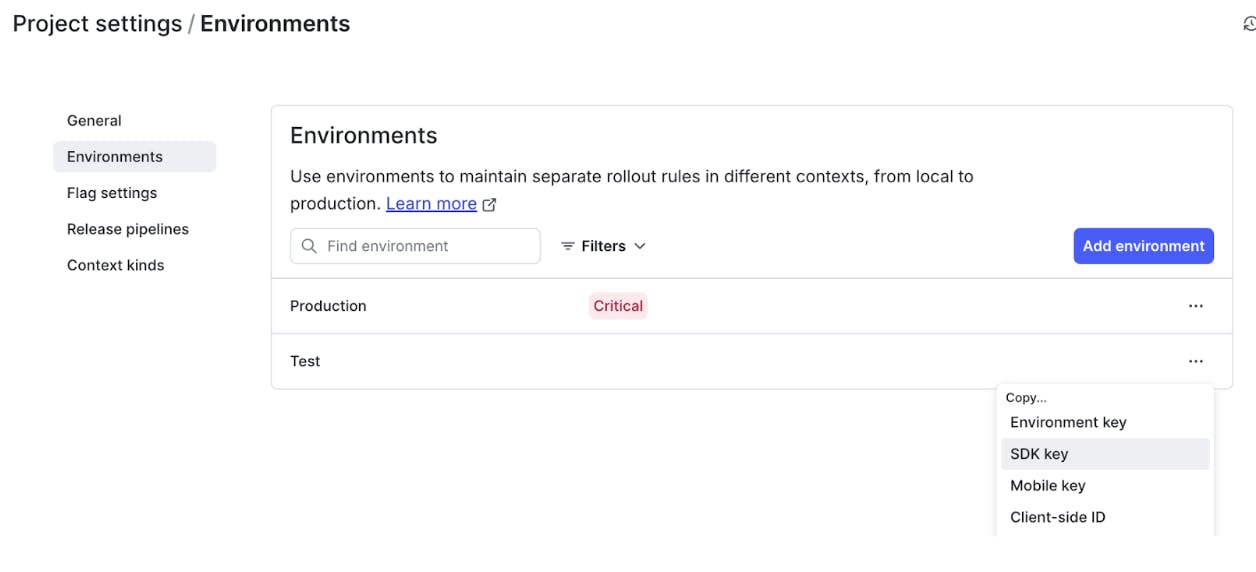
On the General page, select Environments.
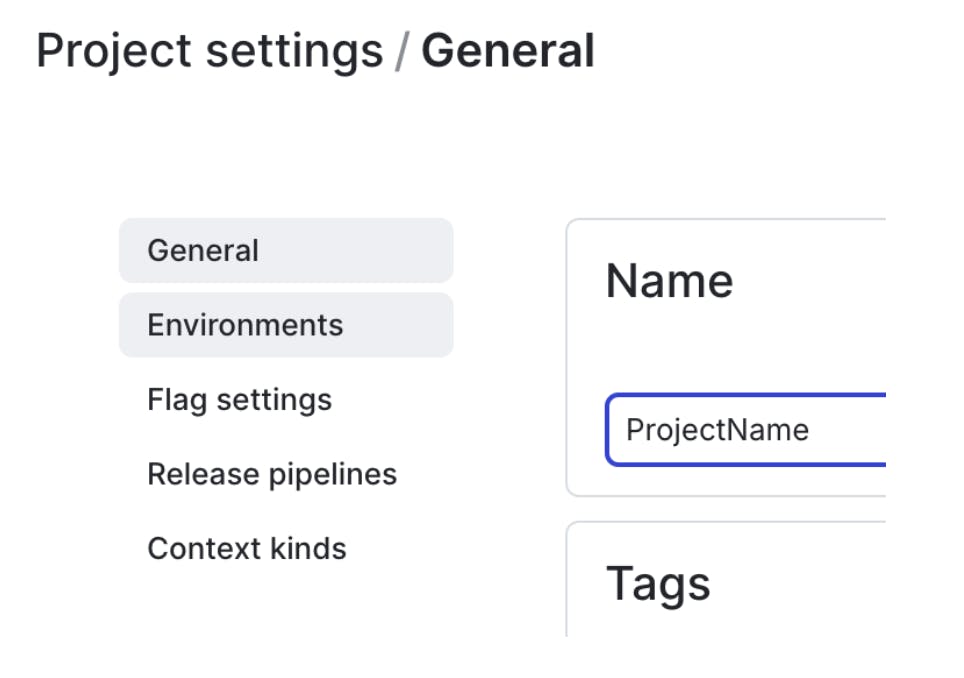
Find the Test section and click on the “...” to find your SDK key. Copy the SDK key into your .env file. Save the file.
The SECRET_KEY is necessary for this project as it is crucial for Flask app security and protects session data and is associated with the Google Maps usage. You can change it to any random string.
Since we will be utilizing Flask throughout the project, we will need to set up the development server. Add a .flaskenv file (make sure you have the leading dot) to your project with the following lines:
FLASK_APP=app.py
FLASK_ENV=development
FLASK_DEBUG=1
FLASK_RUN_PORT=8080
These incredibly helpful lines will save you time when it comes to testing and debugging your project.
FLASK_APP tells the Flask framework where our application is located.
FLASK_ENV configures Flask to run in debug mode.
These lines are convenient because every time you save the source file, the server will reload and reflect the changes.
Configure the environment variables
Create a file named config.py and paste the following text:
This allows your application to access all the environment variables safely and initialize the LaunchDarkly and Google Maps clients.
Build the Flask application
Create a new file named app.py in the googlemapsflags project folder so that it can run a functional Flask application. Add the import statements below:
The feature_flags module will be created in the next section.
Create routes to render a homepage on the Flask application under the LaunchDarkly initialization.
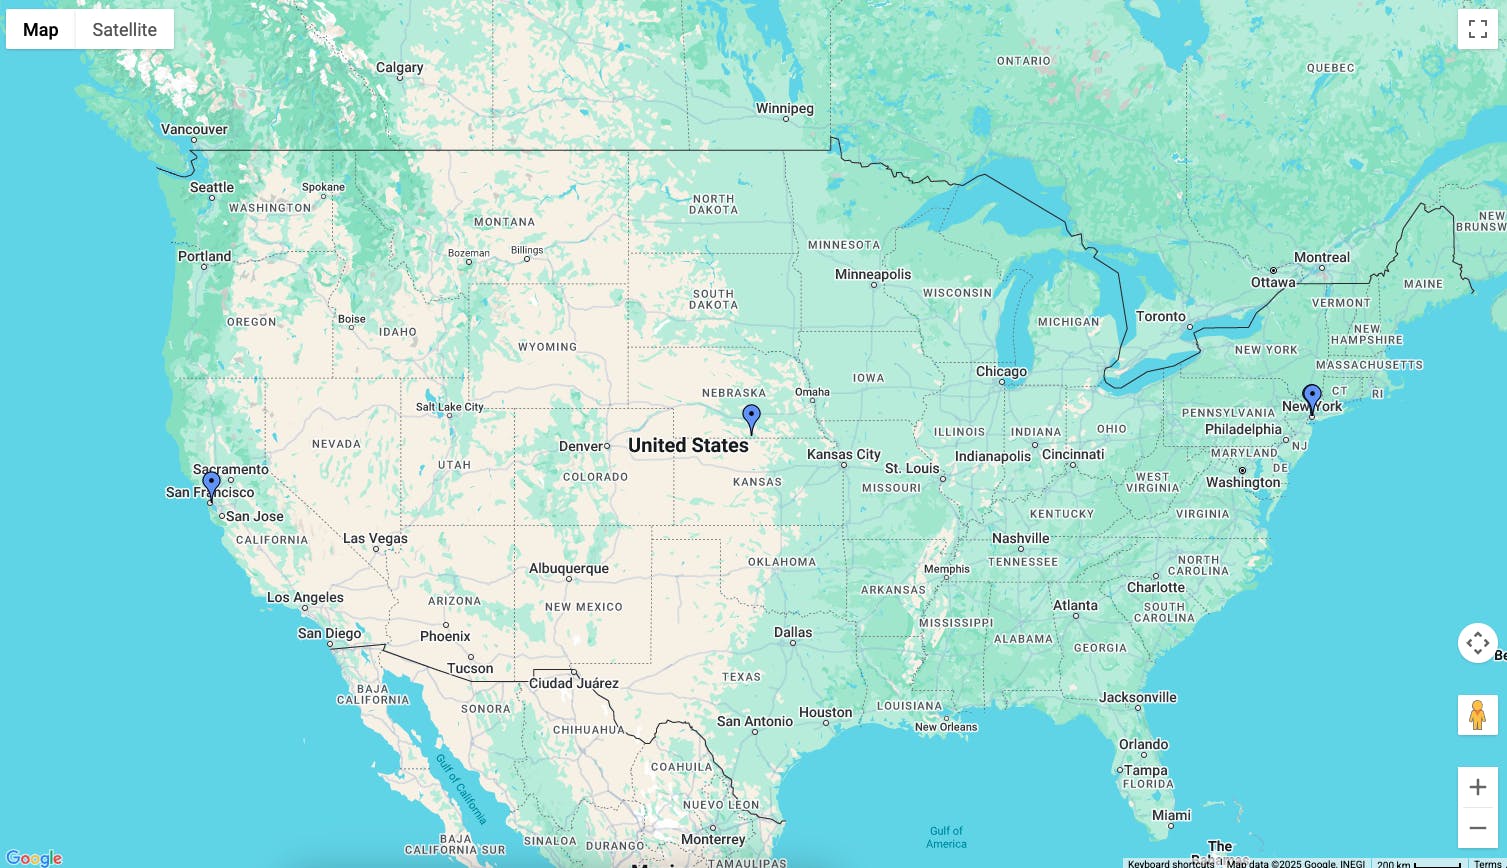
The sample above includes 5 different spots in America, but feel free to add and adjust the coordinates to your own preferences.
In order for the Flask app to run, copy and paste the following:
This is the main script for the Python interpreter to launch the LaunchDarkly SDK, and put the feature flags in action. The script ensures that the Google Maps API key along with the LaunchDarkly SDK key are set before the client can be initialized in the app.
This application will run on port 8080.
Add LaunchDarkly feature flags to your Flask app
Create a new file named feature_flags.py to organize the workspace and implement the steps to initialize and execute the LaunchDarkly feature flags.
After the LaunchDarkly client is initialized, we create a context variable that tells LaunchDarkly what specific attributes exist for this request. This process determines how feature flags should behave for a specific user or entity.
The "example-user-key" is the unique identifier for the context that ensures that the flag evaluations are consistent for the same user or entity across sessions.
The “kind” attribute is set to “user” to represent an individual user, who is named “Sandy” in this case. It is optional to change the name for personal debugging and viewing purposes.
Set up the HTML Flask page
Create a new subdirectory in the application named “templates” with a new HTML file map.html.
Copy and paste the following to the map.html page:
Go ahead and run “python3 app.py”. Go to http://localhost:8080/map and notice that the flags are already red because the flag is defaulted to false.
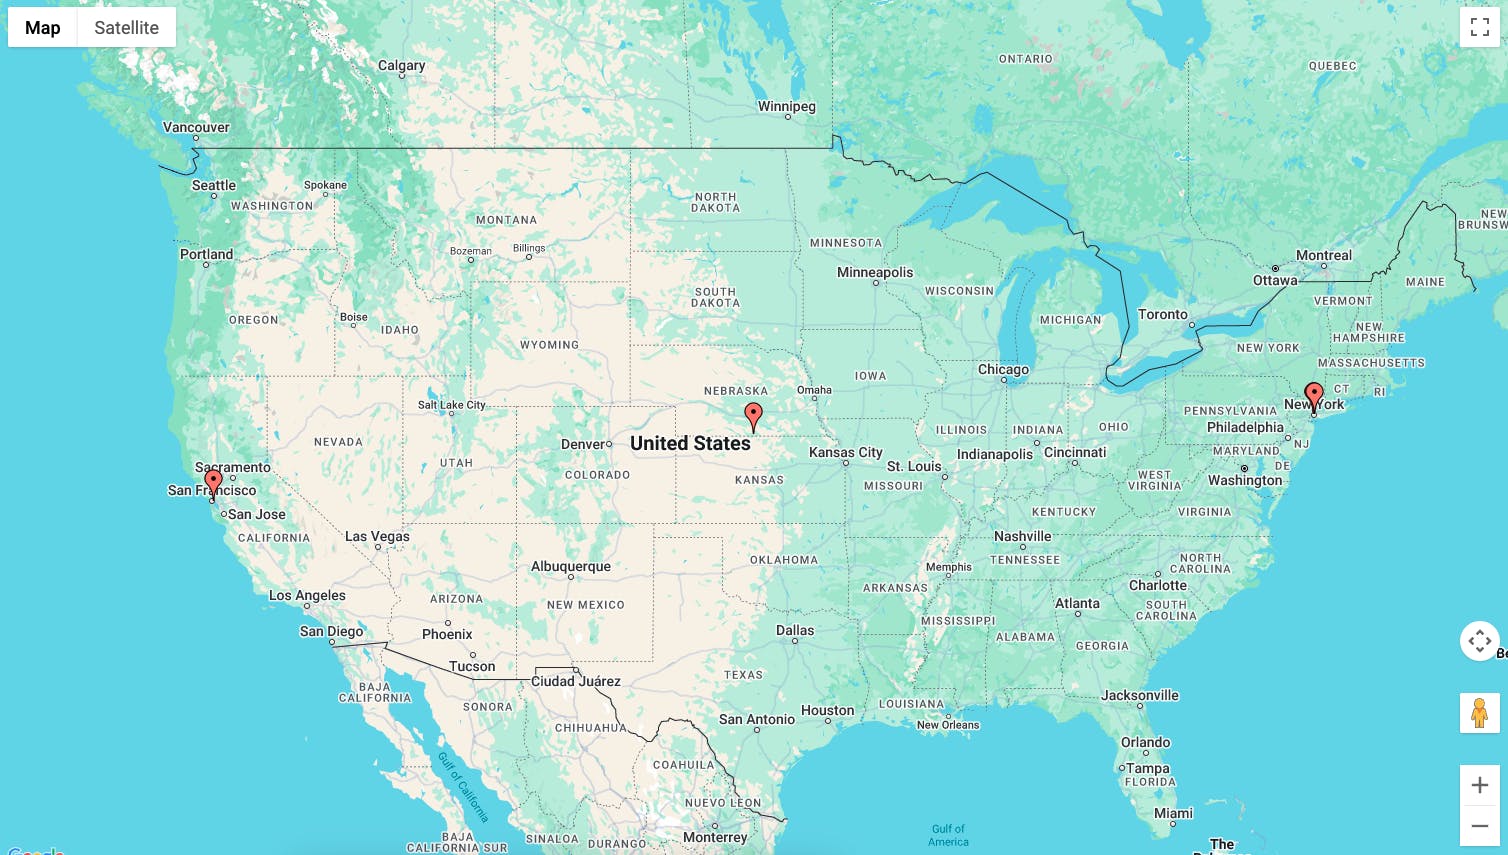
Great, it’s time to flip the switch and see the feature flags in action. Kill the current process and follow along to the next section.
Navigate the feature flag dashboard on LaunchDarkly
In order to change the flag, navigate to the flags dashboard. Click on the feature flag name “googlemaps” to be redirected to the “Targeting” section. Notice that the toggle is already set to “Off” to serve red pins.
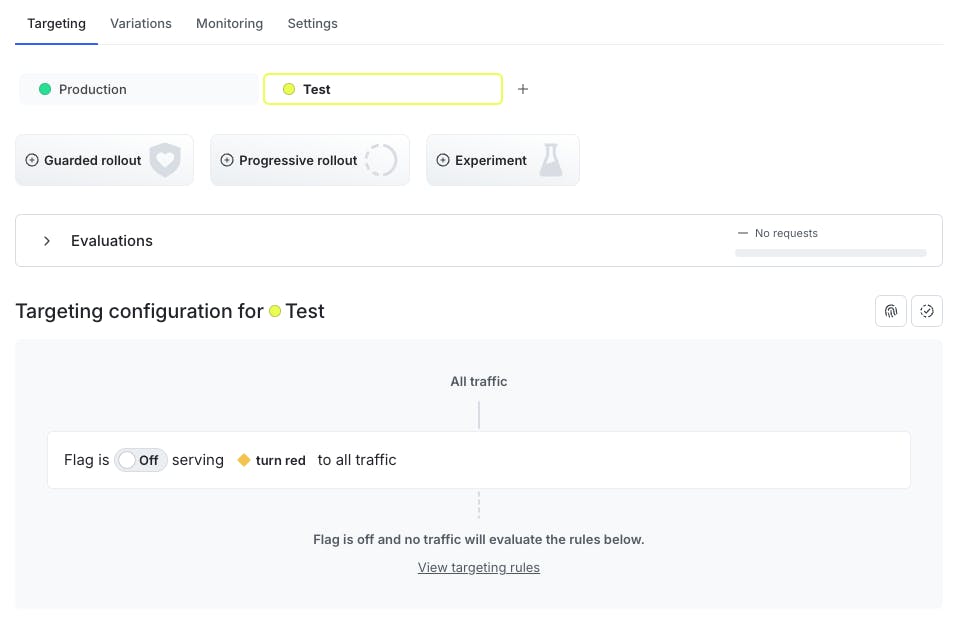
Toggle the flag “On” to turn blue.
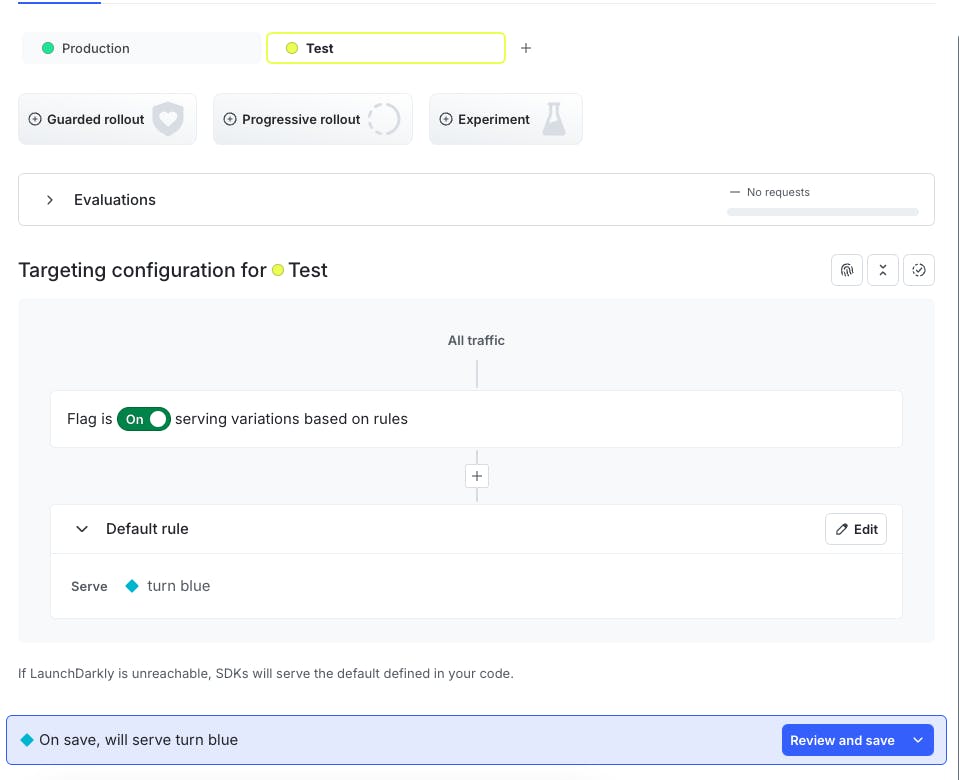
Save changes. Without restarting the server, reload http://localhost:8080/map in your browser and see that the pins on the map have changed colors.
What’s next for building Flask applications with feature flags?
In this tutorial, you learned how to integrate LaunchDarkly feature flags into a Flask web application using the Google Maps API. You created and configured a feature flag to dynamically change map marker colors. By leveraging feature flags, you now have the ability to toggle visual elements of your application in real time - without redeploying or restarting your server. This approach lays the foundation for more advanced feature control and experimentation in production environments.
Challenge yourself by adding more flags to toggle new site UI designs. Perhaps test out the Flask application across various devices such as your mobile phone or tablet to see how it can change dynamically.
Here are other articles to help you get started:
- How to use multiple feature flags in your Flask app
- How to implement kill switch flags in a Flask application
- How to upgrade your APIs safely with Progressive Rollouts in a Python FastAPI app
Join us on Discord or send me an email at dphan@launchdarkly.com, or connect with me on LinkedIn and let us know what you're building.