
Kill switches are a type of feature flag that allows you to shut off features in your application quickly. They are useful for:
- Emergency shut offs of external APIs and services.
- Responding to unexpected spam or traffic spikes.
- Other operational incidents where you need to quickly put the brakes on without causing additional disruption.
In this tutorial you will learn to add a kill switch to disable 3rd-party API calls in a Flask application, using the LaunchDarkly Python SDK. This example will utilize The Cat API as a data source here since it’s free, doesn’t require authentication, and gives us the picture we need to see today.
Tutorial requirements
- Python 3.6 or newer. If your operating system does not provide a Python interpreter, you can go to python.org to download an installer.
- Visual Studio Code or your favorite IDE.
- LaunchDarkly account. If you haven’t done so already, create a free account.
Configuration
If you are using a Unix or Mac OS system, open a terminal and enter the following commands to do the tasks described below:
For those of you following the tutorial on Windows, enter the following commands in a command prompt window:
Set up the developer environment for the Python application
Make sure that you are currently in the virtual environment of your project’s directory in the terminal or command prompt.
Create a file at the root of your project folder named .env and add the following lines to define the environment variables. These are placeholder values, which you’ll be updating later with real ones.
LAUNCHDARKLY_SDK_KEY="sdk-###############"
Build the Flask application
Create a file named app.py and paste in the following code:
Create one subdirectory in the root of your project folder with the name “templates” and an index.html file. Copy the following code below to the newly created file:
As of now, the SDK key has not been initialized yet so once we configure the SDK key in the next section, we will uncomment the lines in app.py.
Type the “python3 app.py” command and navigate to localhost:5000 to watch a gif of Bugcat Capoo watching a loading screen.
Configure your LaunchDarkly kill switch flag
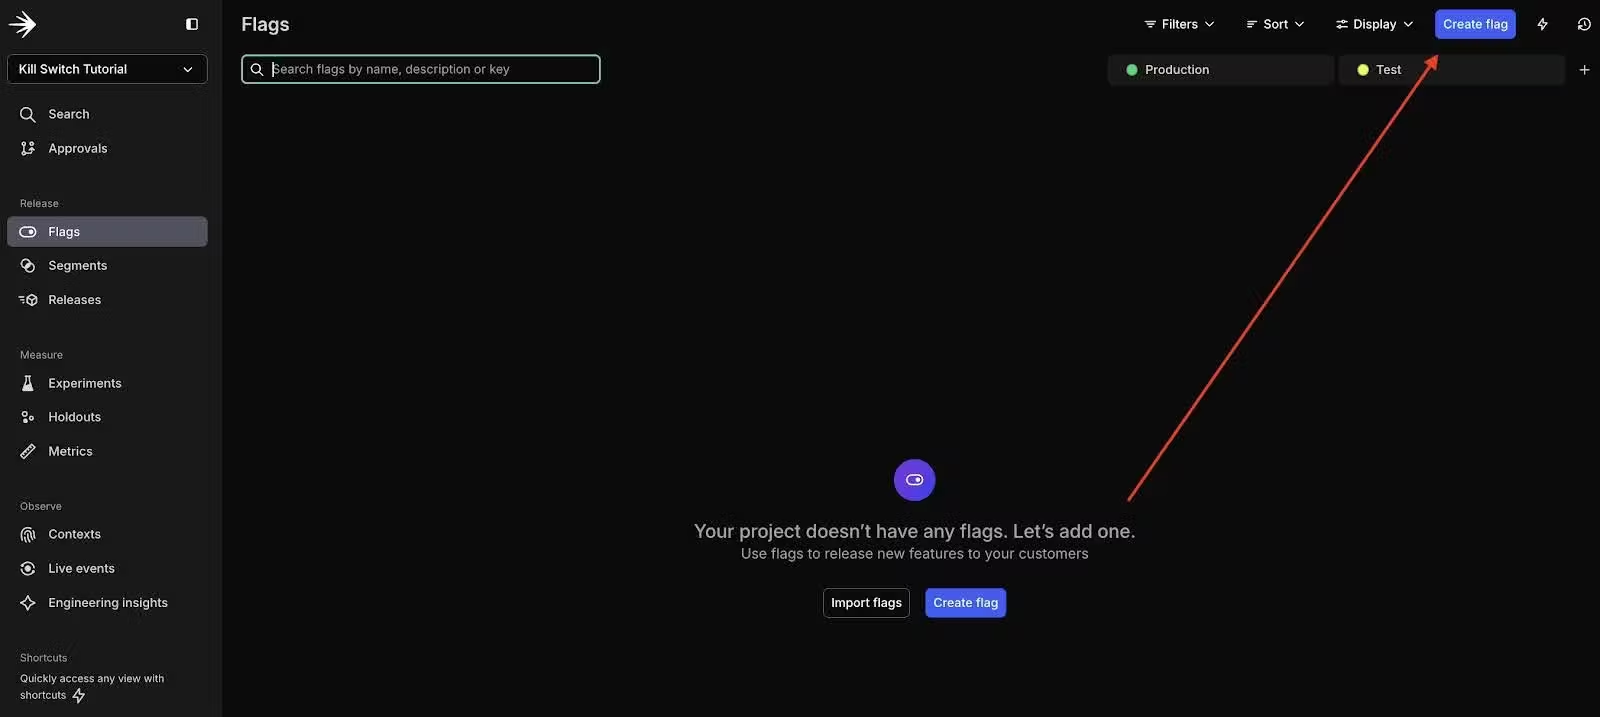
In the LaunchDarkly app, click on “Flags” in the left navigation menu and then click one of the Create flag buttons.
Configure your flag as follows:
- Name your flag “use-cats-api”. When you type in the Name, the Key field will automatically populate.
- Enter some text in the description field to explain the purpose of this flag. “When enabled, get pictures from the Cats API. When disabled, pull from a hardcoded URL.”
- Select “Kill Switch” as the flag type.
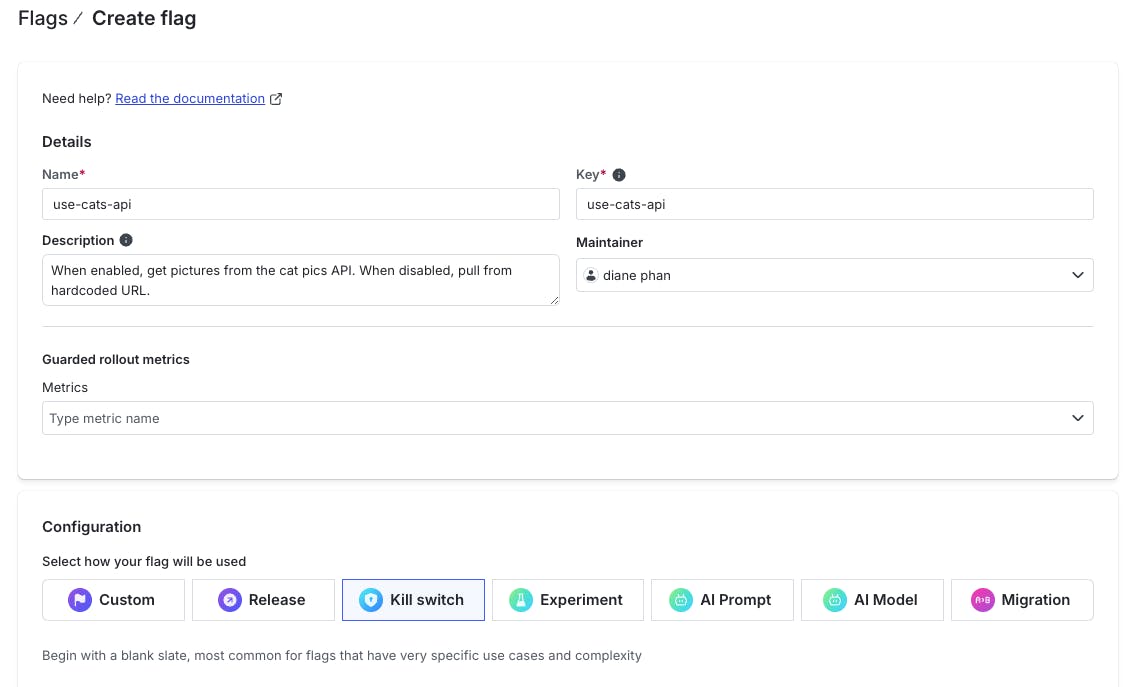
Click the Create Flag at the bottom of this dialog.
On the following screen, click the dropdown menu next to the “Test” environment. Copy the SDK key by selecting it from the dropdown menu.
Very important - turn the flag on using the toggle switch! Then click the Review and save button at the bottom.
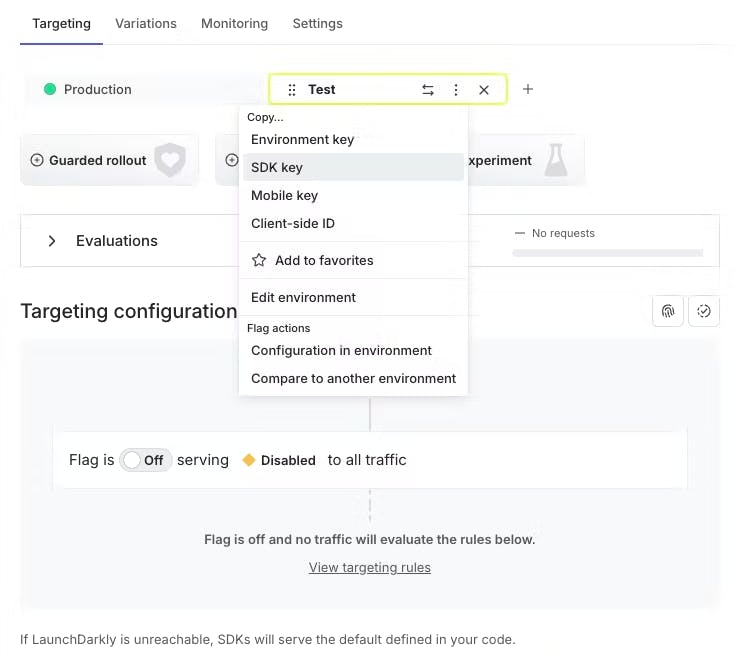
Turn the flag on using the toggle switch. Then click the Review and save button at the bottom.
Add a comment and verify the name of the environment, then click the Save changes button.
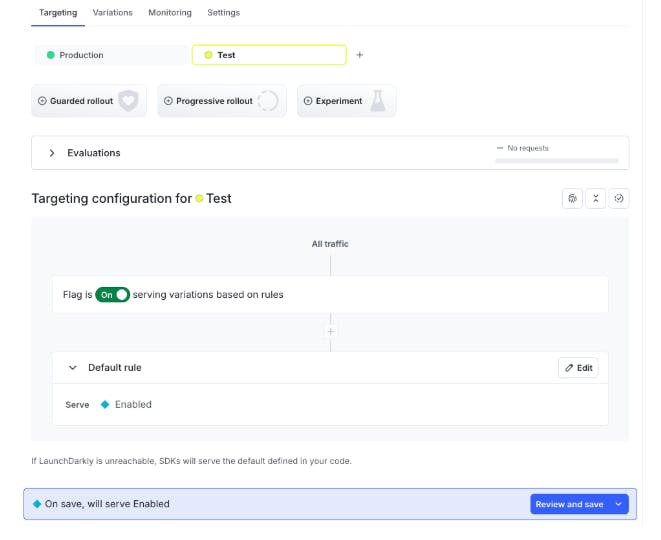
Add the LaunchDarkly Python SDK to the Flask application
Now we’ll add the LaunchDarkly Python SDK to our Flask application. Go to your .env file and paste in the SDK key in the earlier section for “LAUNCHDARKLY_SDK_KEY”. Save the .env file.
In your app.py file, replace the index route so it looks like the following code below:
Be sure to uncomment out the code that initializes the LaunchDarkly client as well.
If the “use_cats_api” flag is toggled on, then a GET request is made to the Cats API. An image is retrieved and stored in the cat_image_url variable that will be passed into the HTML file for the viewer.
Restart the server if you turned it off to load our environment variables. Navigate to the localhost:5000 page to see a random picture of a cat. Refresh it to see different pictures.
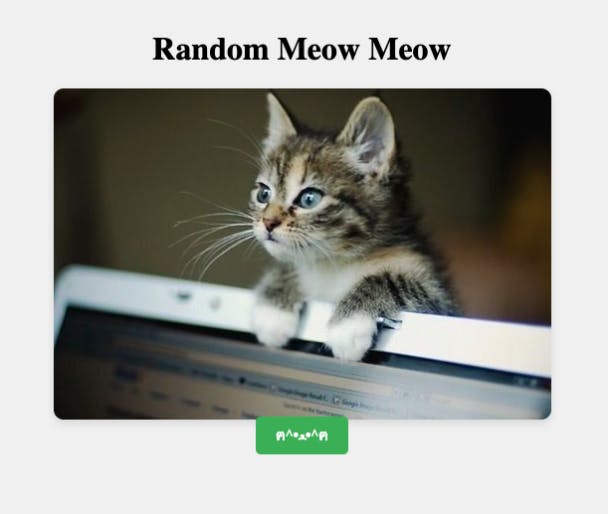
Flip back to LaunchDarkly and disable your flag. Click Review and save again as you did previously when you enabled it. You should see a fixed cat image from the locally defined variable instead of the API.
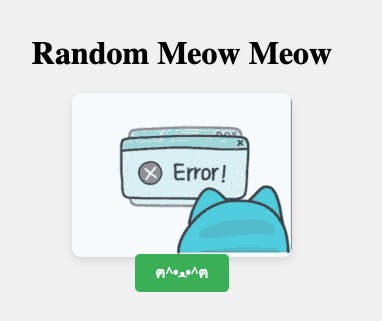
NOTE: When building a production use case, you might want to start with your flag disabled rather than enabled as we did here. Adding that extra step will help you ensure everything works as intended before exposing a new feature.
What’s next for building with kill switches?
In this post you’ve learned how to use the LaunchDarkly Python SDK to add kill switch flags to your Flask web application. If you want to learn more about what you can do with kill switch flags, check out the following articles:
- Add LaunchDarkly kill switches to a FastAPI app
- Quickly disable external API calls in your Sinatra application sing LaunchDarkly kill switch flags
- Implement Kill Switch Flags to a Spring Boot Application
Join us on Discord, send me an email at dphan@launchdarkly.com, or connect with me on LinkedIn and let us know what you're building.