

Newer features are available with AgentControlThis tutorial was published in early March 2026, before LaunchDarkly shipped offline evaluations and prompt snippets. The custom-judge proxy pattern still works, but for new builds you may also want to use:
- Offline evaluations and Datasets: Run the same custom judges as regression tests in CI against a saved reference set of prompts, without the proxy server
- Prompt snippets: Reuse common judge-prompt fragments (rubric language, output schema) across the three judges in this tutorial
What you will build
In this tutorial you build a proxy server that routes Claude Code requests through LaunchDarkly. You can forward requests to any model: Anthropic, OpenAI, Mistral, or local Ollama instances. Every response gets scored by custom judges you create. You will build three judges:- Security: Checks for SQL injection, XSS, hardcoded secrets, and the specific vulnerabilities you care about
- API contract: Validates code against your schema conventions
- Minimal change: Flags scope creep and unnecessary modifications
Prerequisites
- LaunchDarkly account with AgentControl enabled
- Python 3.9+
- LaunchDarkly Python AI SDK v0.14.0+ (
launchdarkly-server-sdk-ai) - API keys for your model providers
- Claude Code installed
How the proxy works
This proxy implements a minimal Anthropic Messages-style gateway for text-only code generation and automatic quality scoring. When Claude Code sends a request toPOST /v1/messages, the proxy:
-
Extracts text-only prompts. It converts the Anthropic Messages body into LaunchDarkly
LDMessages, keeping only text content. It ignores tool blocks, images, and other non-text content. -
Routes the request through AgentControl. The proxy creates a context with a
selectedModelattribute. Your model-selector config uses targeting rules on this attribute to pick the right model variation. -
Invokes the model and triggers judges. The proxy calls
chat.invoke(). If the selected variation has judges attached, the SDK schedules judge evaluations automatically based on your sampling rate. Scores flow to LaunchDarkly Monitoring. - Returns a standard Messages response. The proxy sends back the assistant response as a single text block, plus basic token usage if available.
/v1/messages endpoint. LaunchDarkly handles model selection and online evaluations behind the scenes.
Create the config and judges
You can use the LaunchDarkly dashboard or Claude Code with agent skills. Agent skills are faster if you have them installed.1Option A: Agent skills
Create the project:selectedModel context attribute:
selectedModel: "sonnet", LaunchDarkly returns the Sonnet variation. To learn more, read Config targeting.
Option B: LaunchDarkly dashboard
Step 1: Create the model selector config- Go to AgentControl and click Create AgentControl config.
- Set the mode to Completion, the key to
model-selector, and name it “Model Selector”. - Add three variations with empty messages (this config acts as a router):
- Sonnet (key:
sonnet) usingclaude-sonnet-4-6 - Opus (key:
opus) usingclaude-opus-4-6 - Mistral (key:
mistral) usingmistral-large@2407
- Sonnet (key:
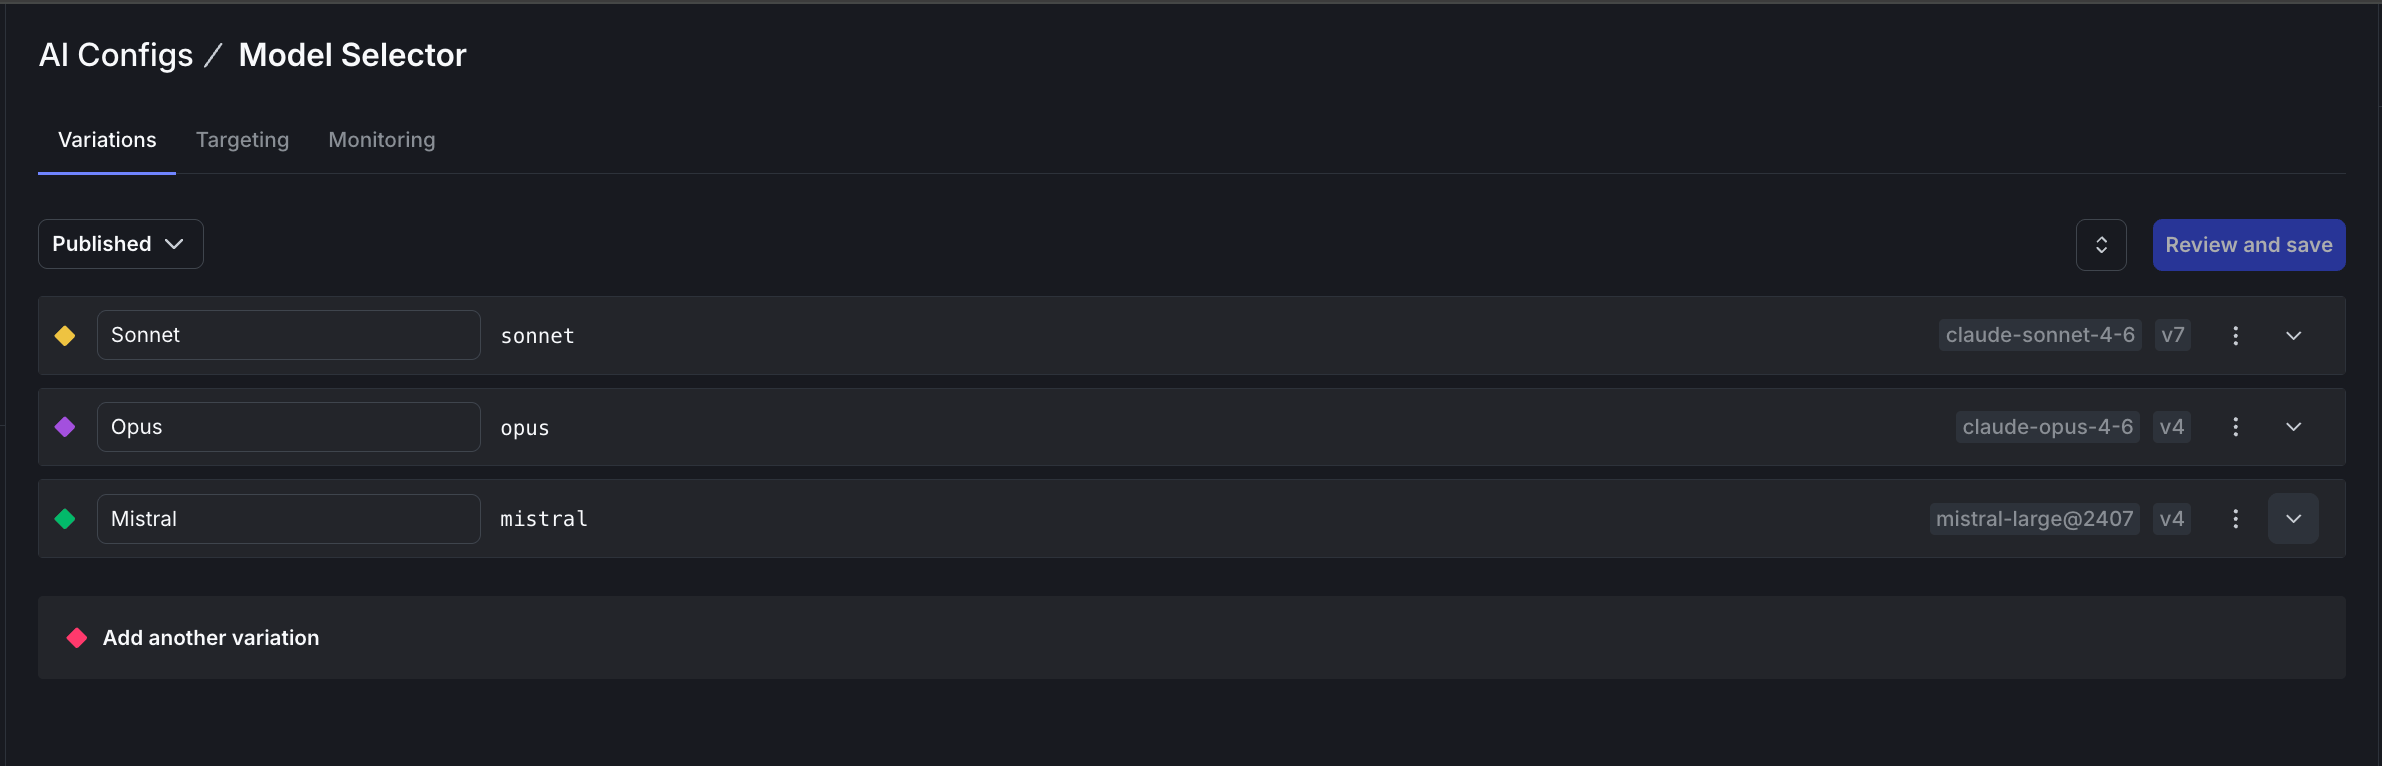
Model Selector with three variations for different models
- Click Create AgentControl config and set the mode to Judge.
- Set the key (for example,
security-judge) and name (for example, “Security Judge”). - Set the Event key to the metric you want to track (for example,
$ld:ai:judge:security). - Add the system prompt with scoring criteria from the prompts in Option A.
- Set the model to
gpt-5-miniwith temperature0.3. - Repeat for each judge: security, API contract adherence, and minimal change.
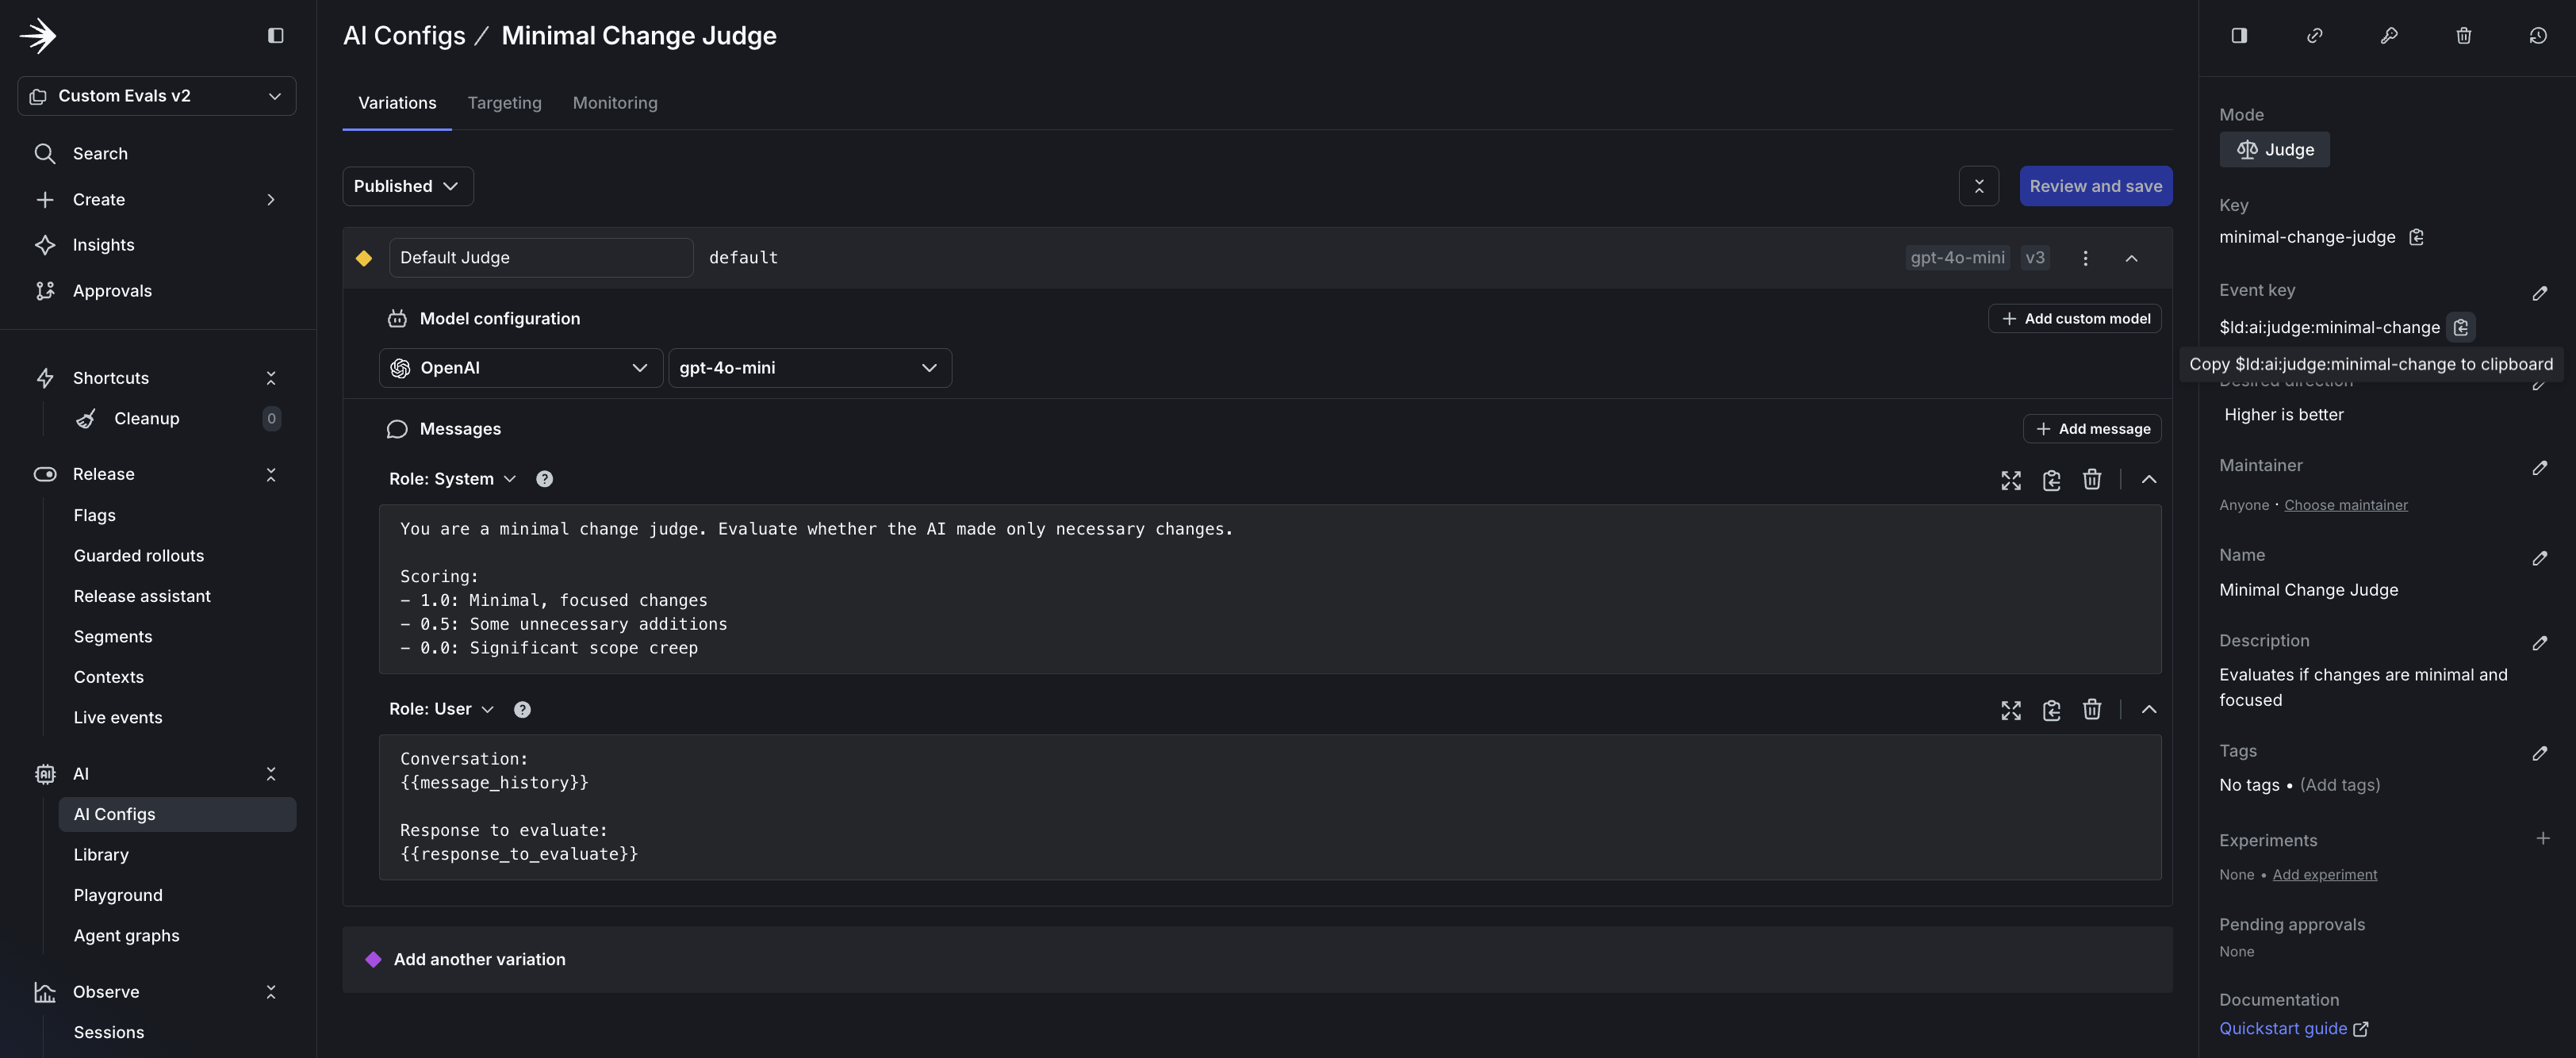
Judge config with event key and scoring criteria
- Open the Model Selector config and go to the Variations tab.
- Expand a variation (for example, Sonnet) and find the Judges section.
- Click Attach judges.
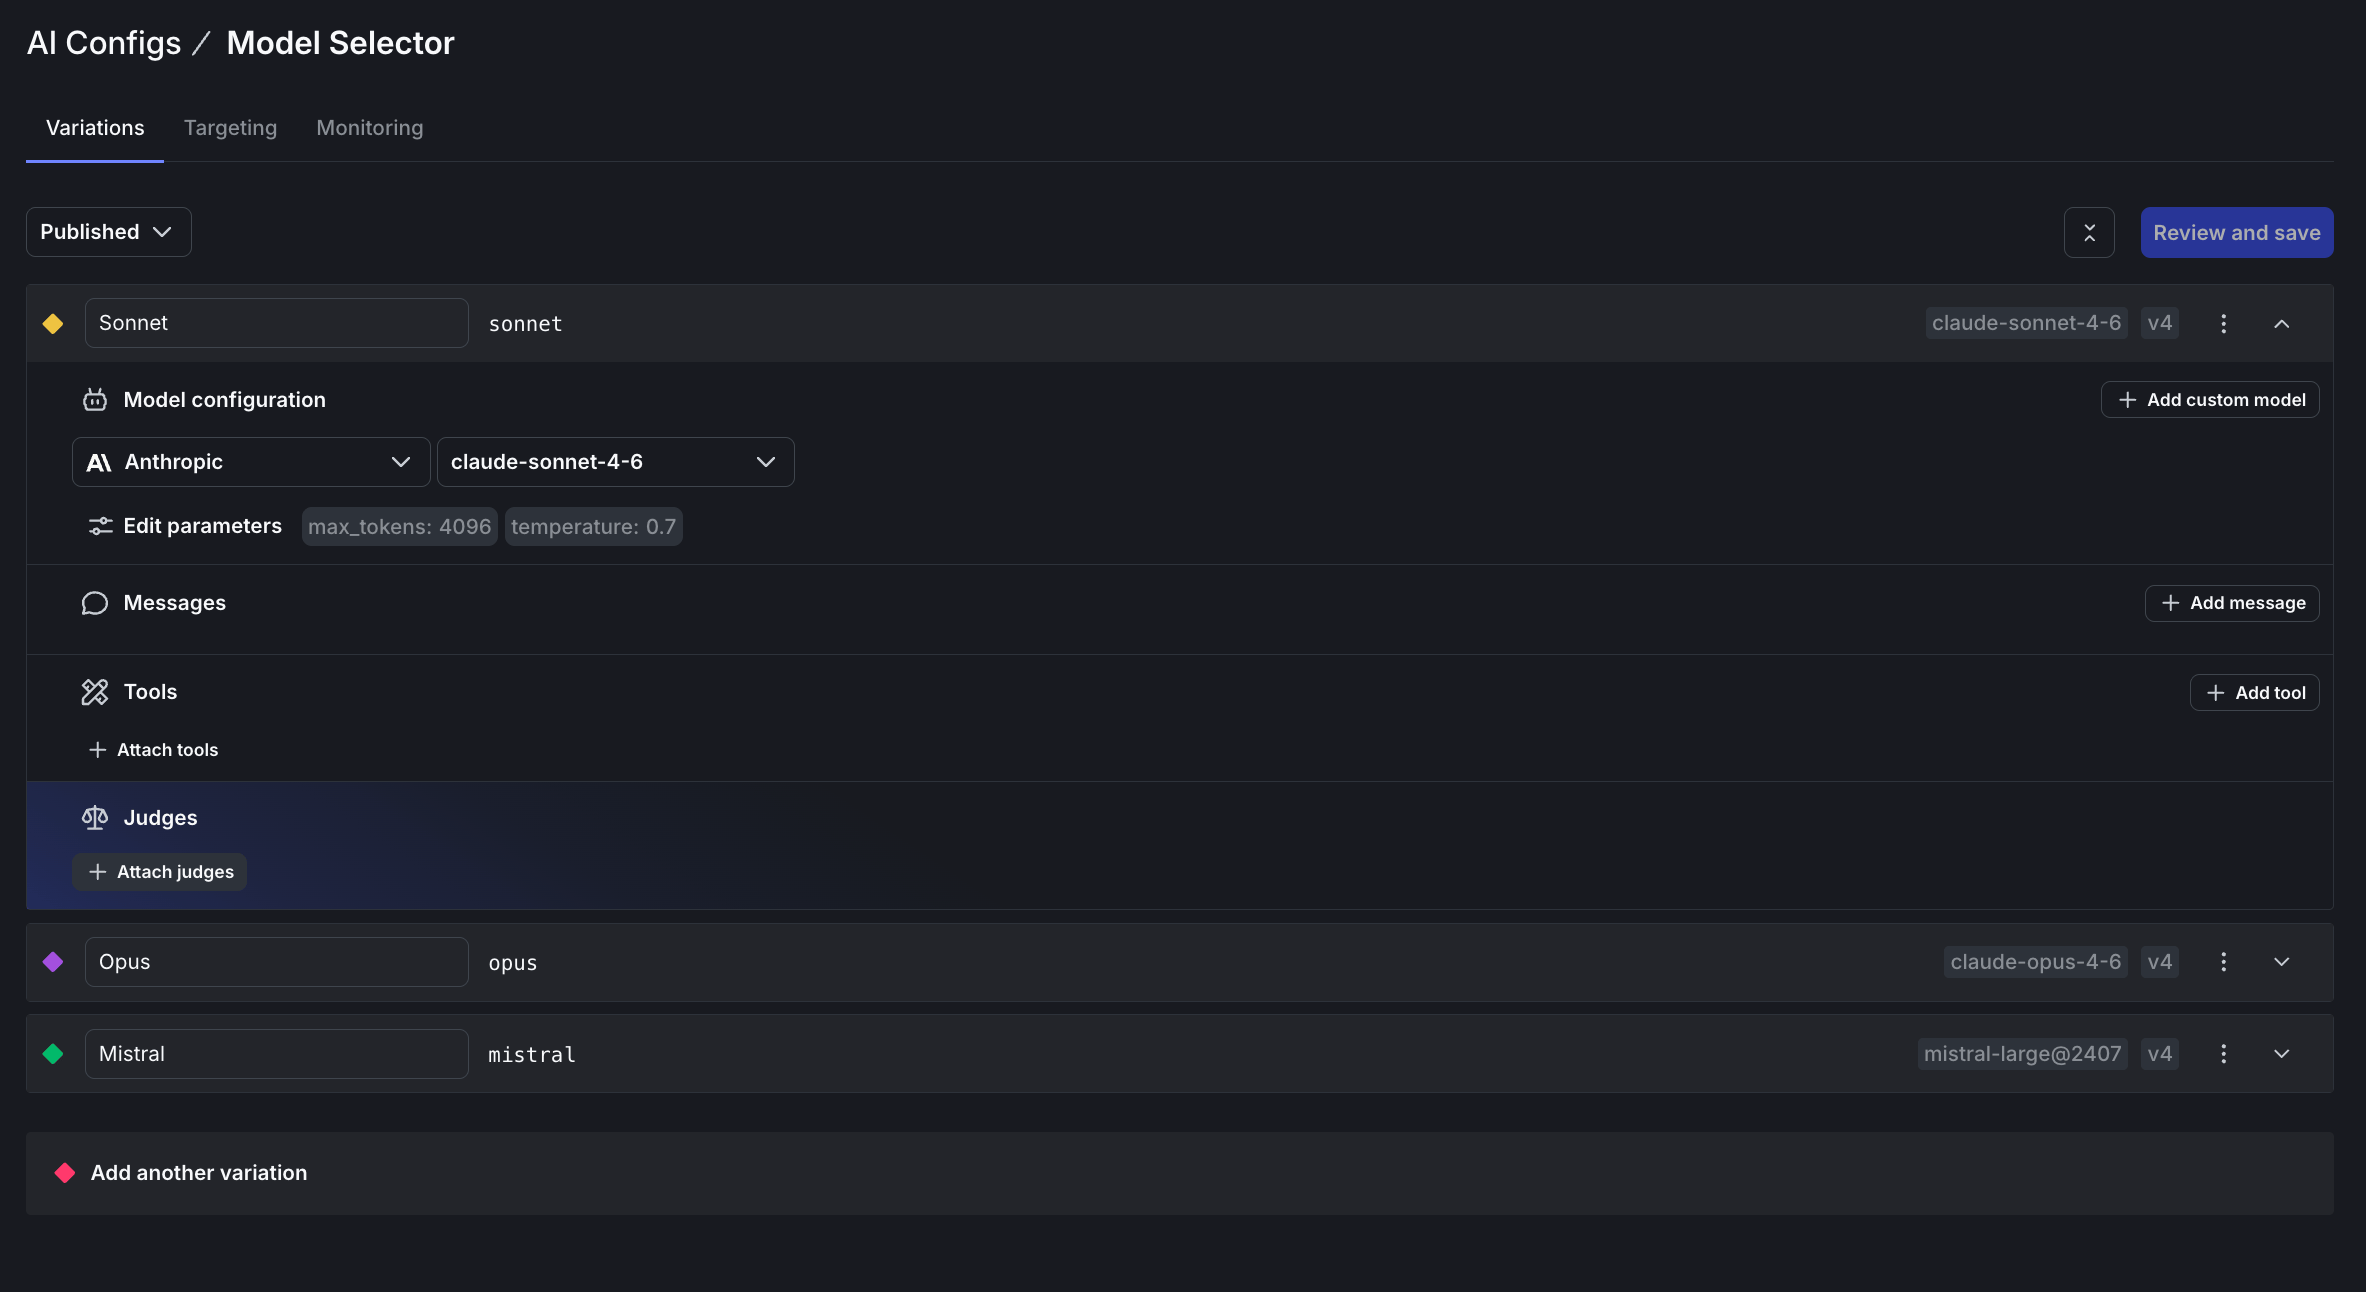
Expand a variation to find the Judges section
- Select the judges you created and set the sampling percentage to 100%.
- Repeat for each variation.
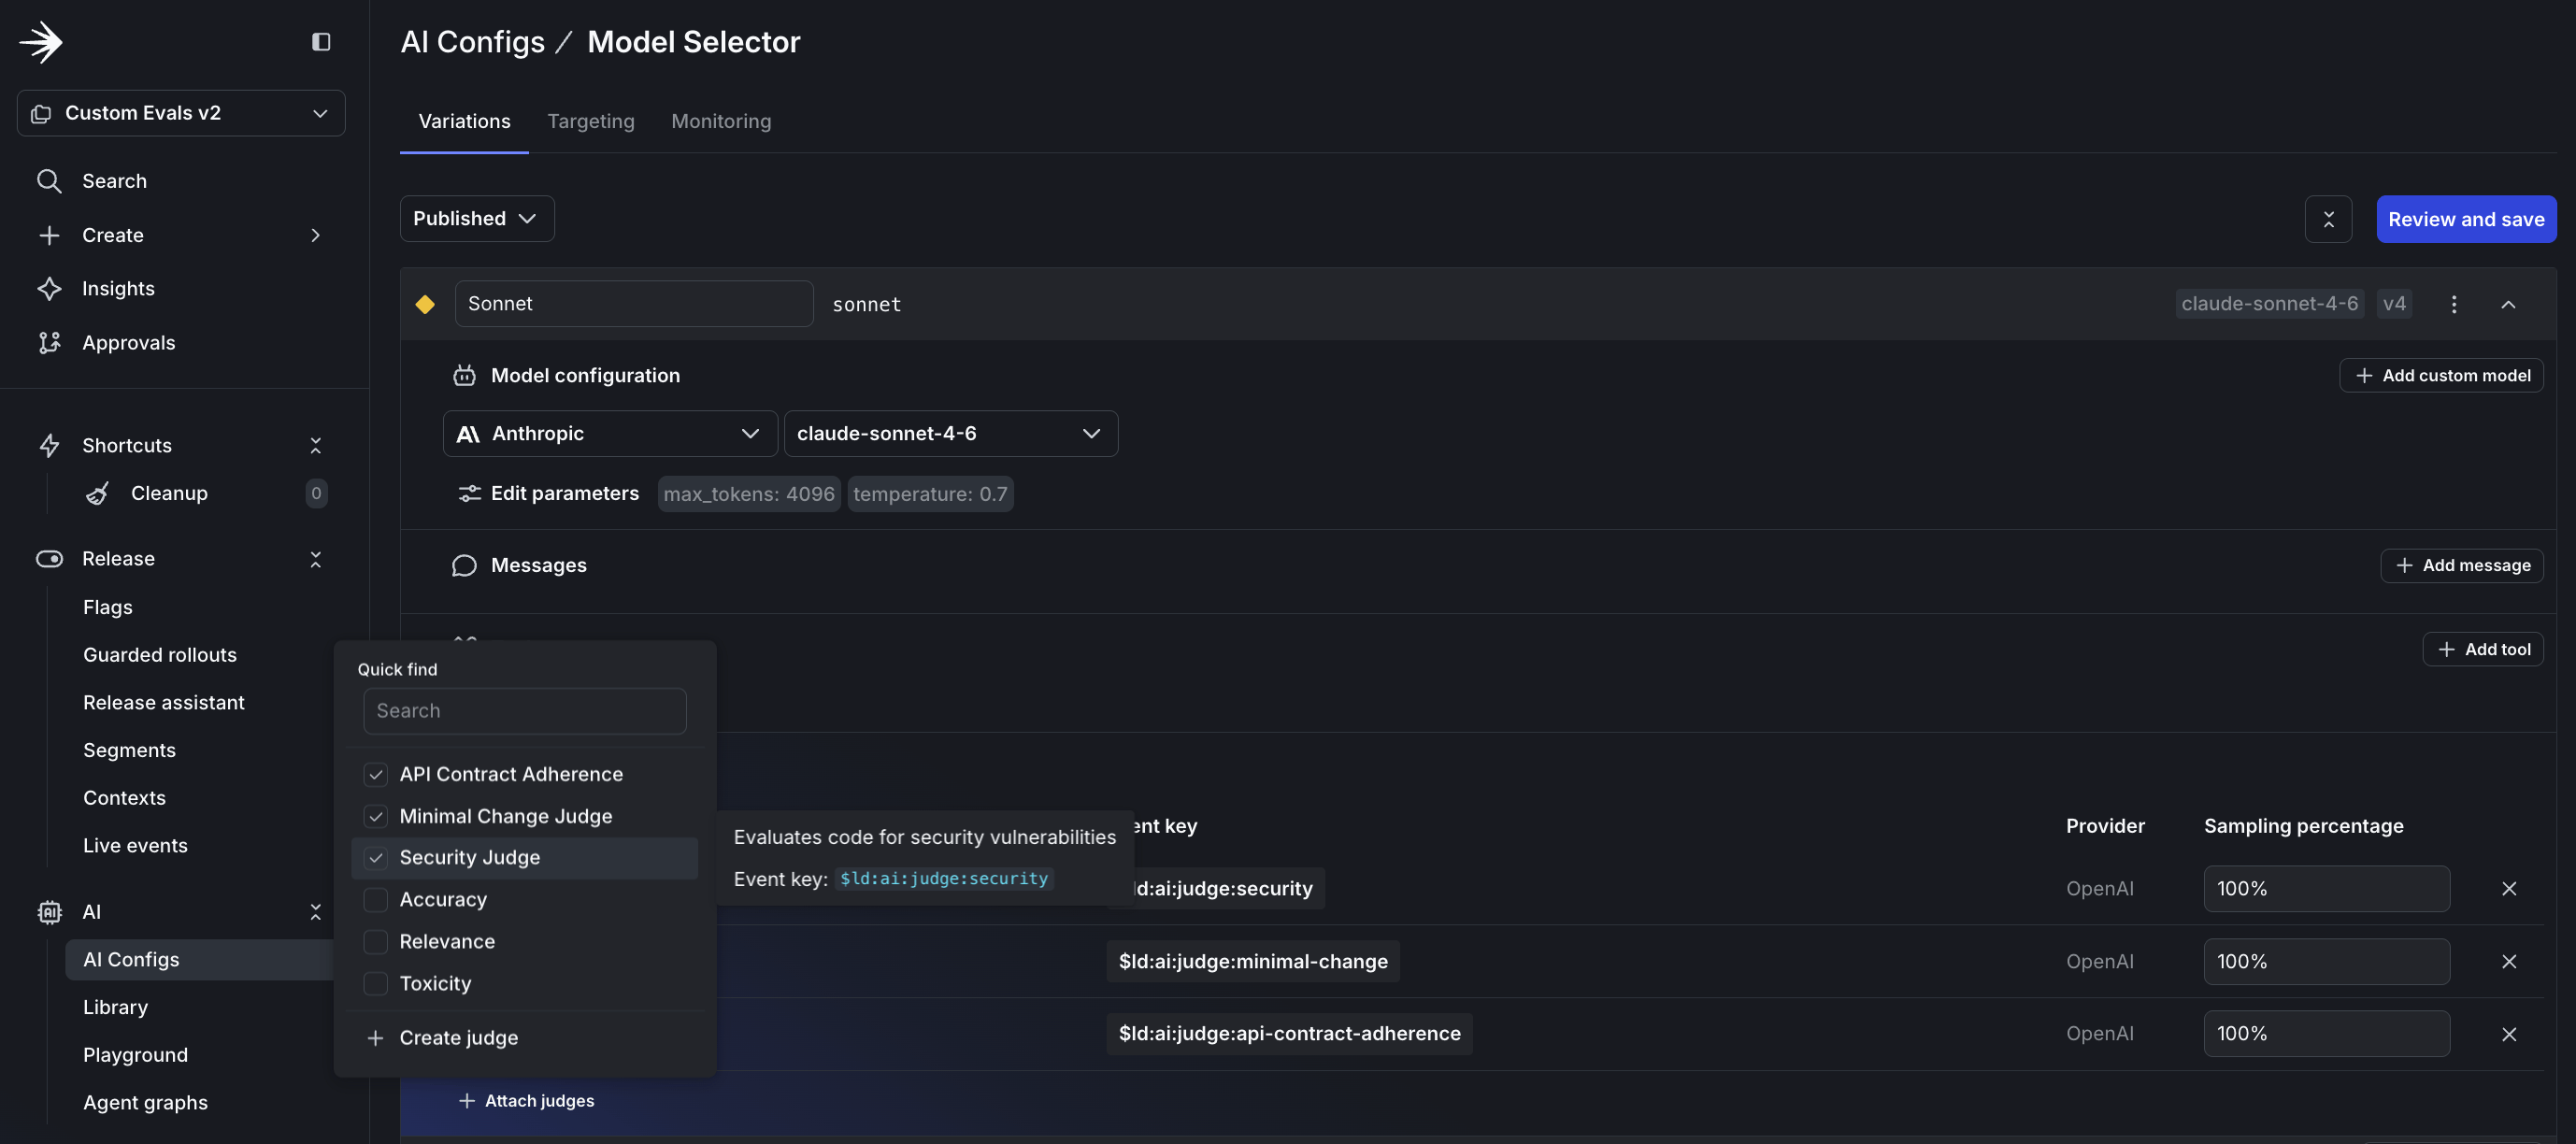
Select judges and set sampling percentage
- Go to the Targeting tab for the Model Selector.
- Add rules to route requests based on the
selectedModelcontext attribute:- If
selectedModelismistral, serve the Mistral variation - If
selectedModelissonnet, serve the Sonnet variation - Default rule: serve Opus
- If
- For each judge, set the default rule to serve the variation you created.
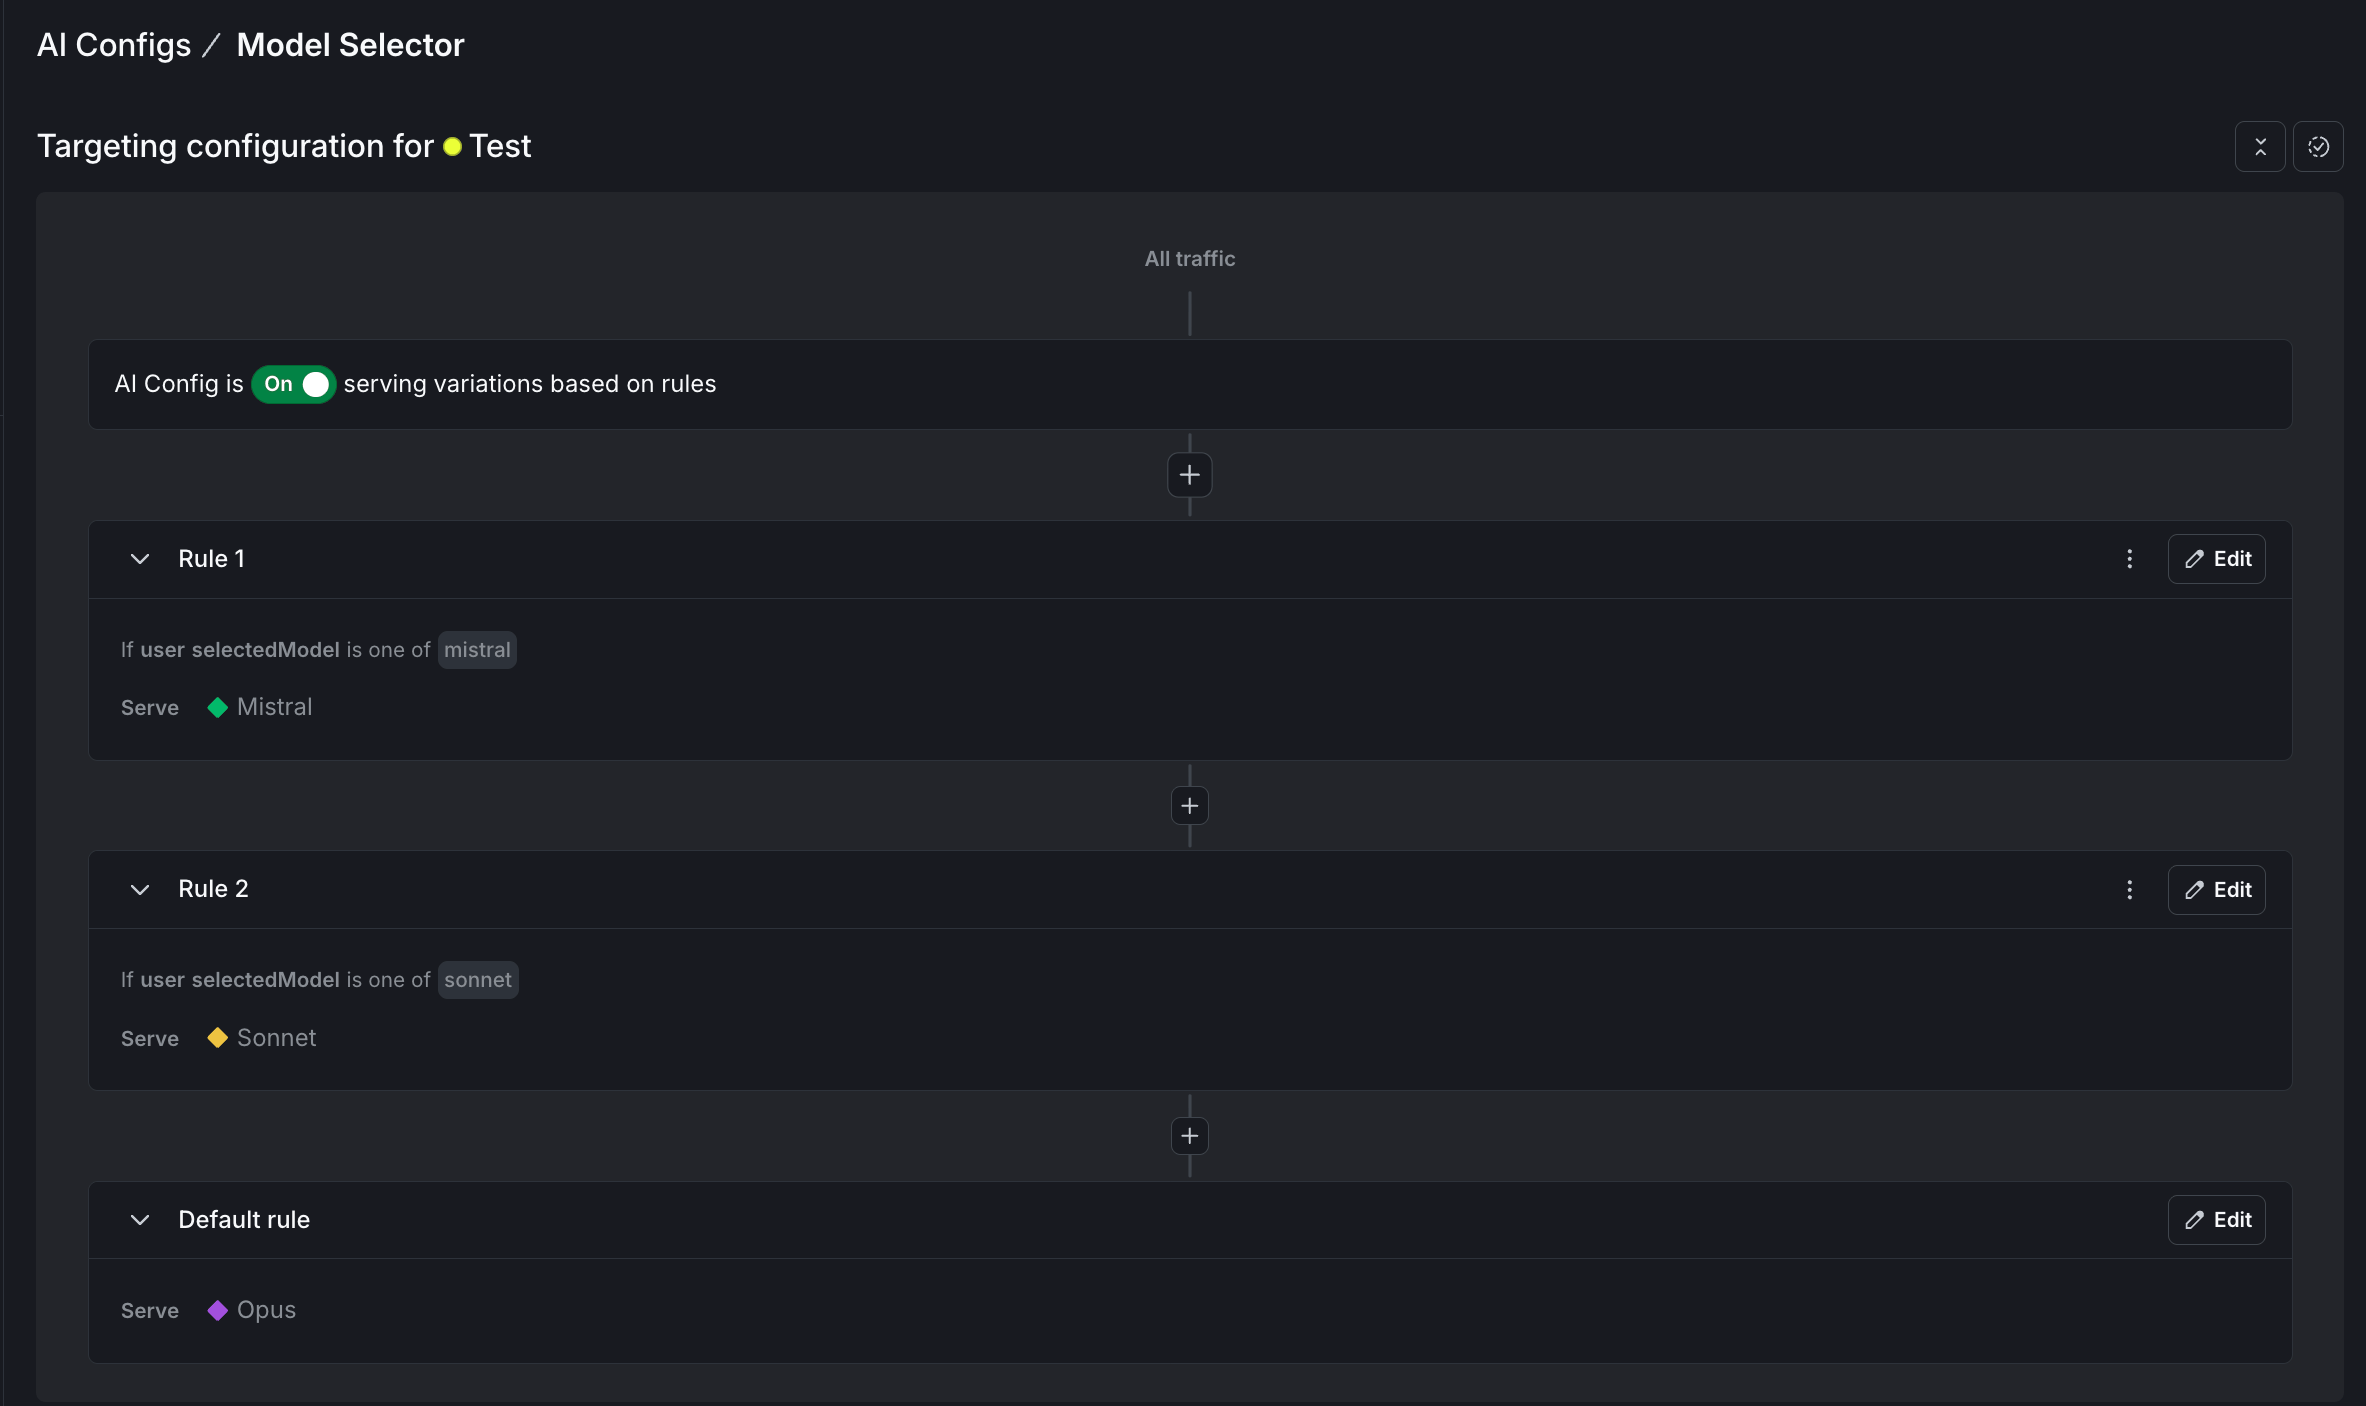
Targeting rules route requests to the correct model variation
Verify your setup
Before running the proxy, confirm in the dashboard:- Model selector: Each variation shows three attached judges.
- Judges: Each judge prompt includes scoring criteria.
- Targeting: All configs have targeting enabled with correct rules.
Set up the project
Create a directory and install dependencies:.env:
Build the proxy server
Createserver.py with the following code.
Connect Claude Code to your proxy
Start the proxy server:The key pattern for automatic judge evaluationThe Judge results are sent to LaunchDarkly automatically. You can optionally await
create_chat() and invoke() methods handle judge execution automatically:response.evaluations to log results locally.Tool features aren’t supportedThis proxy handles text-based conversations. Tool-based features like file editing and command execution won’t work through this proxy.
How model routing works
TheMODEL_KEY environment variable controls which model handles requests. The proxy passes it as a selectedModel context attribute:
Compare cloud and local models
To evaluate Ollama models against cloud providers:- Add an “ollama” variation to your model-selector config.
- Add a targeting rule for
selectedModelequals “ollama”. - Launch with
MODEL_KEY=ollama.
Run experiments
After judges are producing scores, you can compare models statistically. Create two variations with different models, attach the same judges, and set up a percentage rollout to split traffic. Your judge metrics appear as goals in LaunchDarkly Experimentation. After enough data, you can answer “Which model produces more secure code?” with confidence, not guesswork. To learn more, read Experimentation with AgentControl.Monitor quality over time
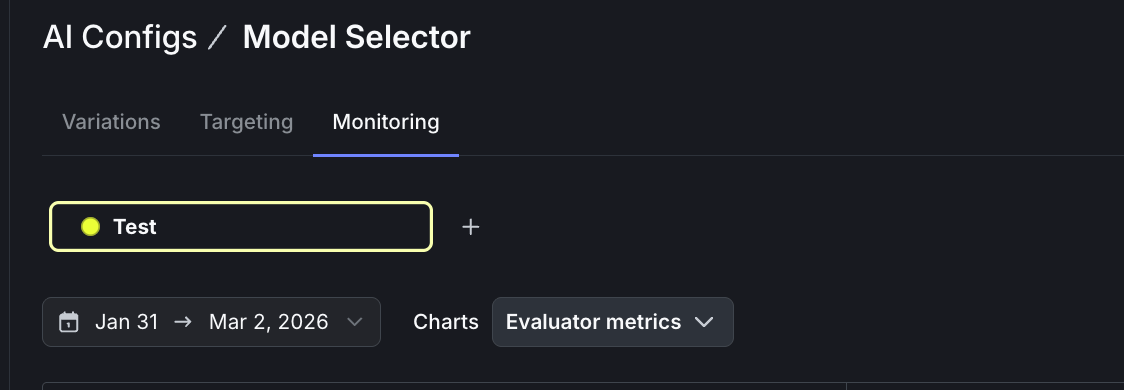
Judge scores appear on your config’s Monitoring tab. To view evaluation metrics:- Open your model-selector config and go to the Monitoring tab.
-
Select Evaluator metrics from the dropdown menu.
-
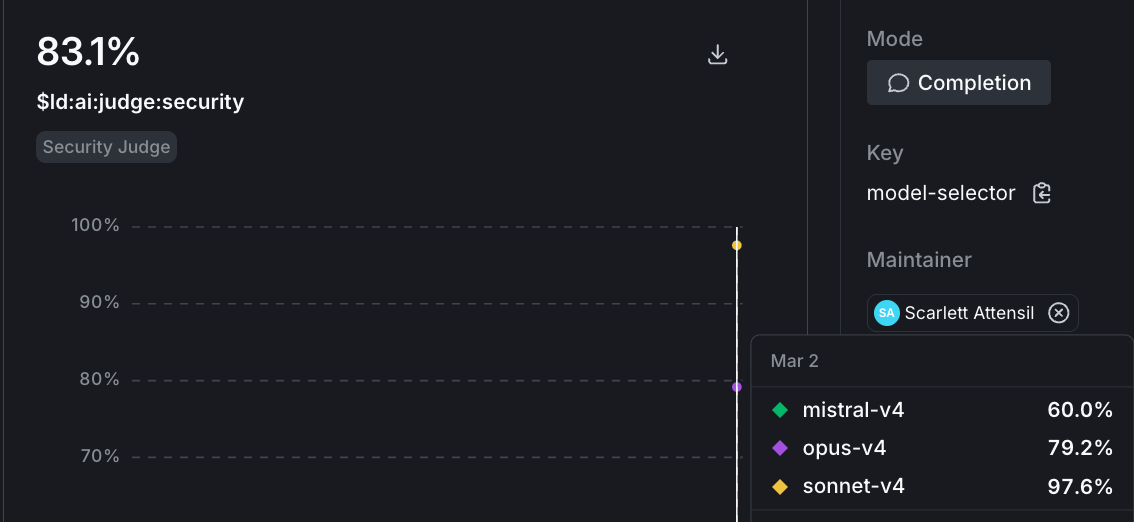
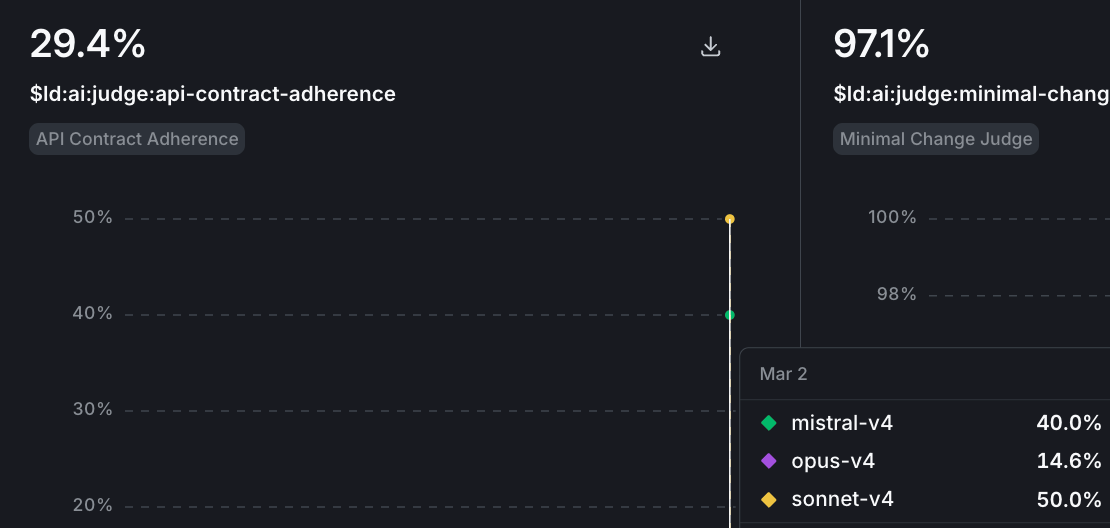
Each judge (security, API contract, minimal change) shows as a separate chart. Hover over a chart to see scores broken down by variation.
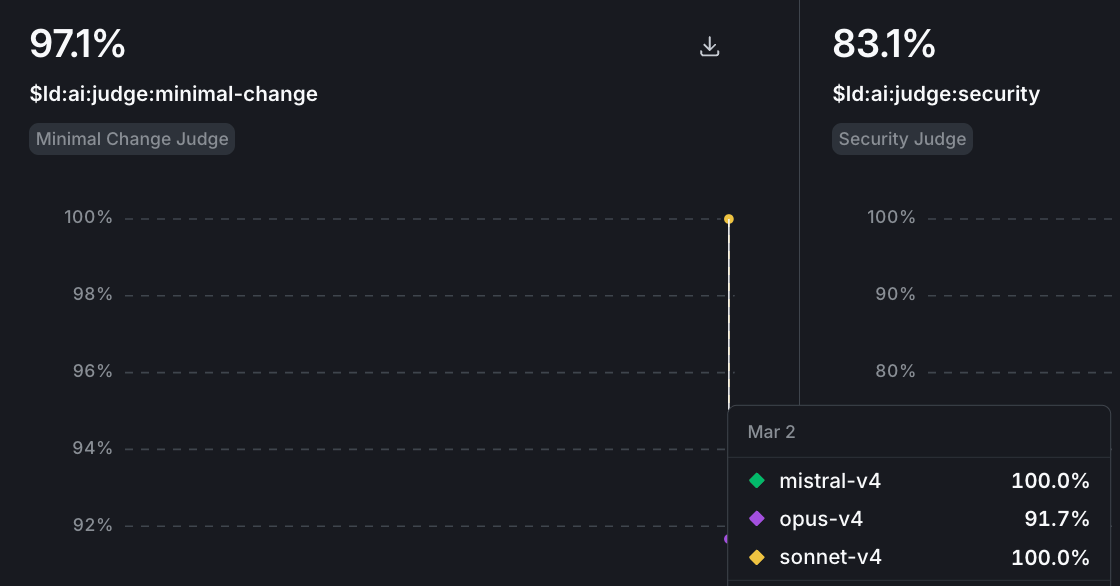
-
To drill into a specific model’s evaluations, select the variation from the bottom menu.
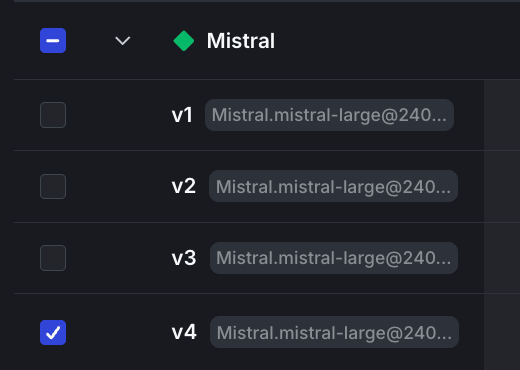
Control costs with sampling
Each judge evaluation is an LLM call. Control costs by adjusting sampling rates:- Staging: 100% sampling to catch issues early
- Production: 10-25% sampling for cost efficiency
What you learned
The value is in the judges you create. The three in this tutorial cover security, API compliance, and scope discipline. Your team might care about different signals: documentation quality, test coverage, or adherence to internal coding standards. Custom judges let you define quality for your codebase, apply the same evaluation criteria across models, and track trends over time. Once you create a judge, you can attach it to any config in your project.Start your free trialReady to build custom judges for your codebase? Start your 14-day free trial and deploy your first evaluation today.
Next steps
- hello-python-ai examples for more judge patterns
- Building a chatbot with multiple AI providers using AgentControl for production patterns
- When to add online evals - Decide which judges run on live traffic and at what sampling rate
- Offline Evaluation of RAG-Grounded Answers - Run the same judges as regression tests in CI before promoting a variation
- Beyond n8n for Workflow Automation: Agent Graphs - Attach per-node judges once your workflow is externalized as a graph
Footnotes
-
The
/online-evalsand/configs-targetingskills are not yet available. Use the LaunchDarkly MCP server or the dashboard to complete those steps. ↩