

Introducing Guarded Releases: observability at the point of release
How Guarded Releases Work
Guarded Releases combine three powerful capabilities:- Progressive rollout: Gradually expose your feature to increasing percentages of users (1%, 5%, 10%, 25%, 50%, 100%).
- Real-time monitoring: Track rage clicks, error rates, latency, and custom metrics for each feature variation.
- Automated response: When metrics exceed defined thresholds, LaunchDarkly alerts your team or automatically rolls back the feature.
Traditional APM vs Guarded Releases
| Aspect | Traditional APM | Guarded Releases |
|---|---|---|
| Scope | System-wide monitoring | Feature-specific monitoring |
| Attribution | ”Something broke, figure out what" | "Feature X caused this issue” |
| Response | Hunt through dashboards, correlate timestamps, redeploy | One-click rollback of the specific feature |
| Blast Radius | 100% of users affected by time you notice | Only the rollout percentage affected (e.g., 10%) |
| Debug Context | Error logs and stack traces | Session replays + errors + logs + traces in one timeline |
Setting up Guarded Releases for rage click monitoring
Building on the implementation from Part 1, you’re already capturing rage click data automatically and can now filter for the result in the Sessions tab by typinghas_rage_clicks=true in the search bar.
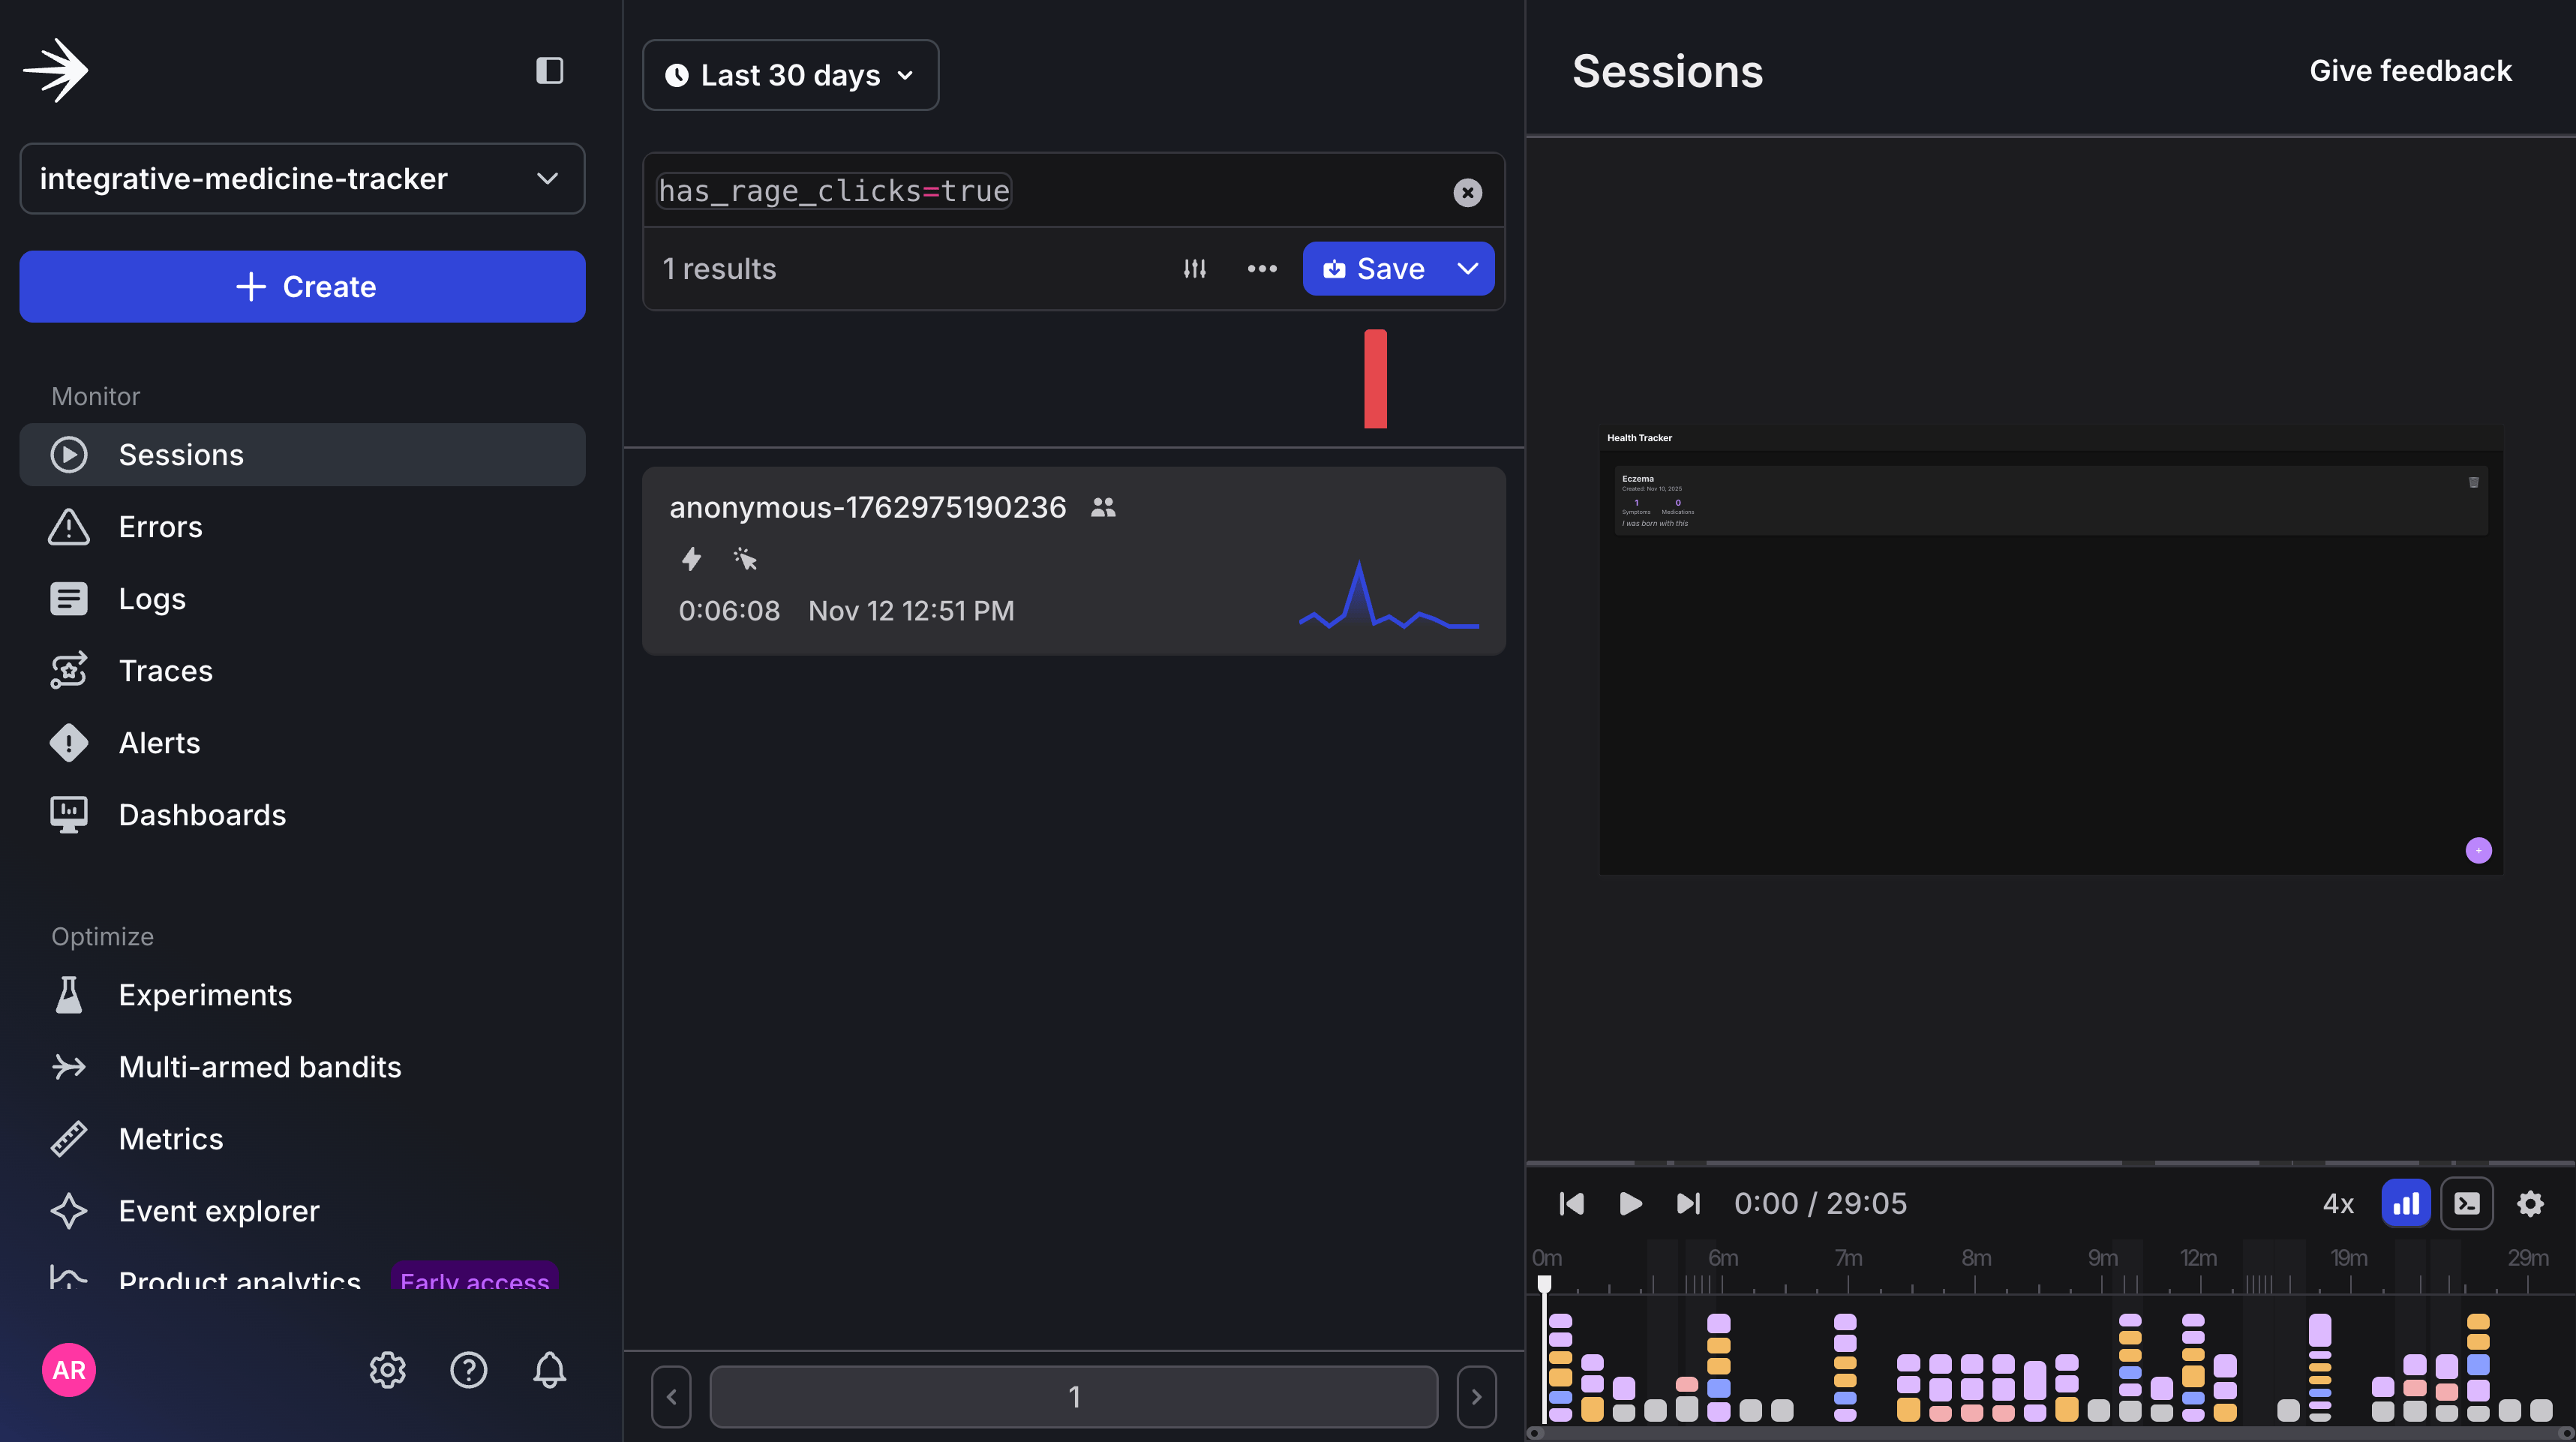
LaunchDarkly Sessions view showing automatic rage click detection with has_rage_clicks=true filter.
Prerequisites
- A free LaunchDarkly account - sign up at this link and you’ll get access to our observability SDK
- Complete the previous rage click detection tutorial.
Step 1: Create Your Feature Flag
First, you’ll need to create the feature flag that will be associated with the Guarded rollout/release. In this case, you can use the new feature flag to enable/disable the Test Rage Click Button in the UI. What’s cool is you can connect to the LaunchDarkly MCP server in Cursor (or any AI-enabled IDE) and use it to create new feature flags directly in the agent chat window. The full instructions for setting this up can be found in the docs. To get started, you’ll need your LaunchDarkly Access token with Writer access. Let’s call itCursor MCP.
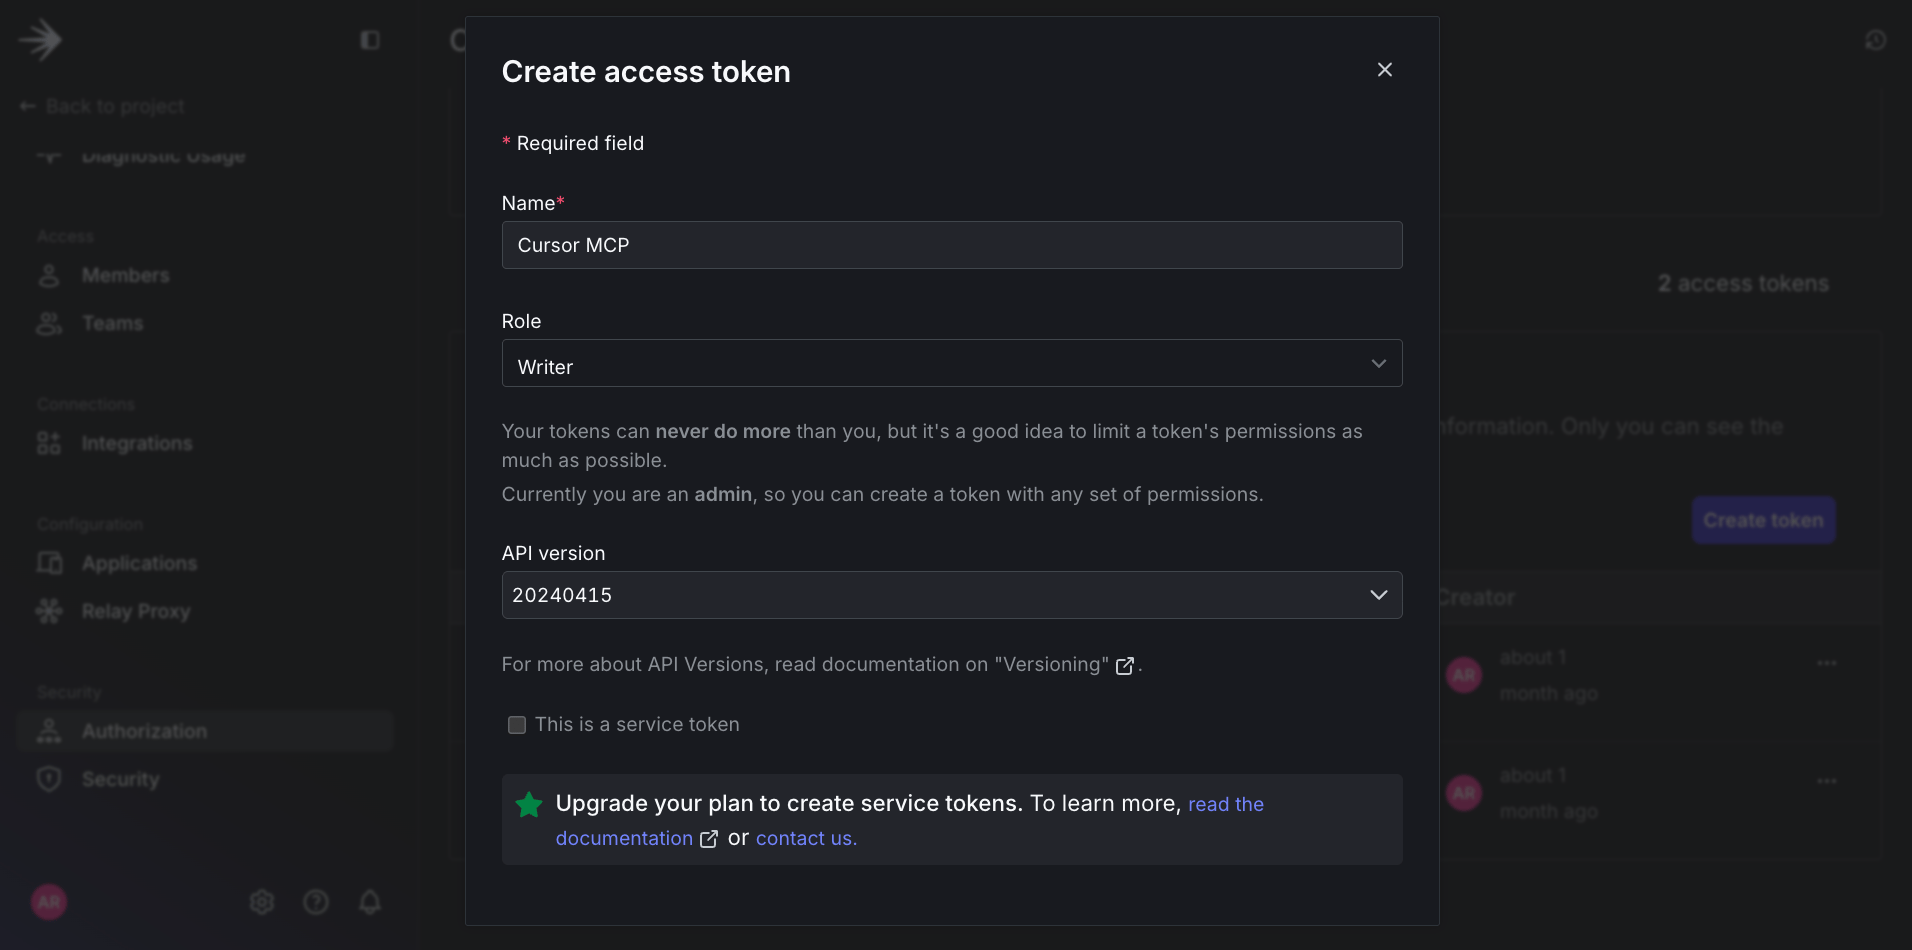
Grab access token with write access from LaunchDarkly.
- Project name:
integrative-medicine-tracker - Feature flag:
Test Rage Click Button
Create a new feature flag for the Test Rage Click Button in the integrative-medicine-tracker project in LaunchDarkly
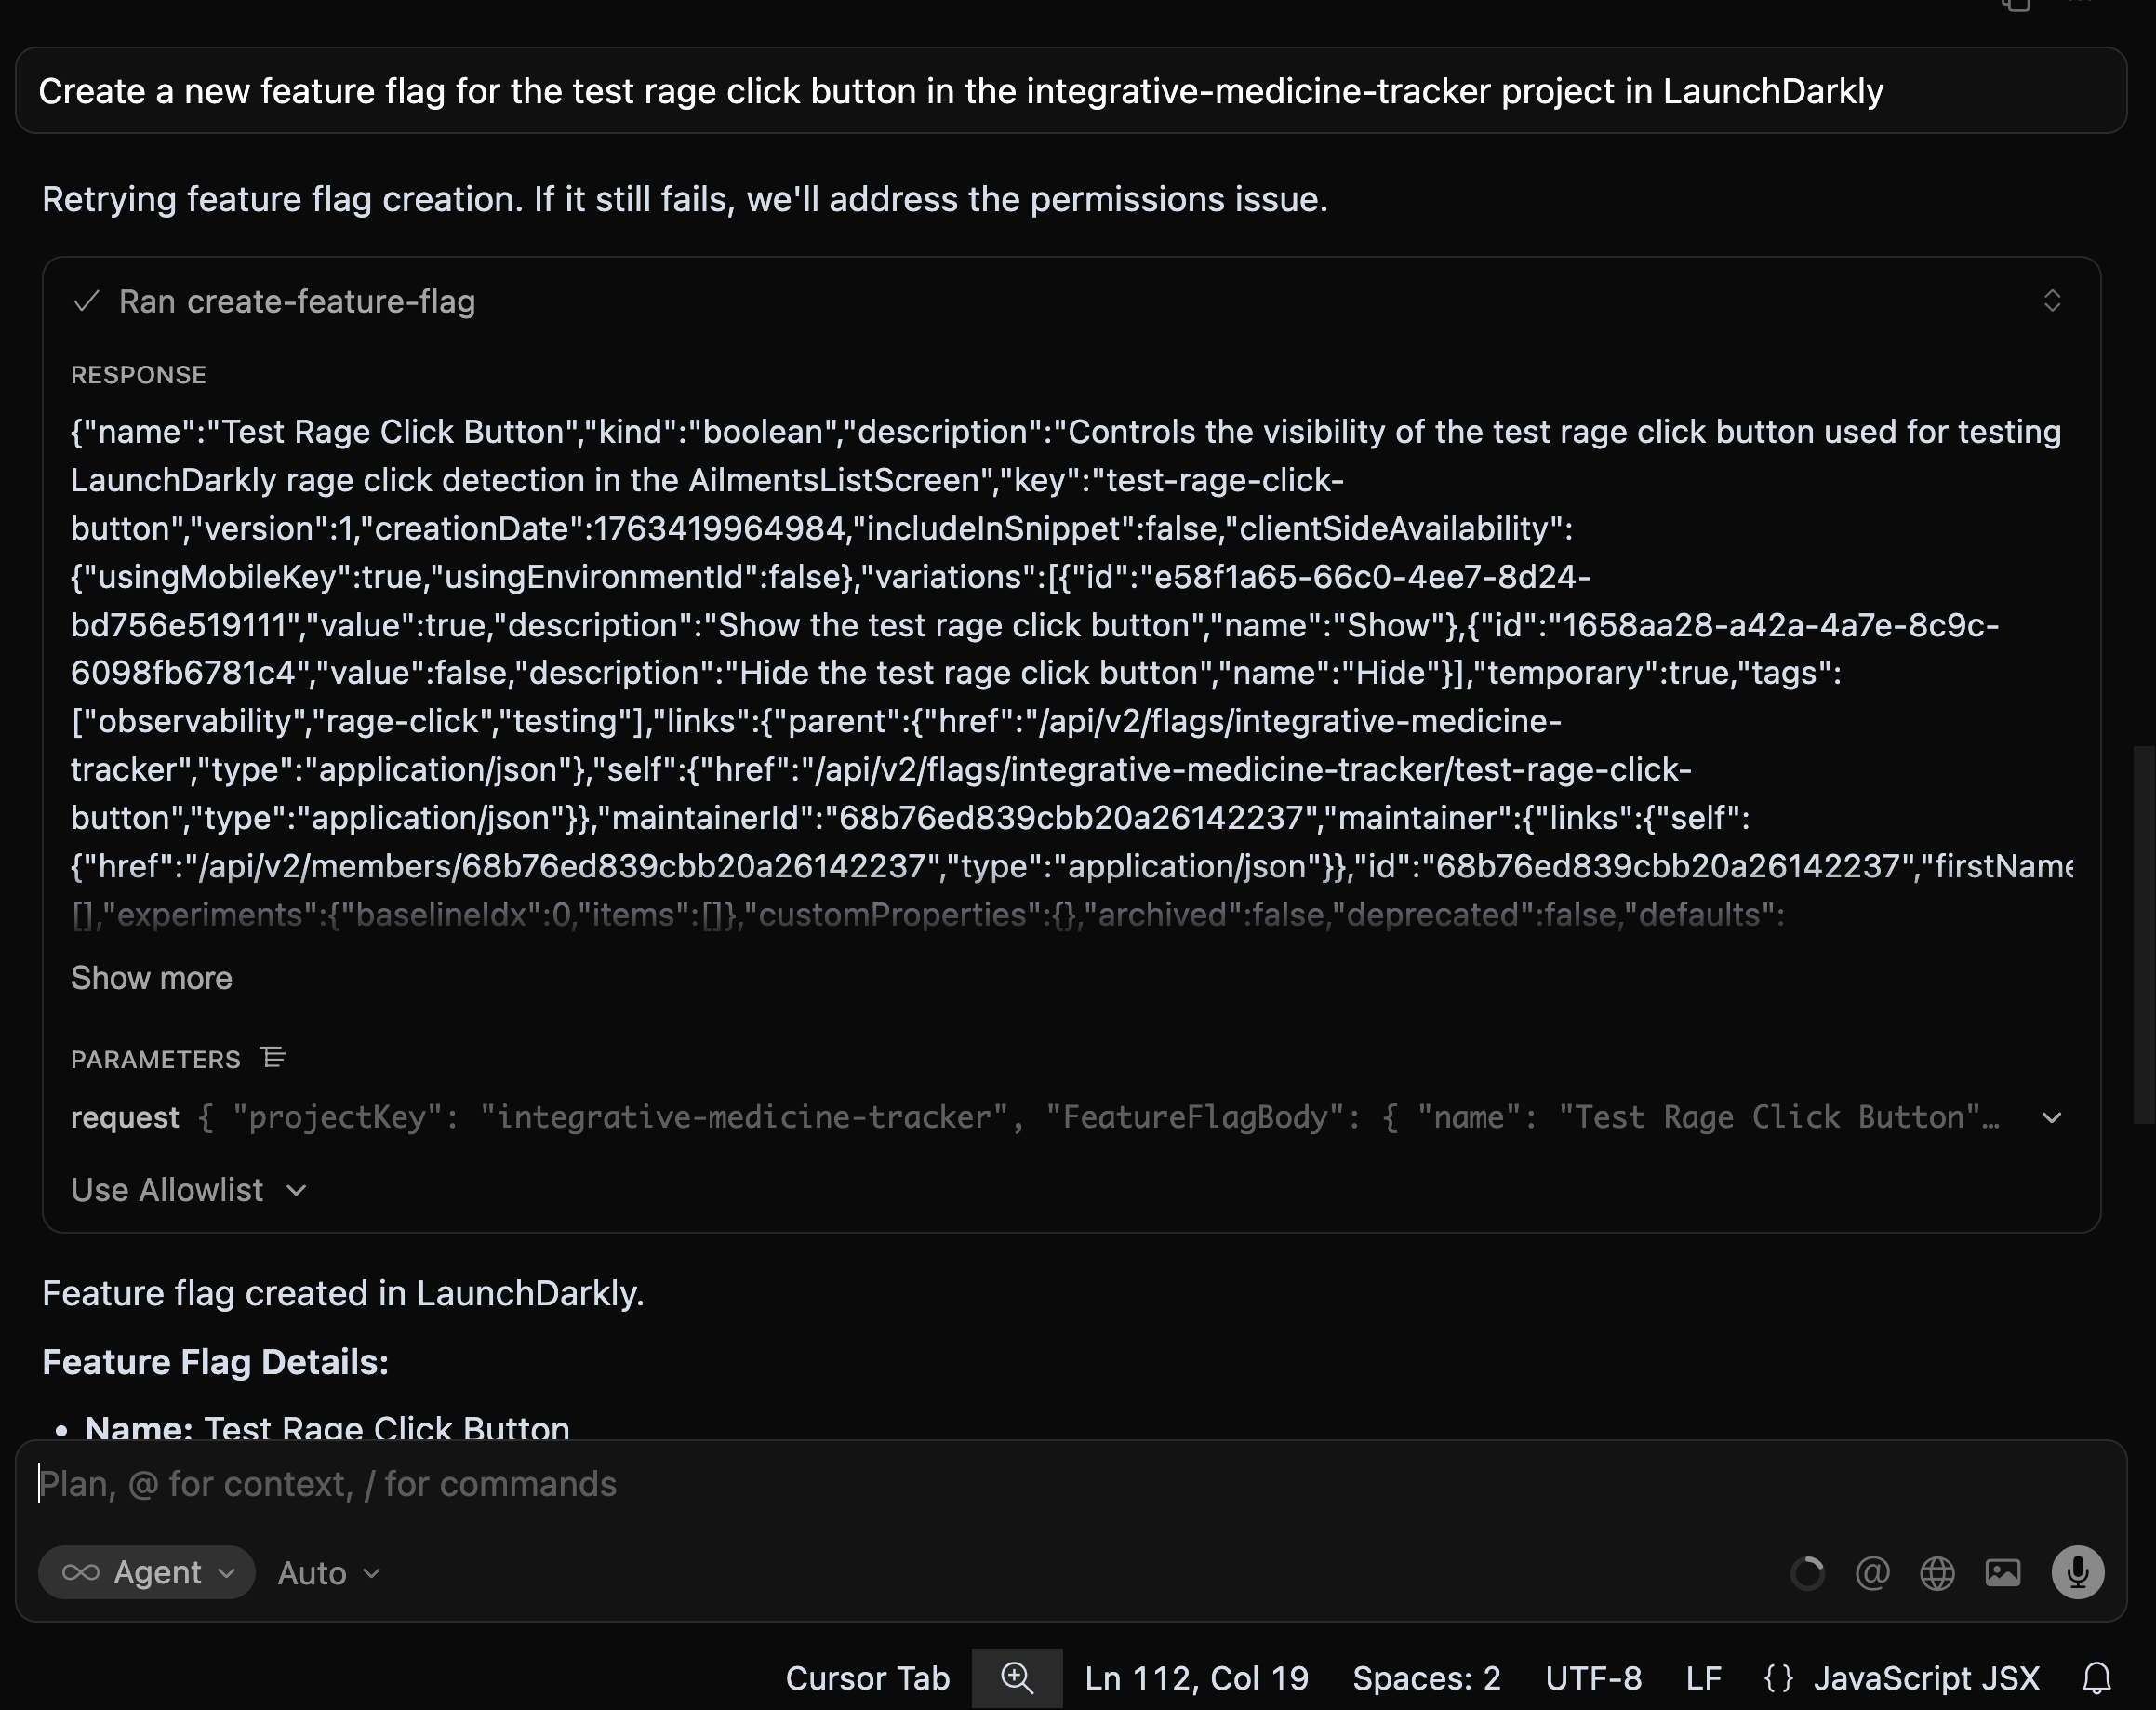
Execute prompt to create feature flag using LaunchDarkly MCP Server.
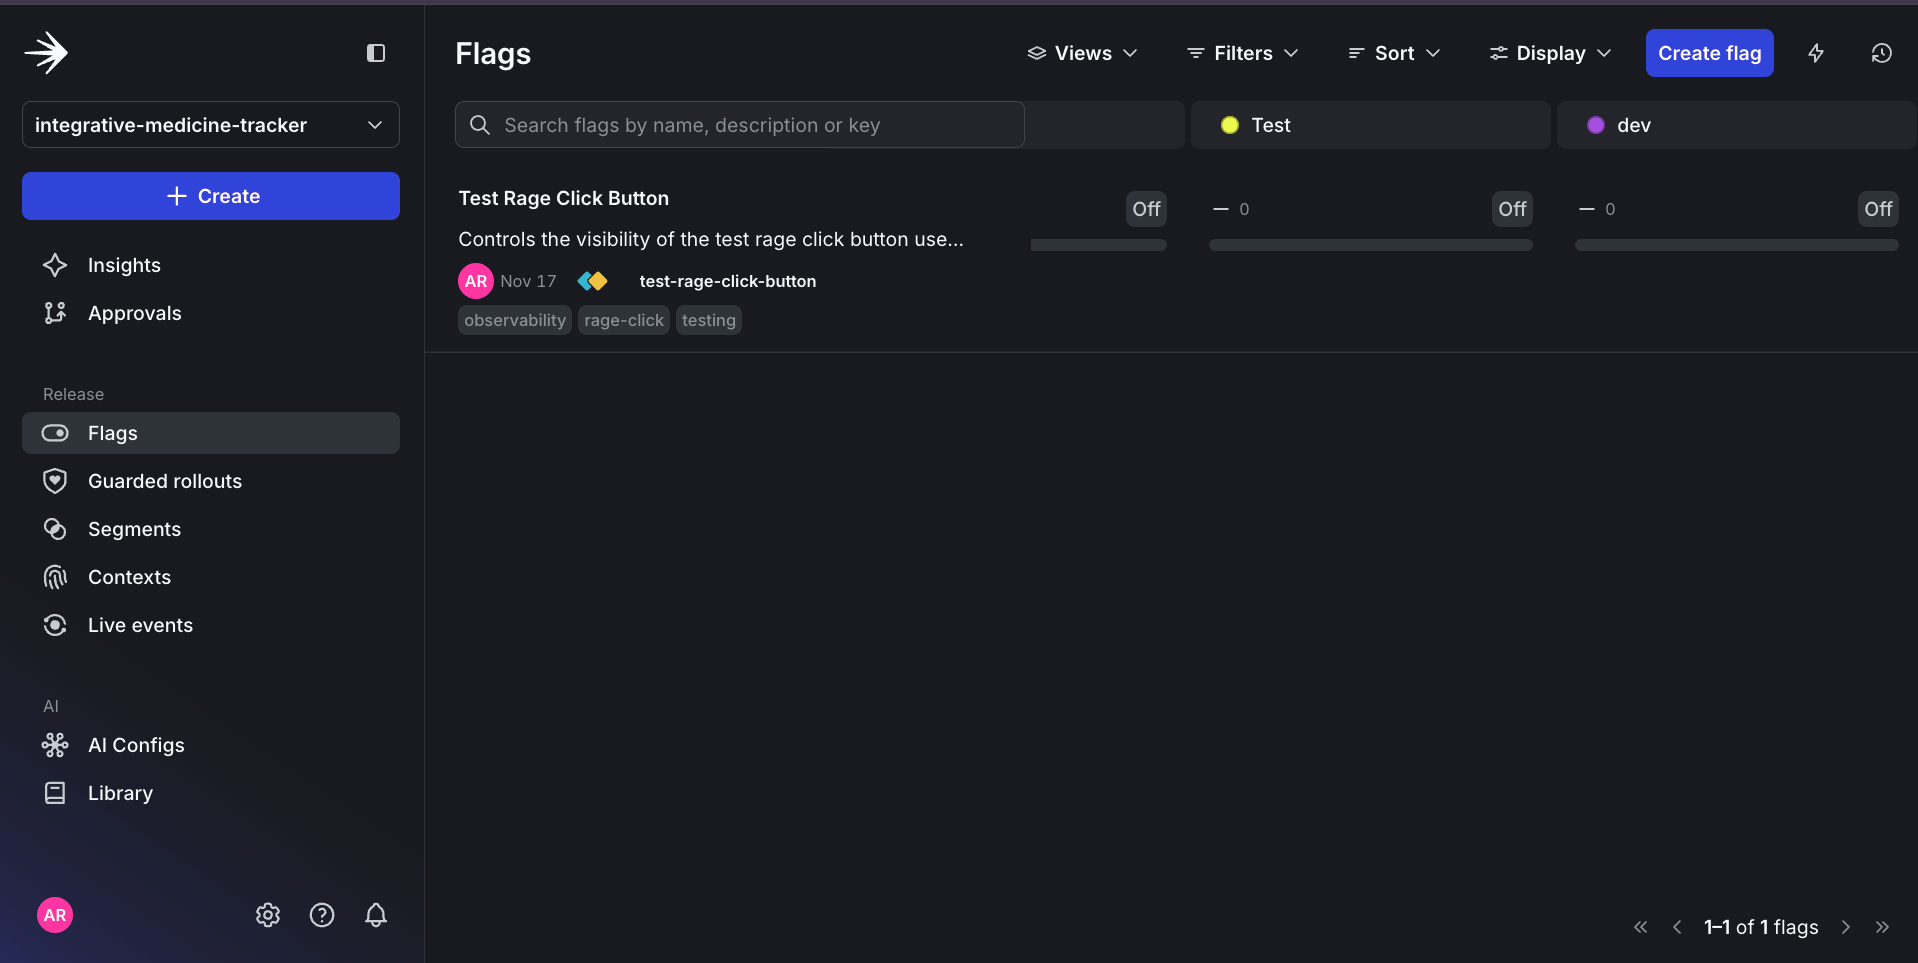
Target Rage Click Button feature flag in the LaunchDarkly UI.
Screens/AilmentsListScreen.jsx file, where the test rage click button was created, import the LaunchDarkly client.
AilmentsListScreen() function which will check for changes to the feature flag and the updated feature flag value.
It also includes debugging and retry logic for connecting to the LaunchDarkly client.
launchdarkly.jsx.
Here, you’ll add two functions: one to get the LaunchDarkly client and the other to check whether the feature flag is enabled.
Available on client-side SDKs.
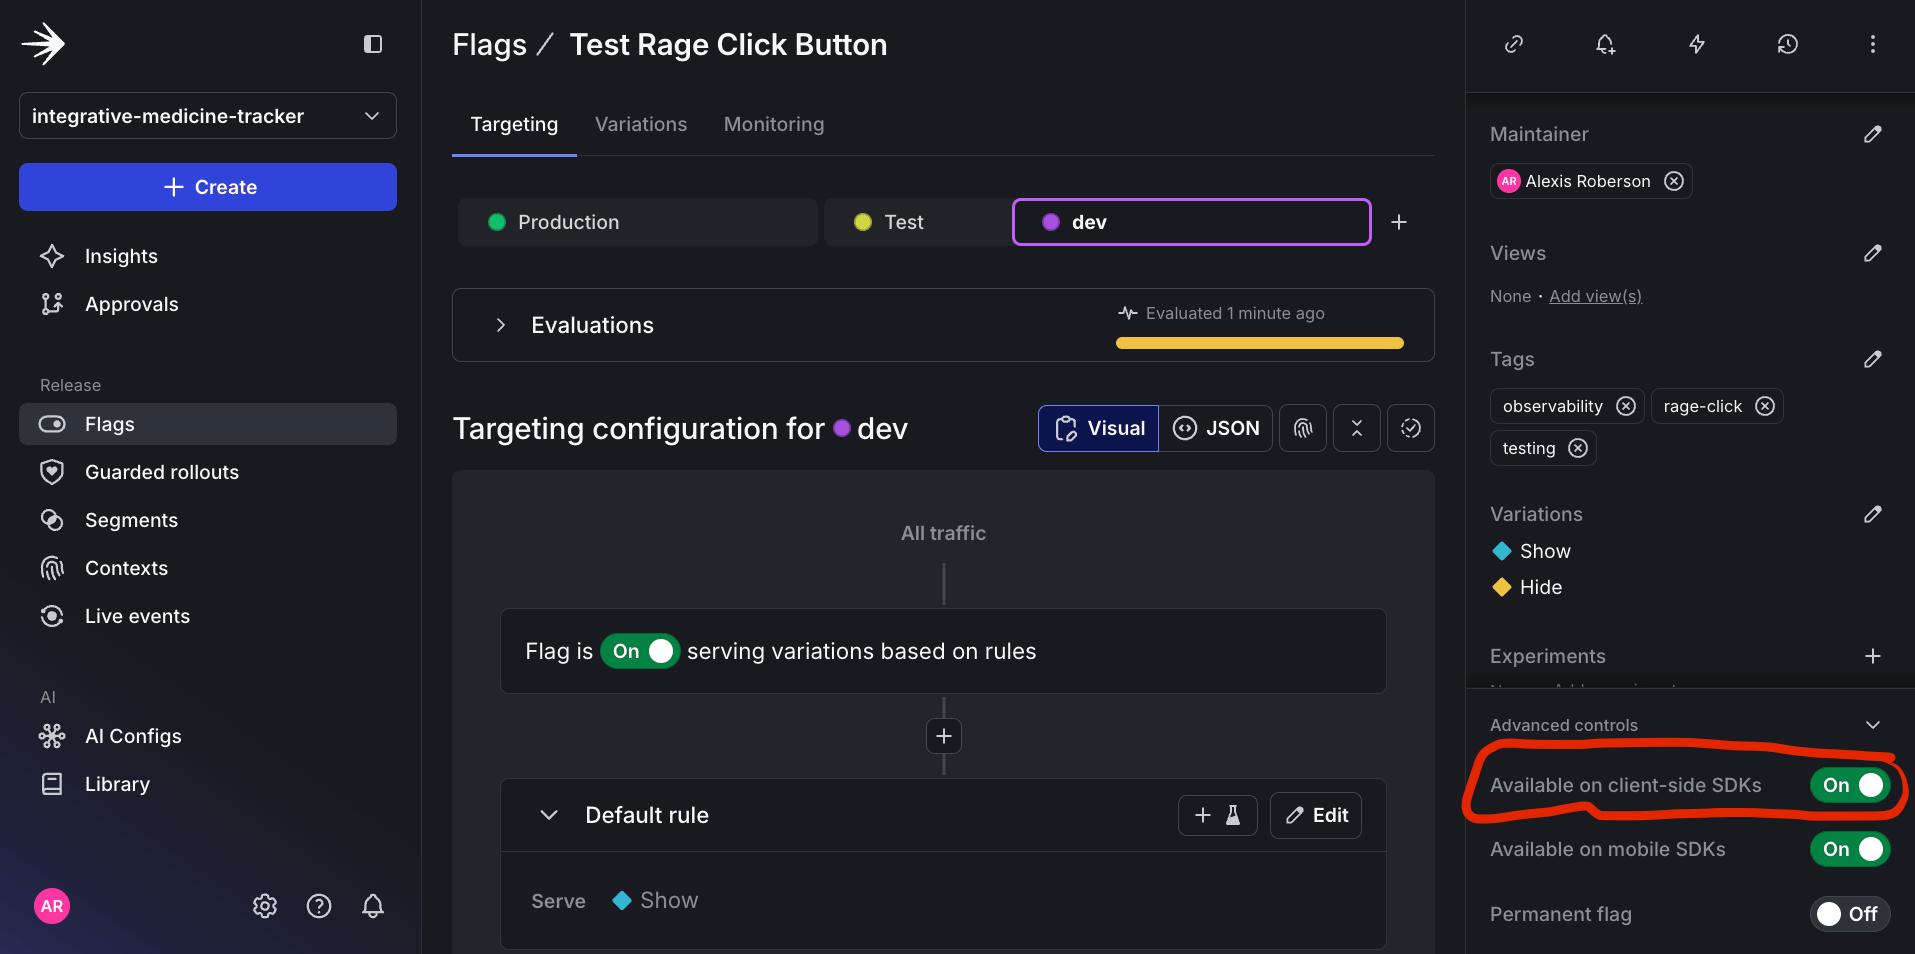
Enabling Target Rage Click Button feature flag in the LaunchDarkly UI.
has_rage_clicks=true experience rage clicks, LaunchDarkly automatically associates those sessions with your feature flag.
Step 2: Use Automatic Rage Click Tracking
When you enabled session replay in Part 1, LaunchDarkly automatically:- Detects rage click patterns based on your configured thresholds (5 clicks, within 8 pixels, over 2 seconds).
- Tags sessions with the has_rage_clicks attribute.
- Correlates rage clicks with active feature flags.
- Makes this data available for filtering and monitoring.
Step 3: Enable Guarded Releases on Your Feature Flag
How this works
Guarded rollouts which are attached to a specific feature flag gradually release features to users while monitoring custom metrics (like rage clicks). If a defined threshold is exceeded during the rollout, LaunchDarkly can automatically roll back the feature or send notifications to your team. Taking the feature flag we created earlier in this tutorial, we can create a rage click detection metric and connect it to a guarded rollout. Here’s what you’ll need to do:- Create a guarded rollout under the Test Rage Click Button feature Flag.
- Create a metric to track click counts by the user in a session.
- Attach the metric to the guarded rollout and configure threshold, automatic rollback, and time duration.
Test Rage Click Button feature flag, click Edit on the Default rule.
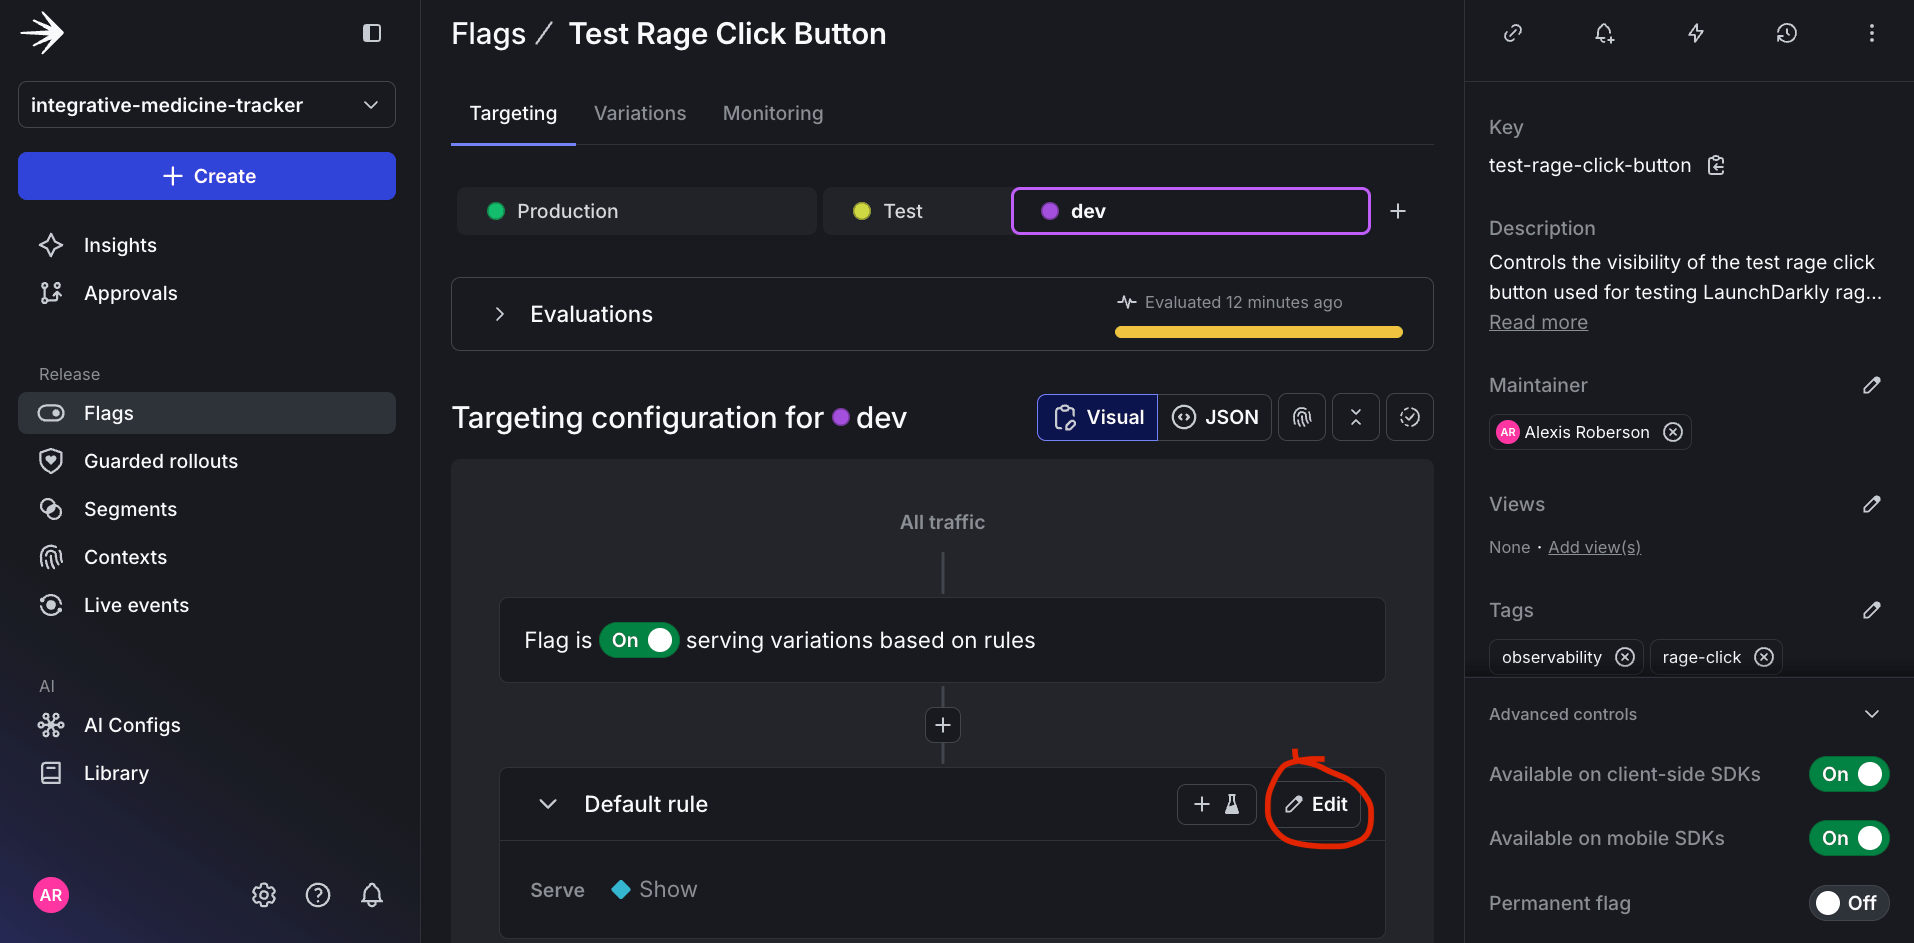
Click Edit on the Target Rage Click Button feature flag default rule.
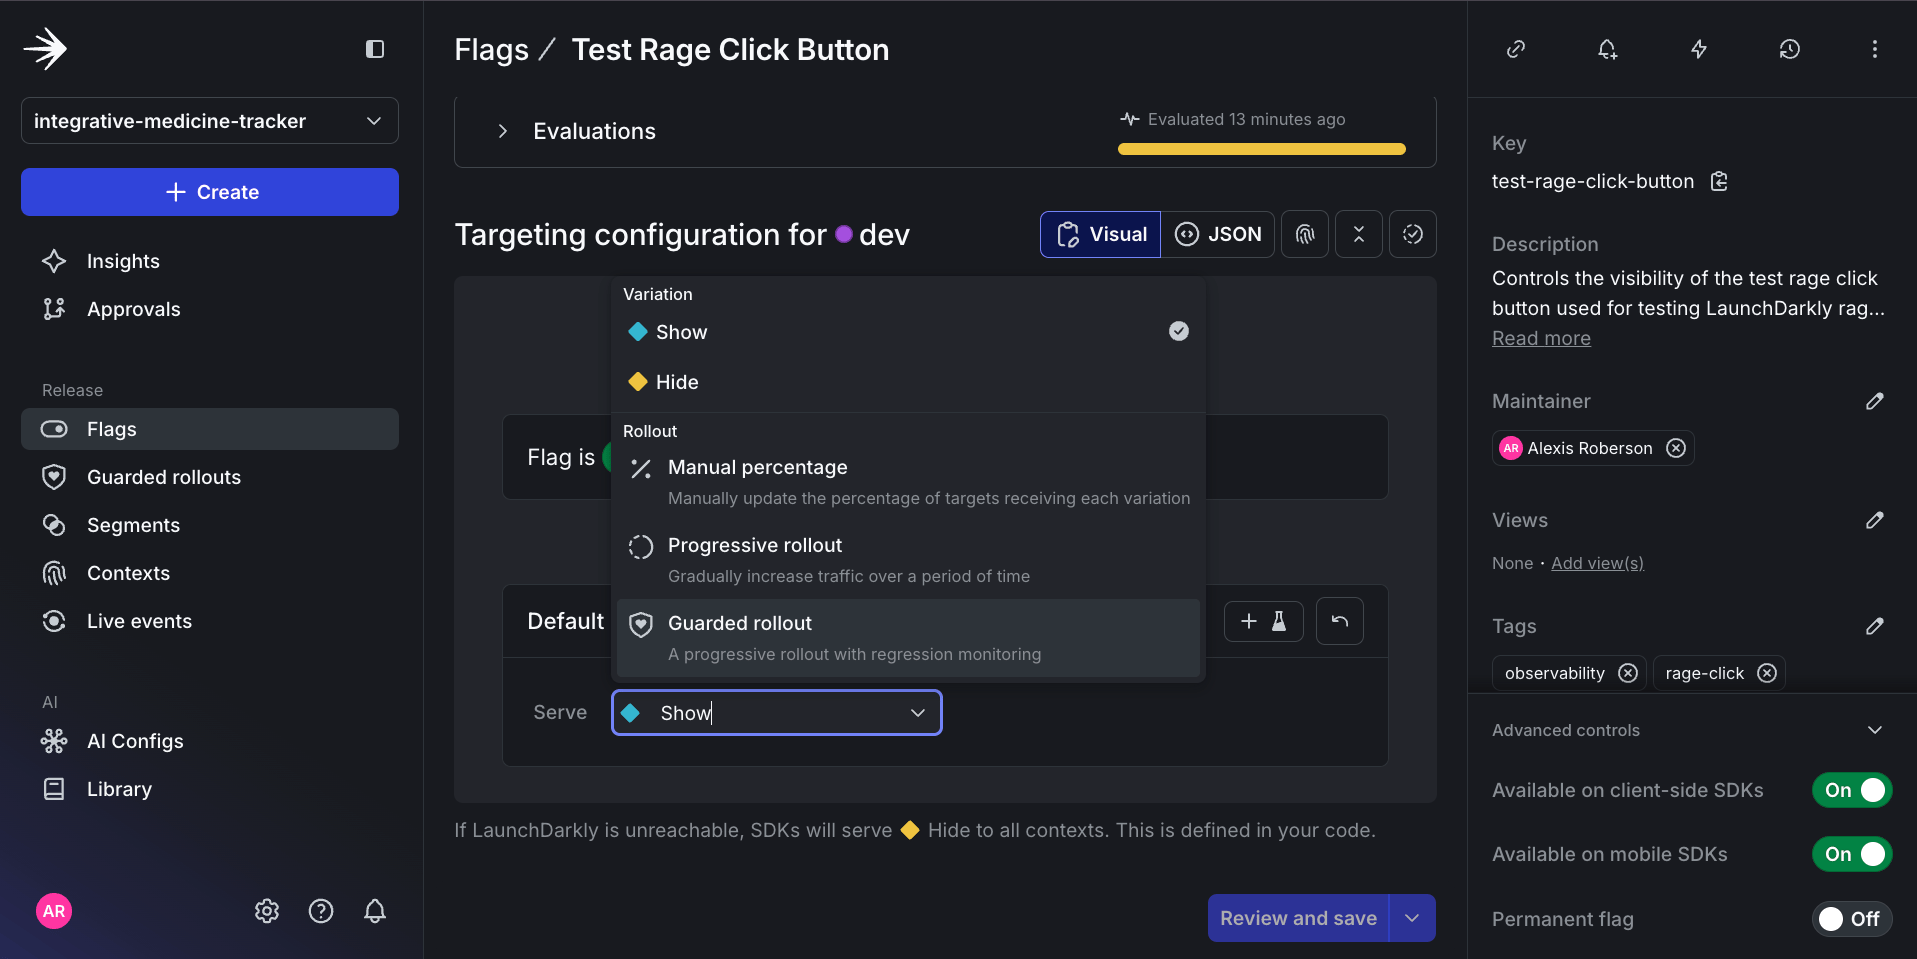
Select Guarded rollout as Target Rage Click Button feature flag default rule.
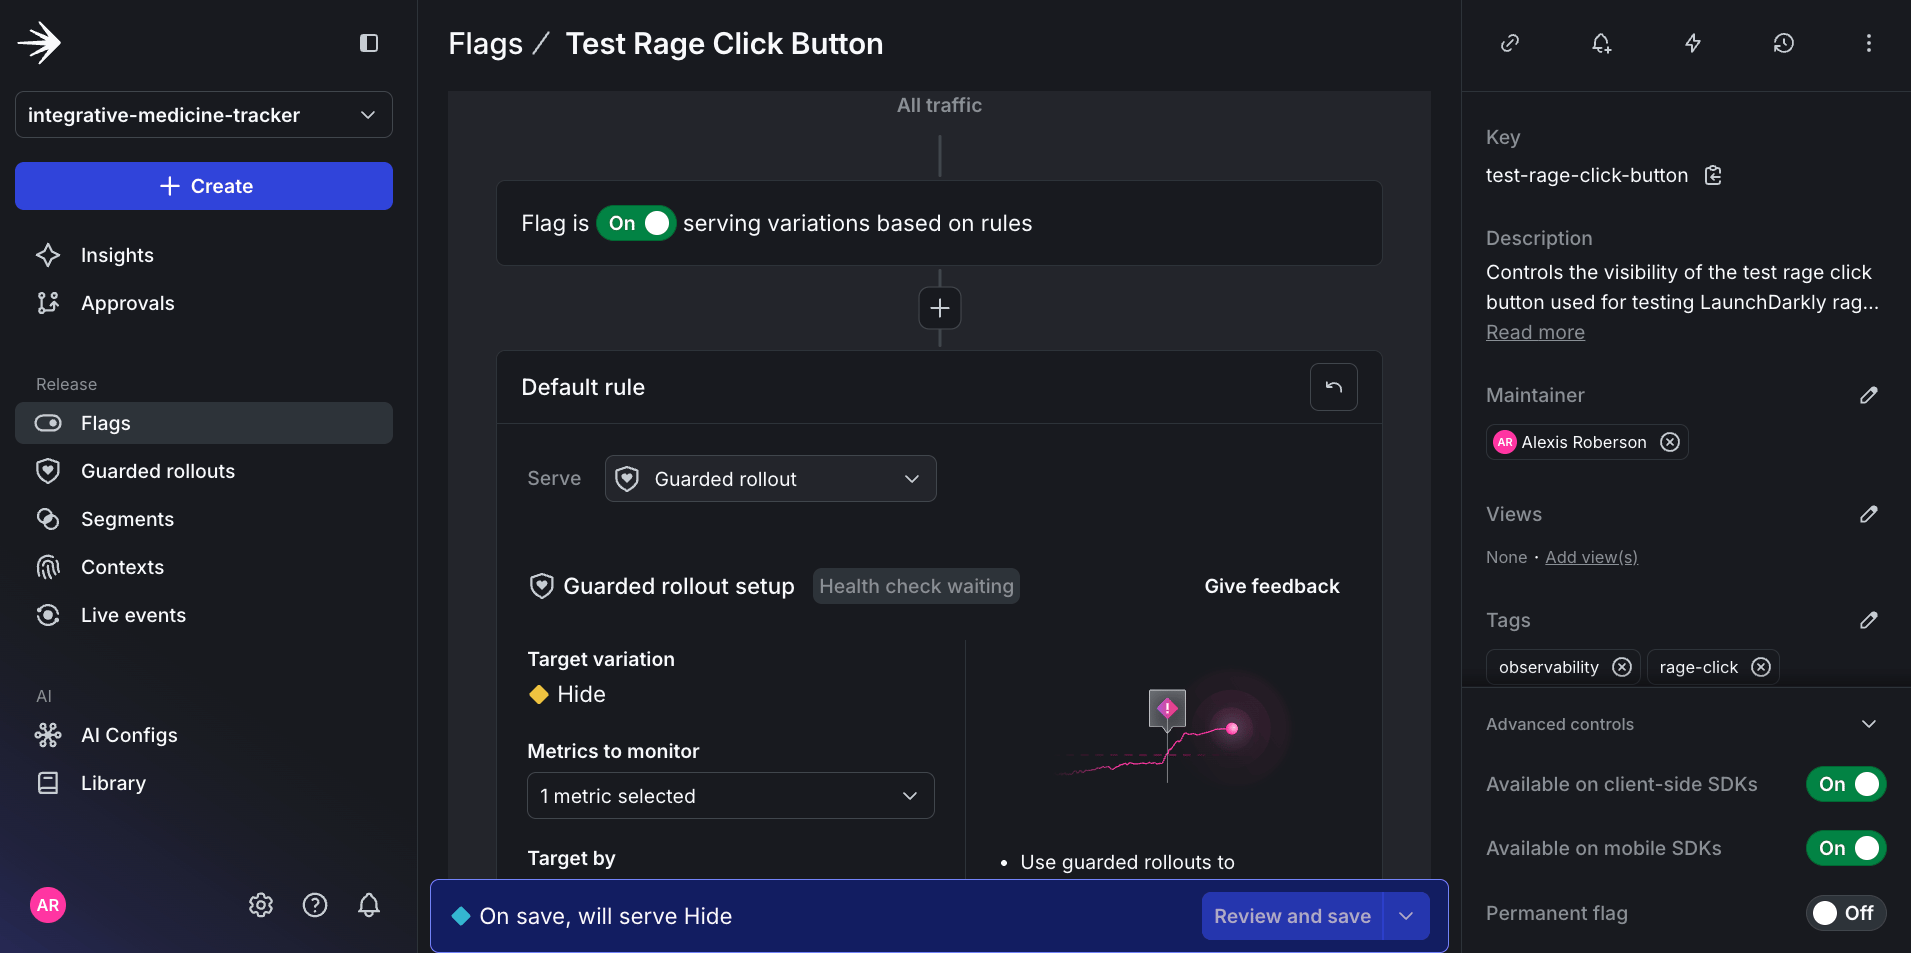
Result of Default rule widget after selecting Guarded rollout.
select metrics or metric group, then Create.
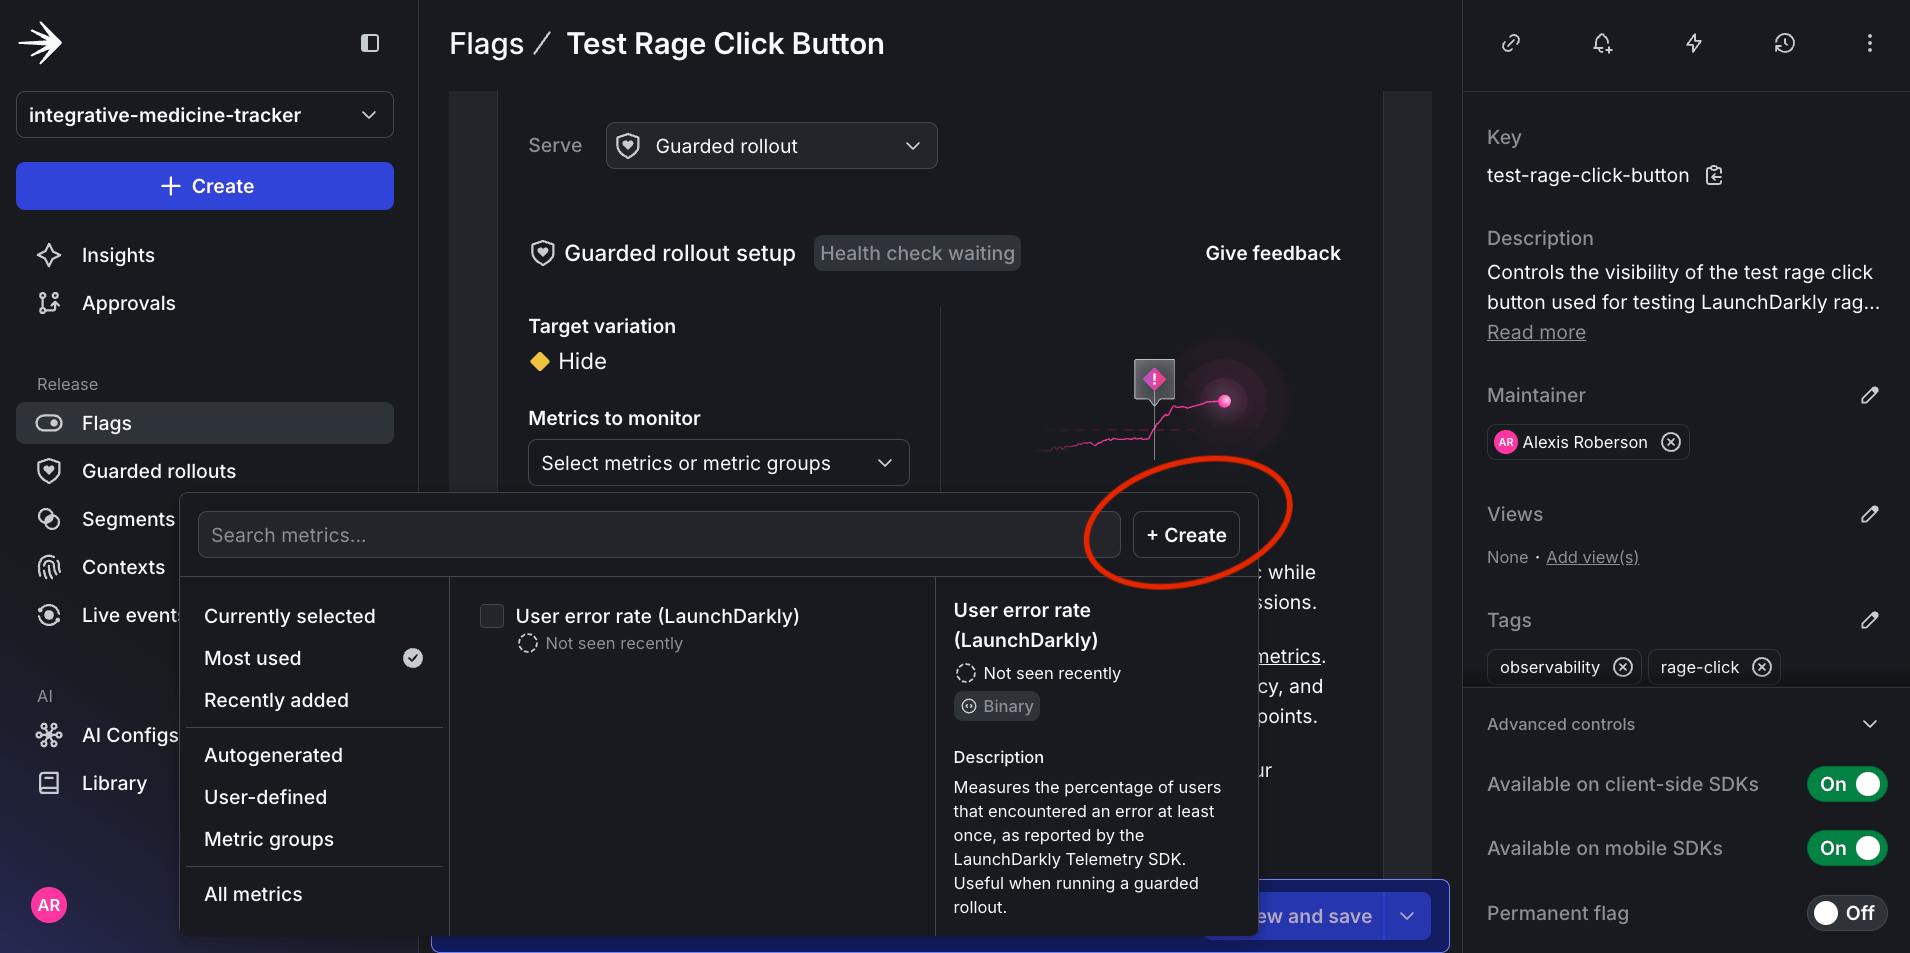
Create button to define new custom metric for Guarded rollout.
- Event key:
test-rage-click-button - Metric definition:
Countevents peruser, then compute the Average of those values wherelower is better. (It is important to specify lower is better because you want the rollout to catch when there is an uptick in clicks to indicate the rage clicks.) - Metric name:
Test Rage Click Button - Click Count - Description:
Tracks the number of clicks on the test rage click button. Higher click counts may indicate user frustration or button malfunction.

Create new custom metric for Guarded rollout.
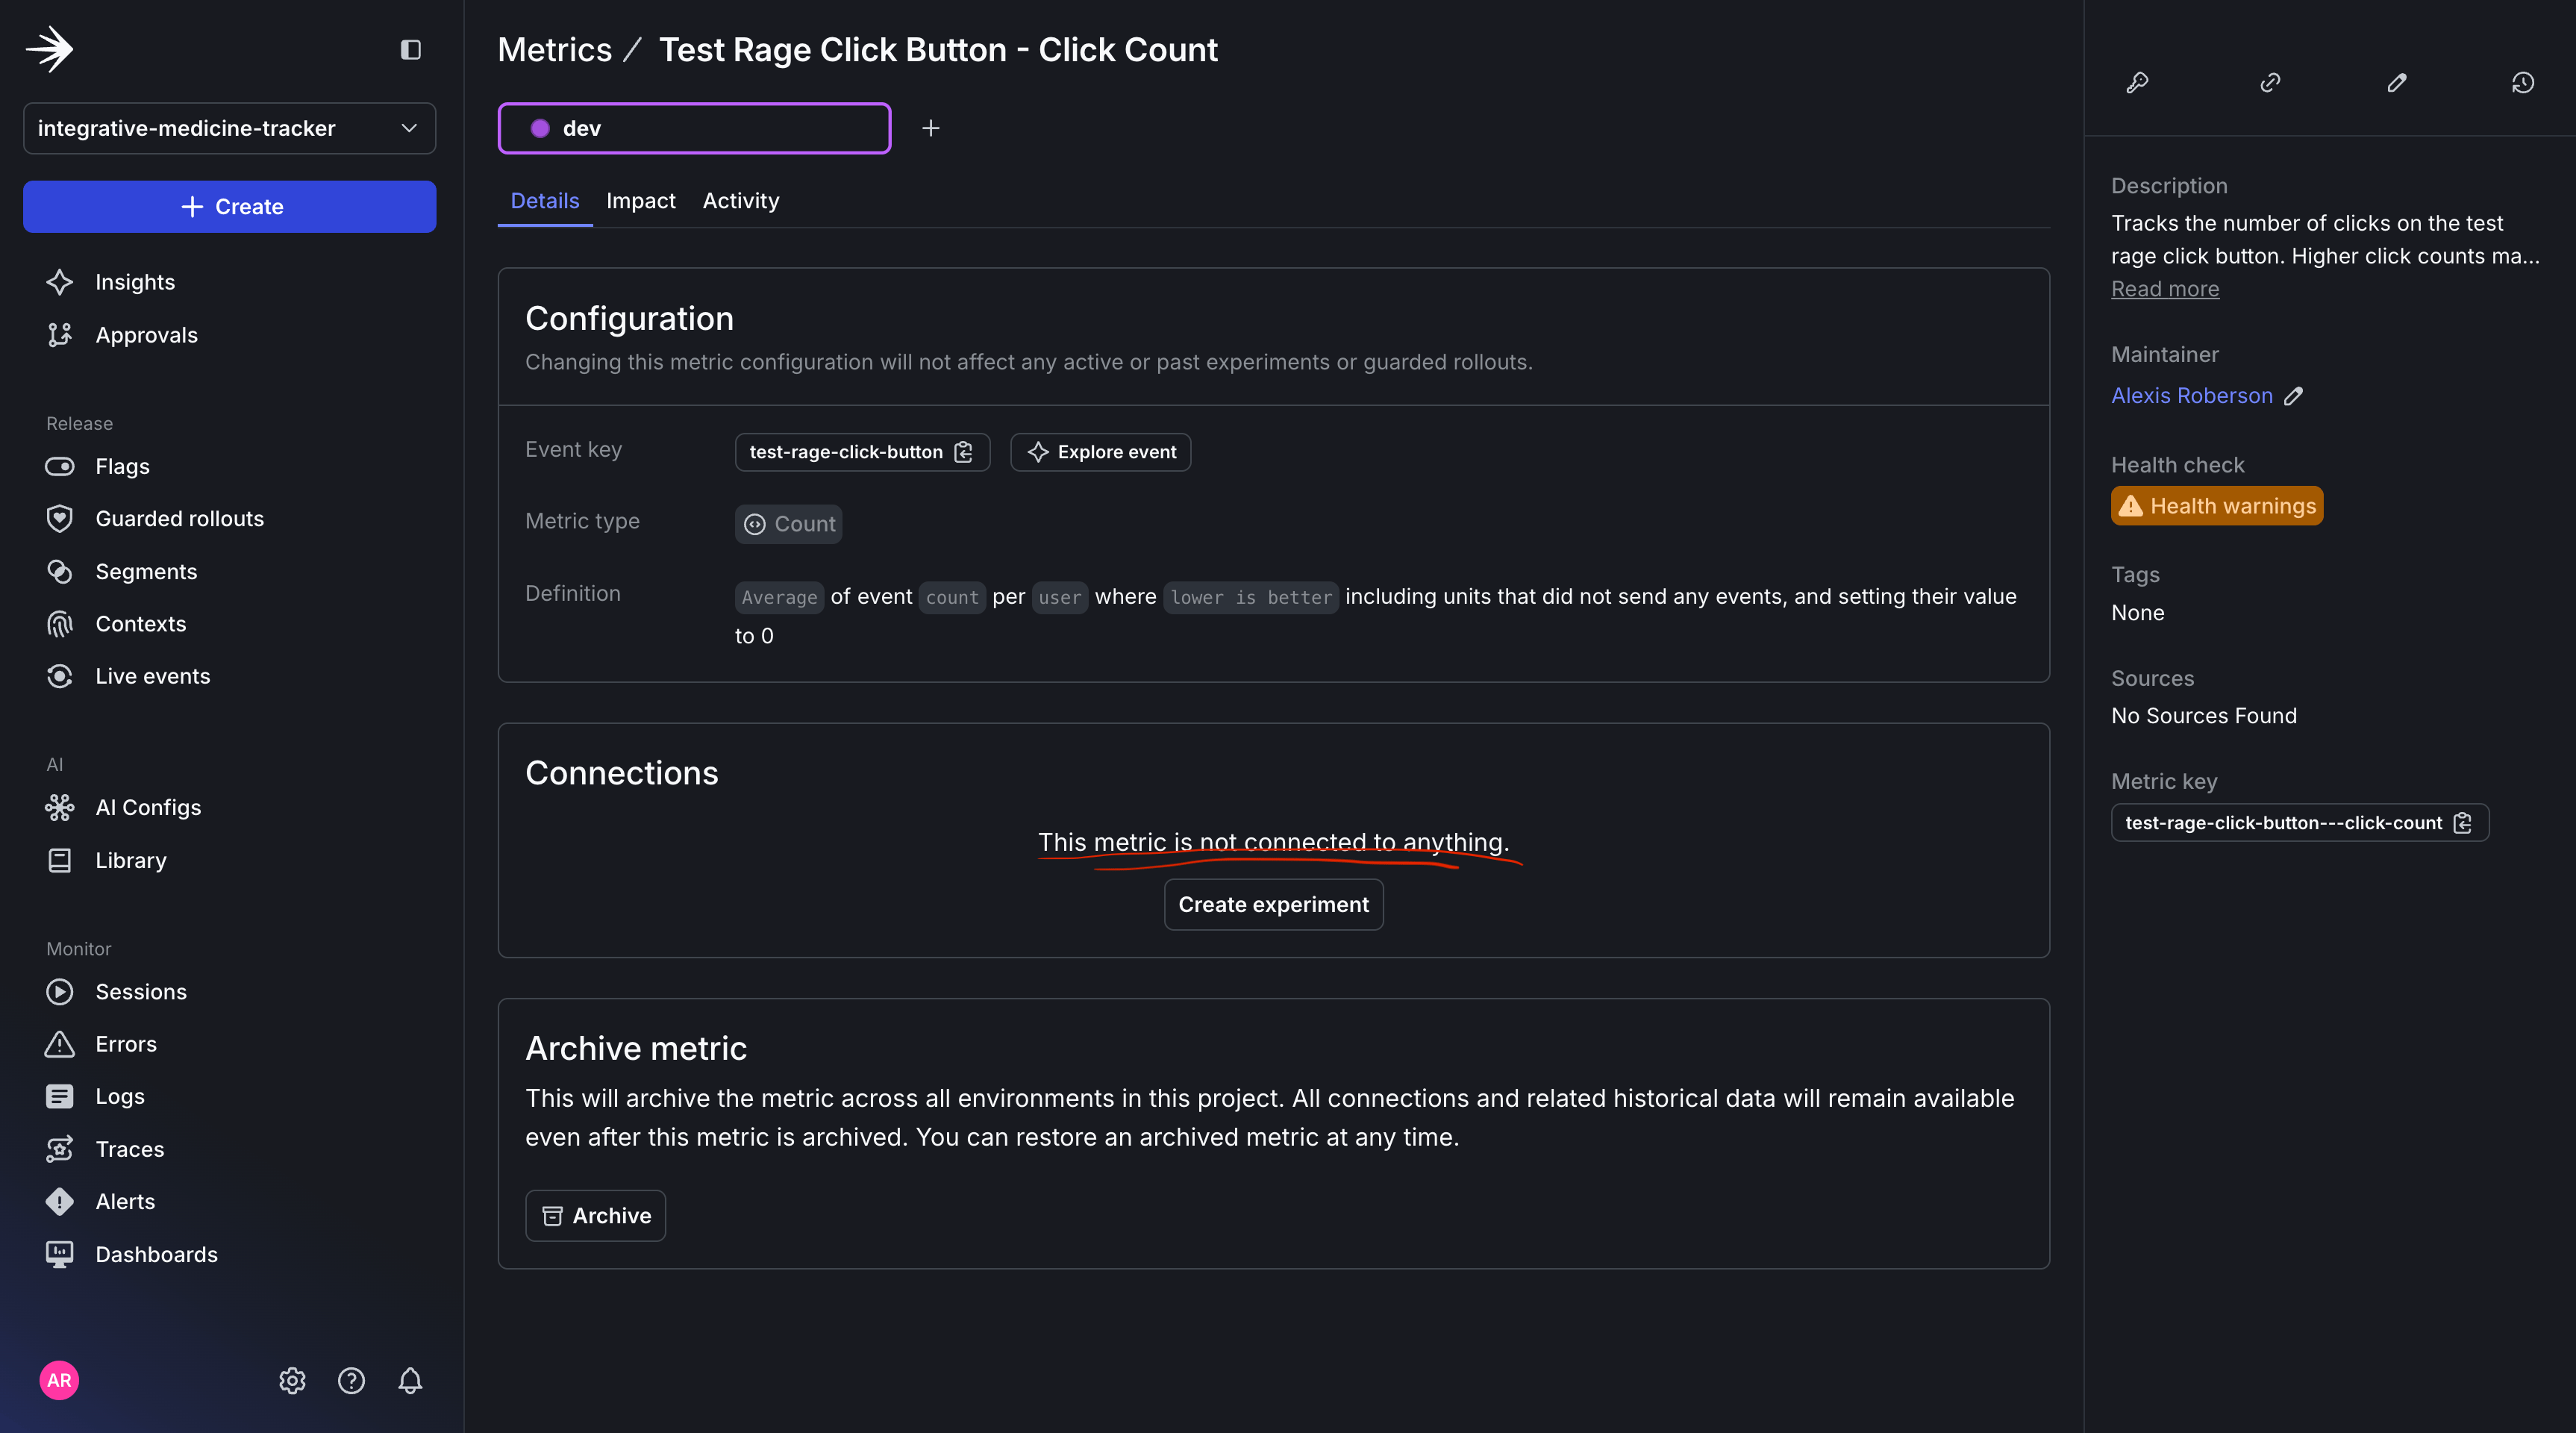
Landing page after creating custom metric for Guarded rollout.
Test Rage Click Button metric, you just created.
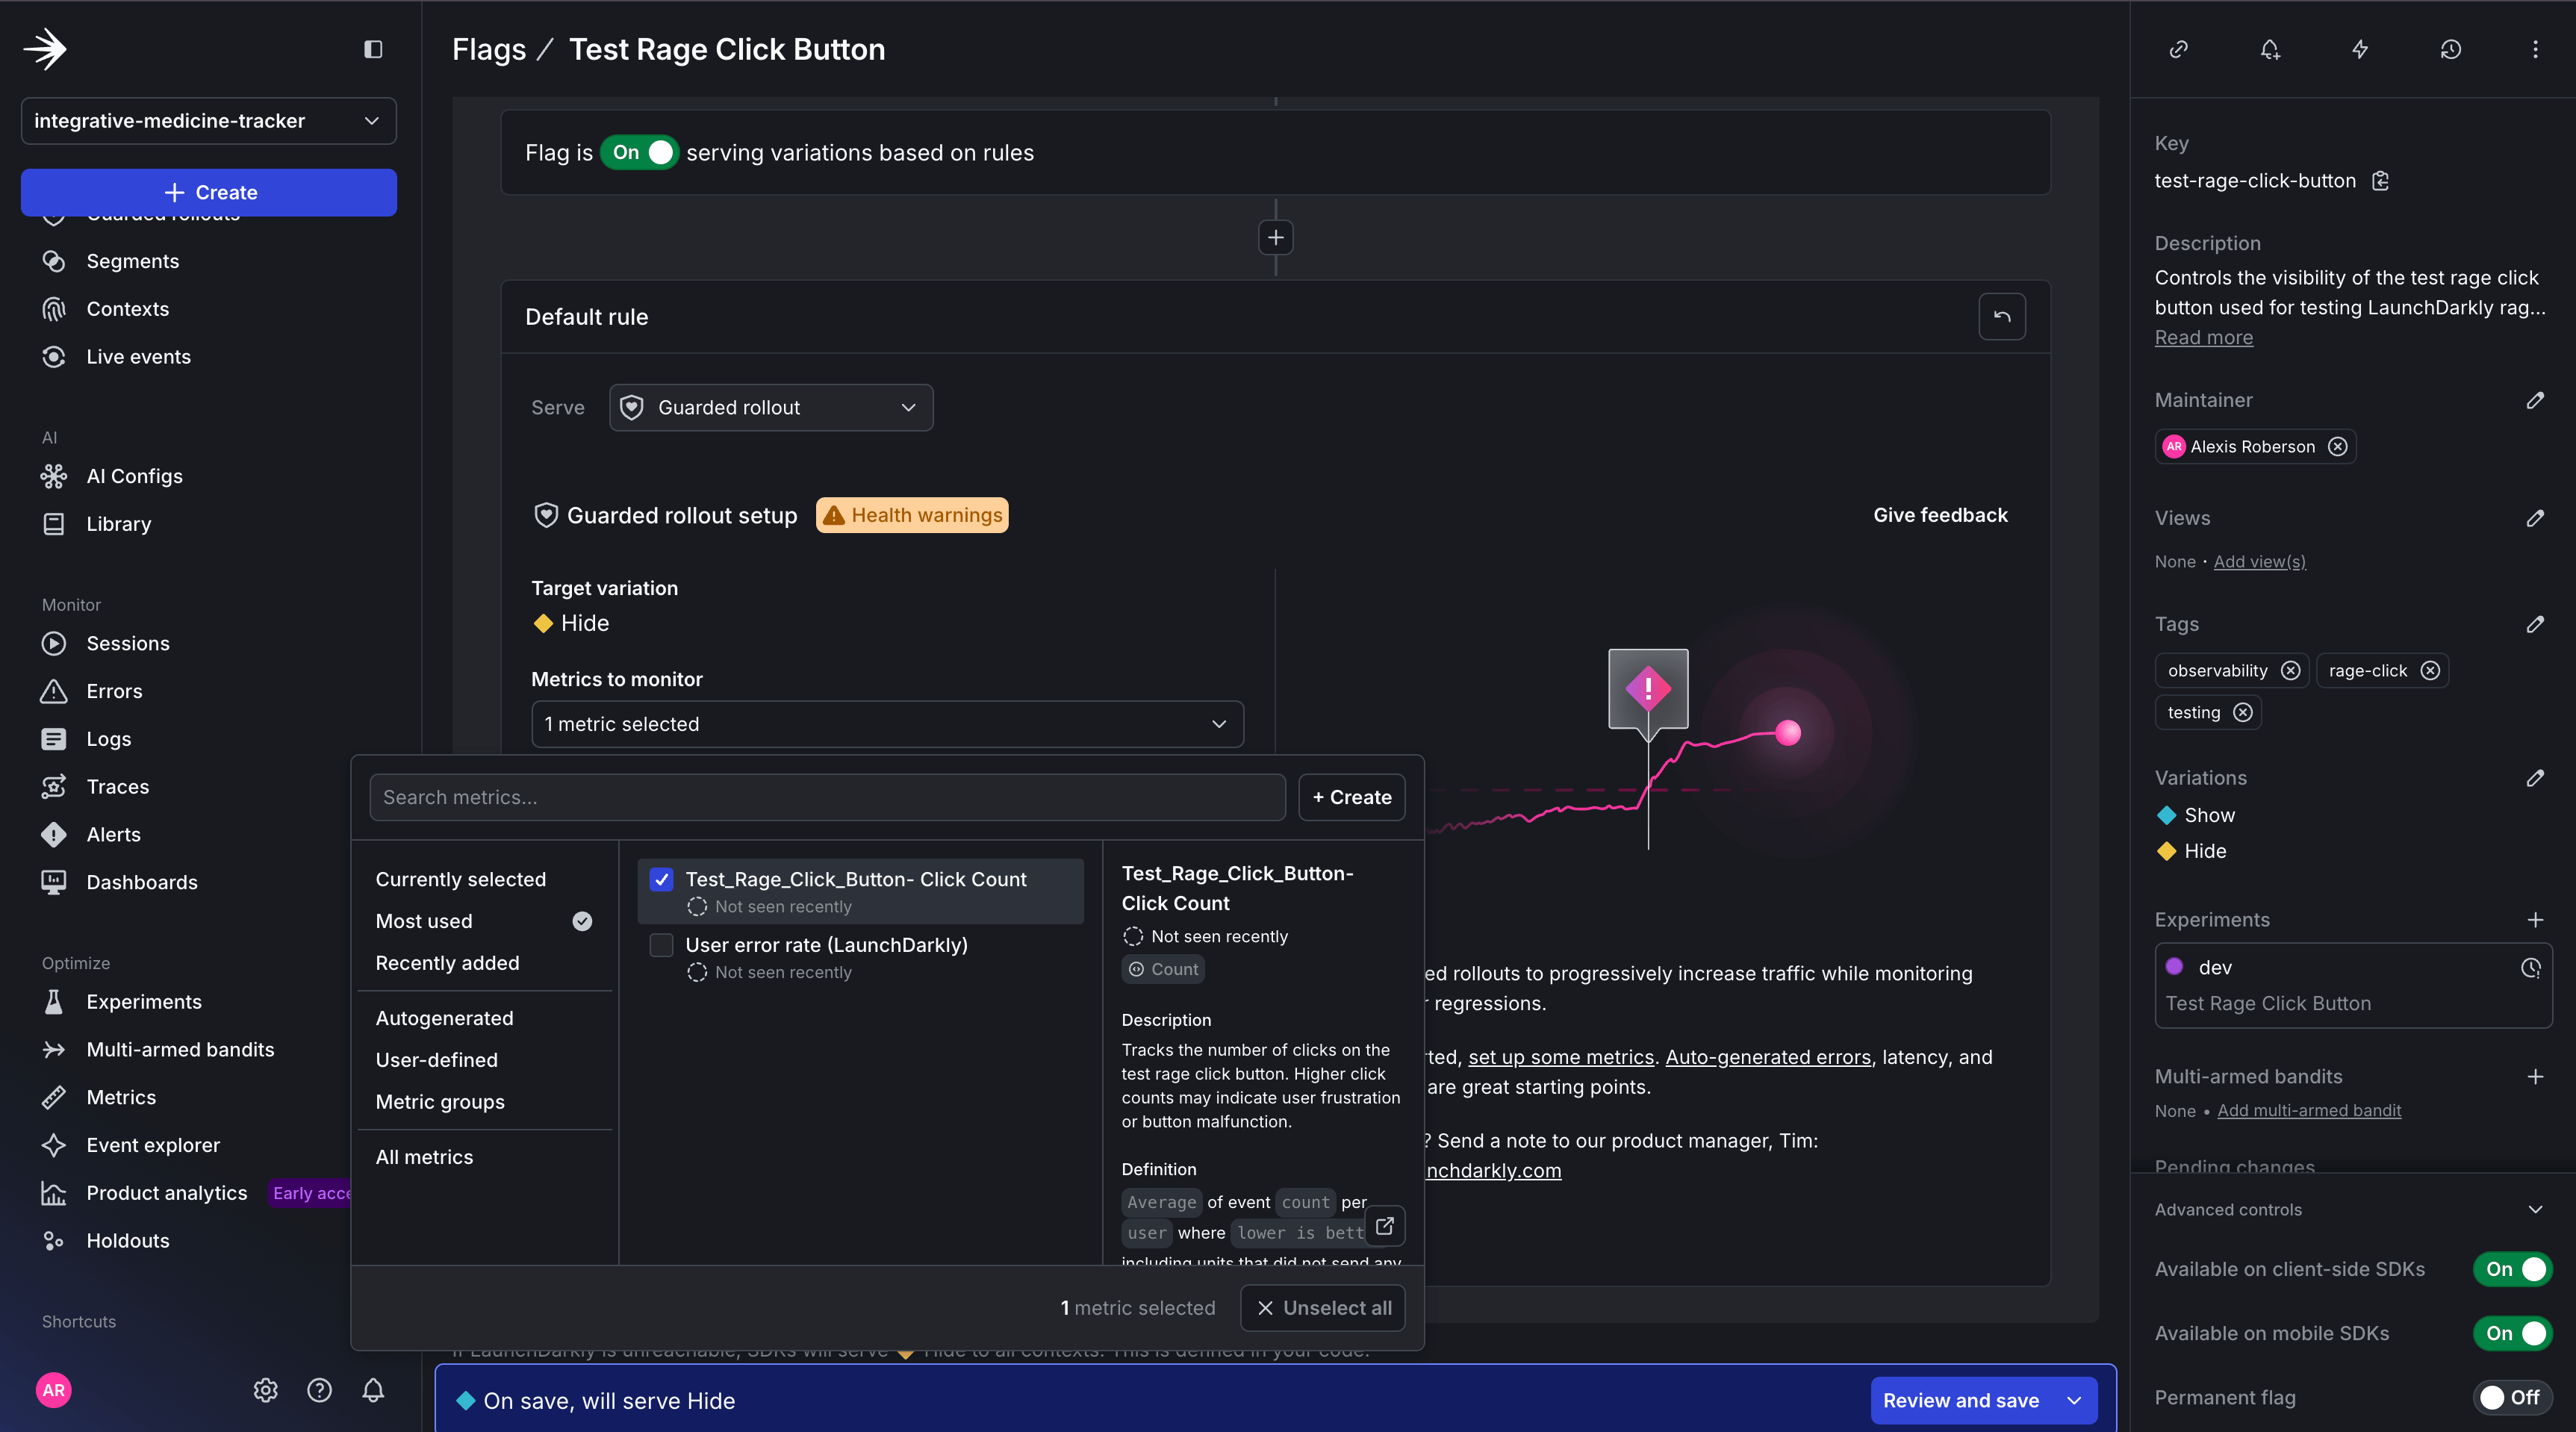
Assign newly created custom metric to Guarded rollout.
- Catch issues early.
- Catch any increase in clicks suggesting user frustration.
- Decrease click sensitivity, while still having control.
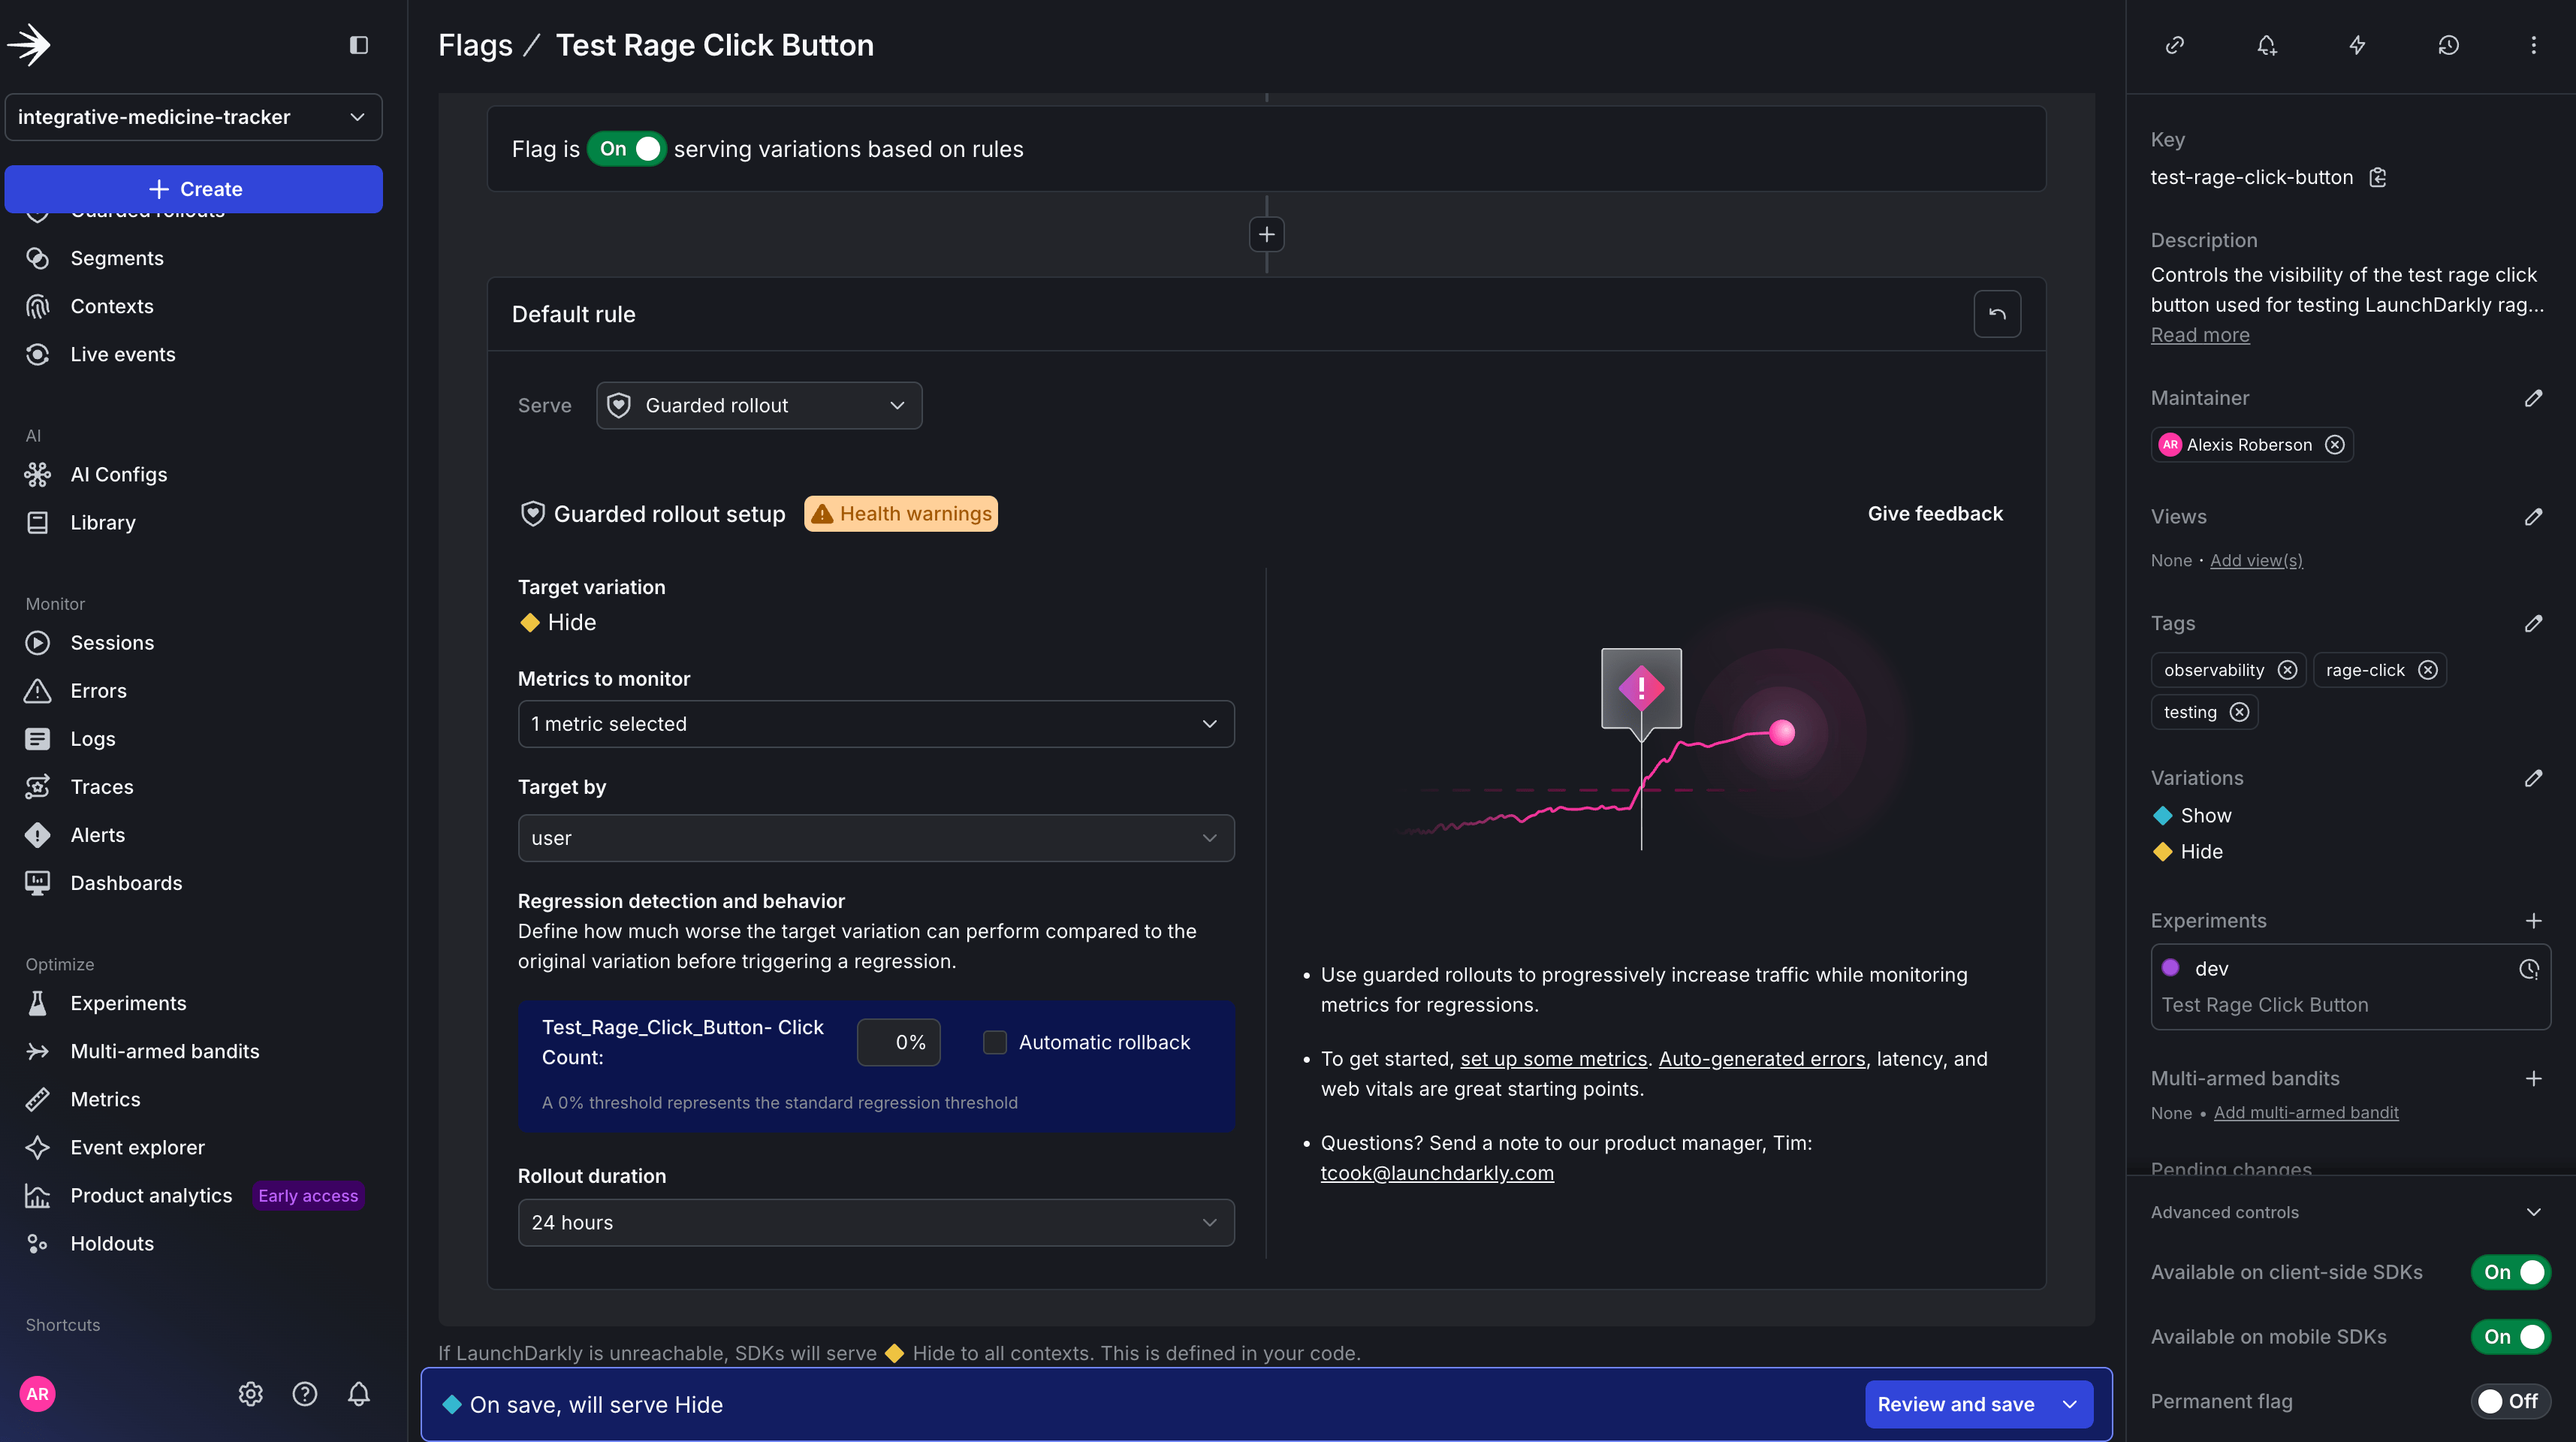
Configure the threshold, duration and, automatic rollback for Guarded rollout.
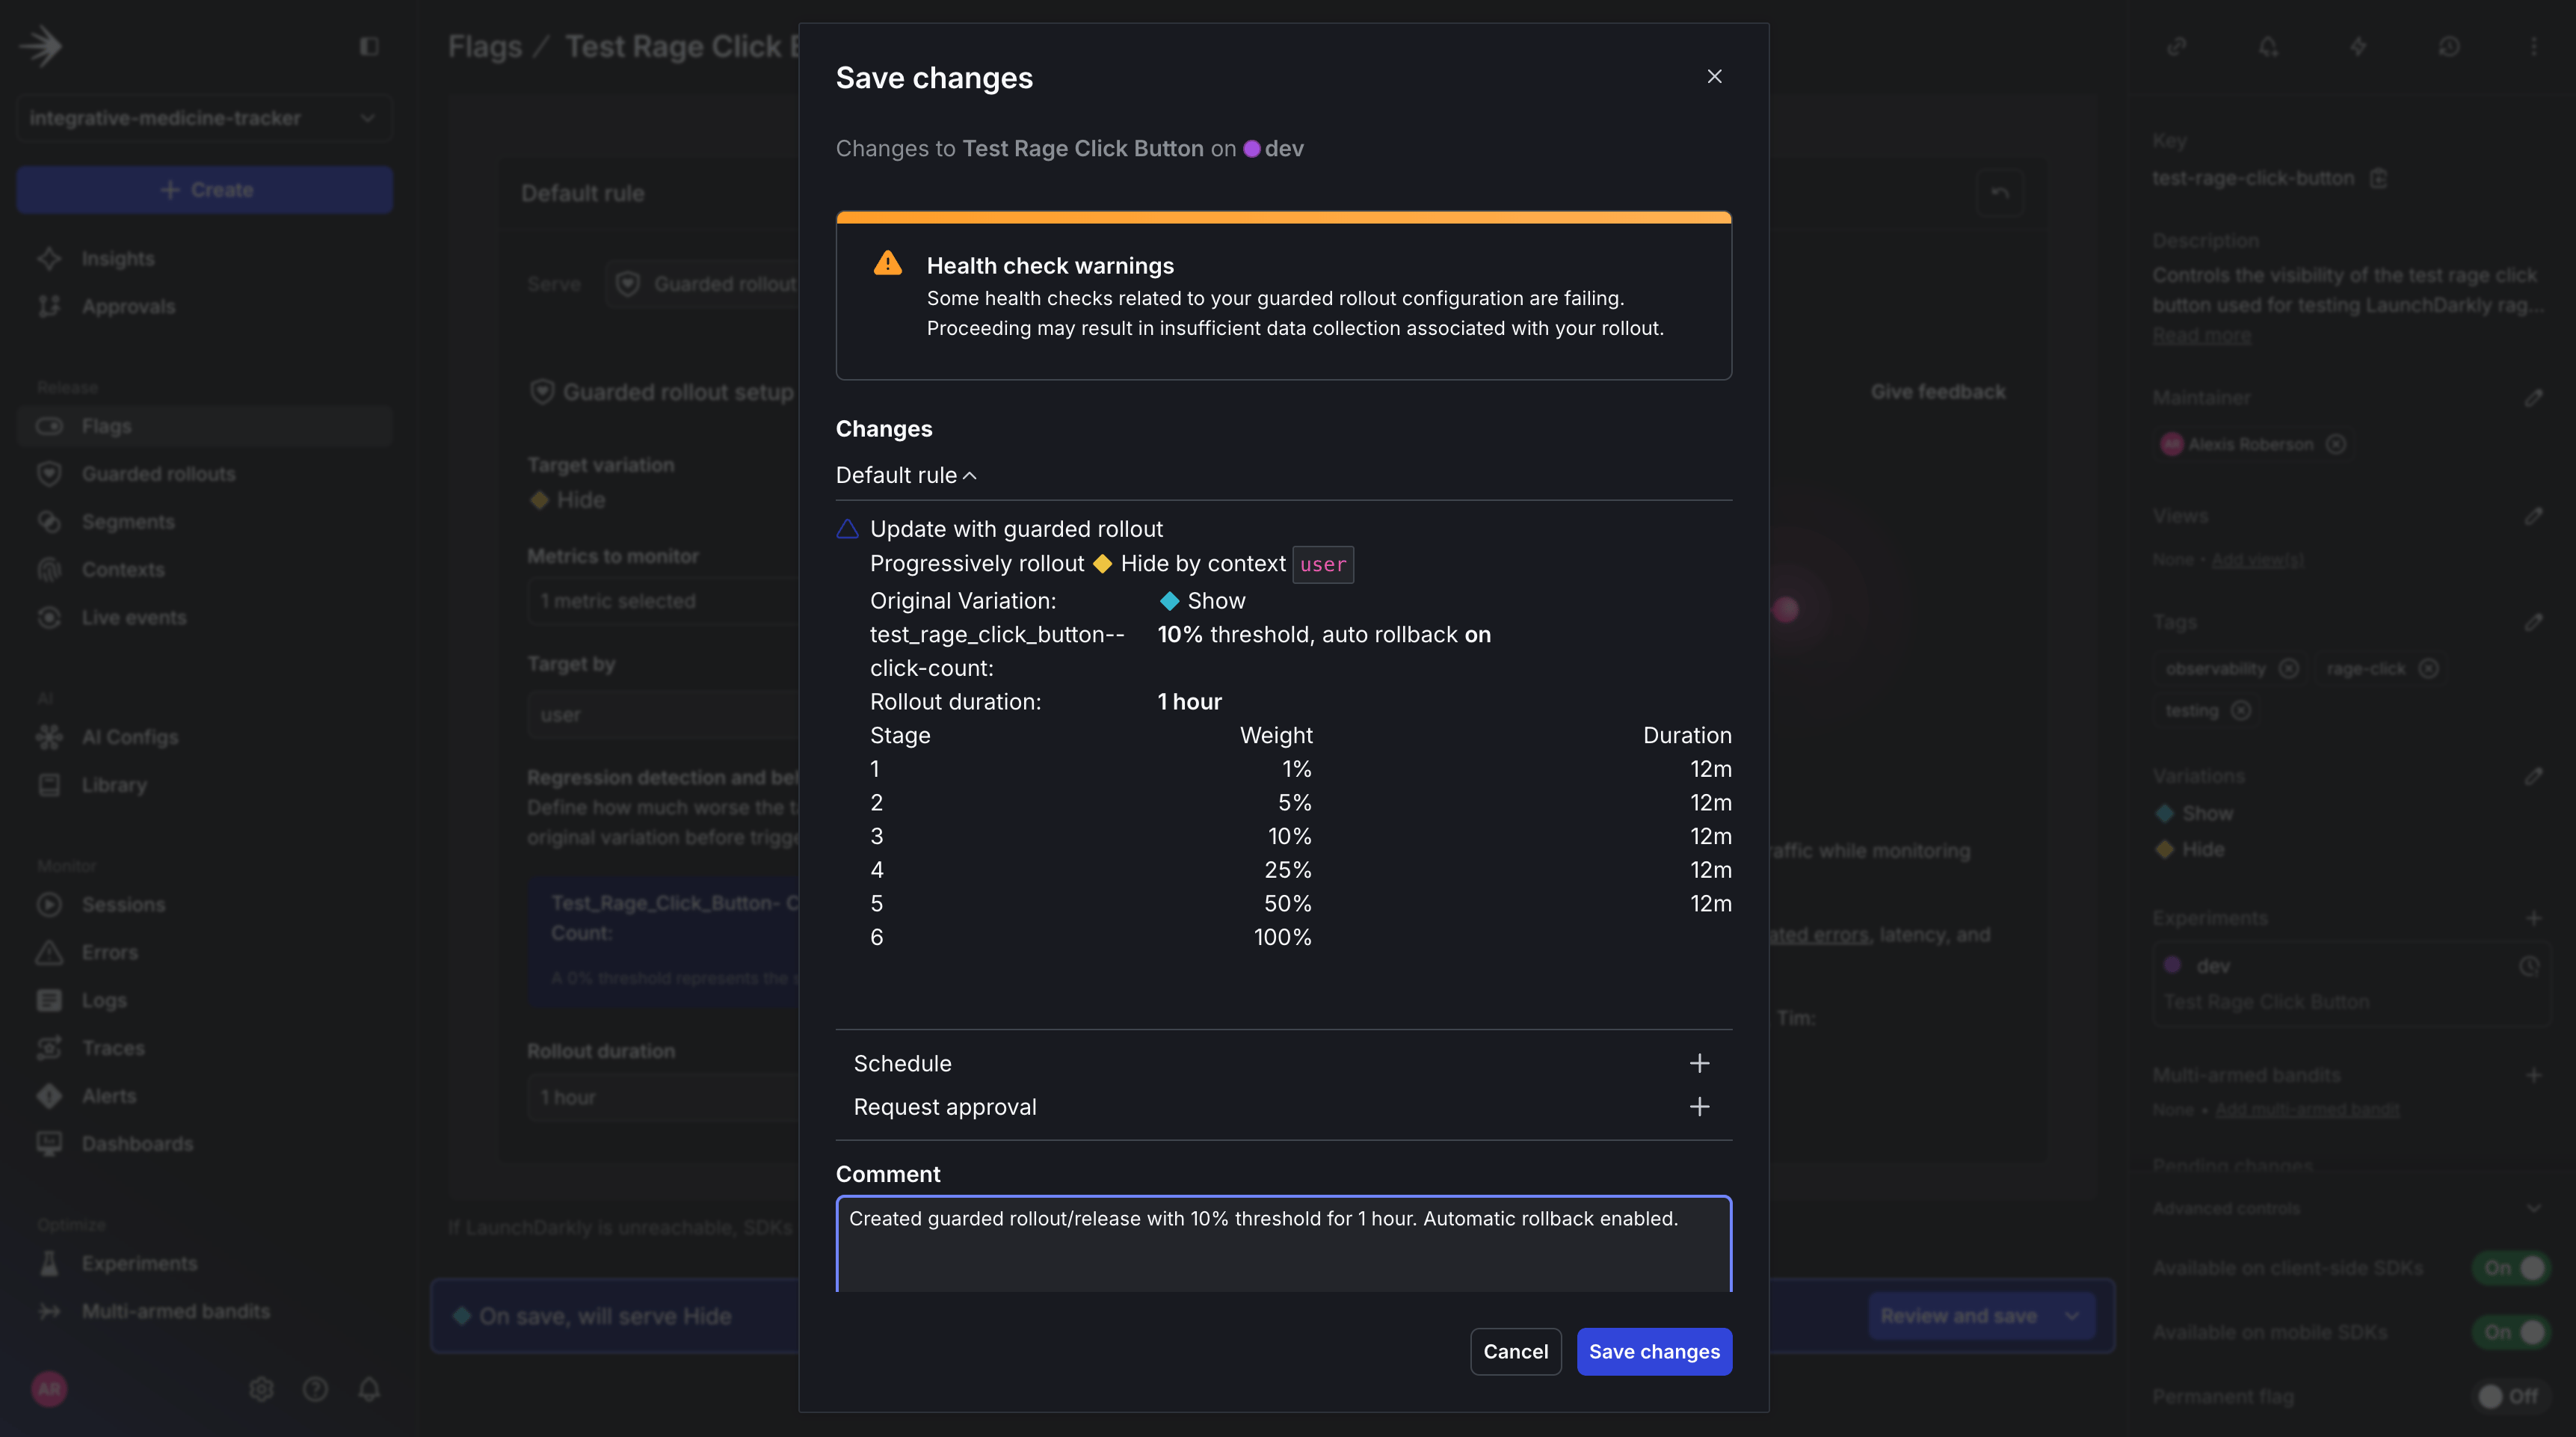
Save Guarded rollout changes.
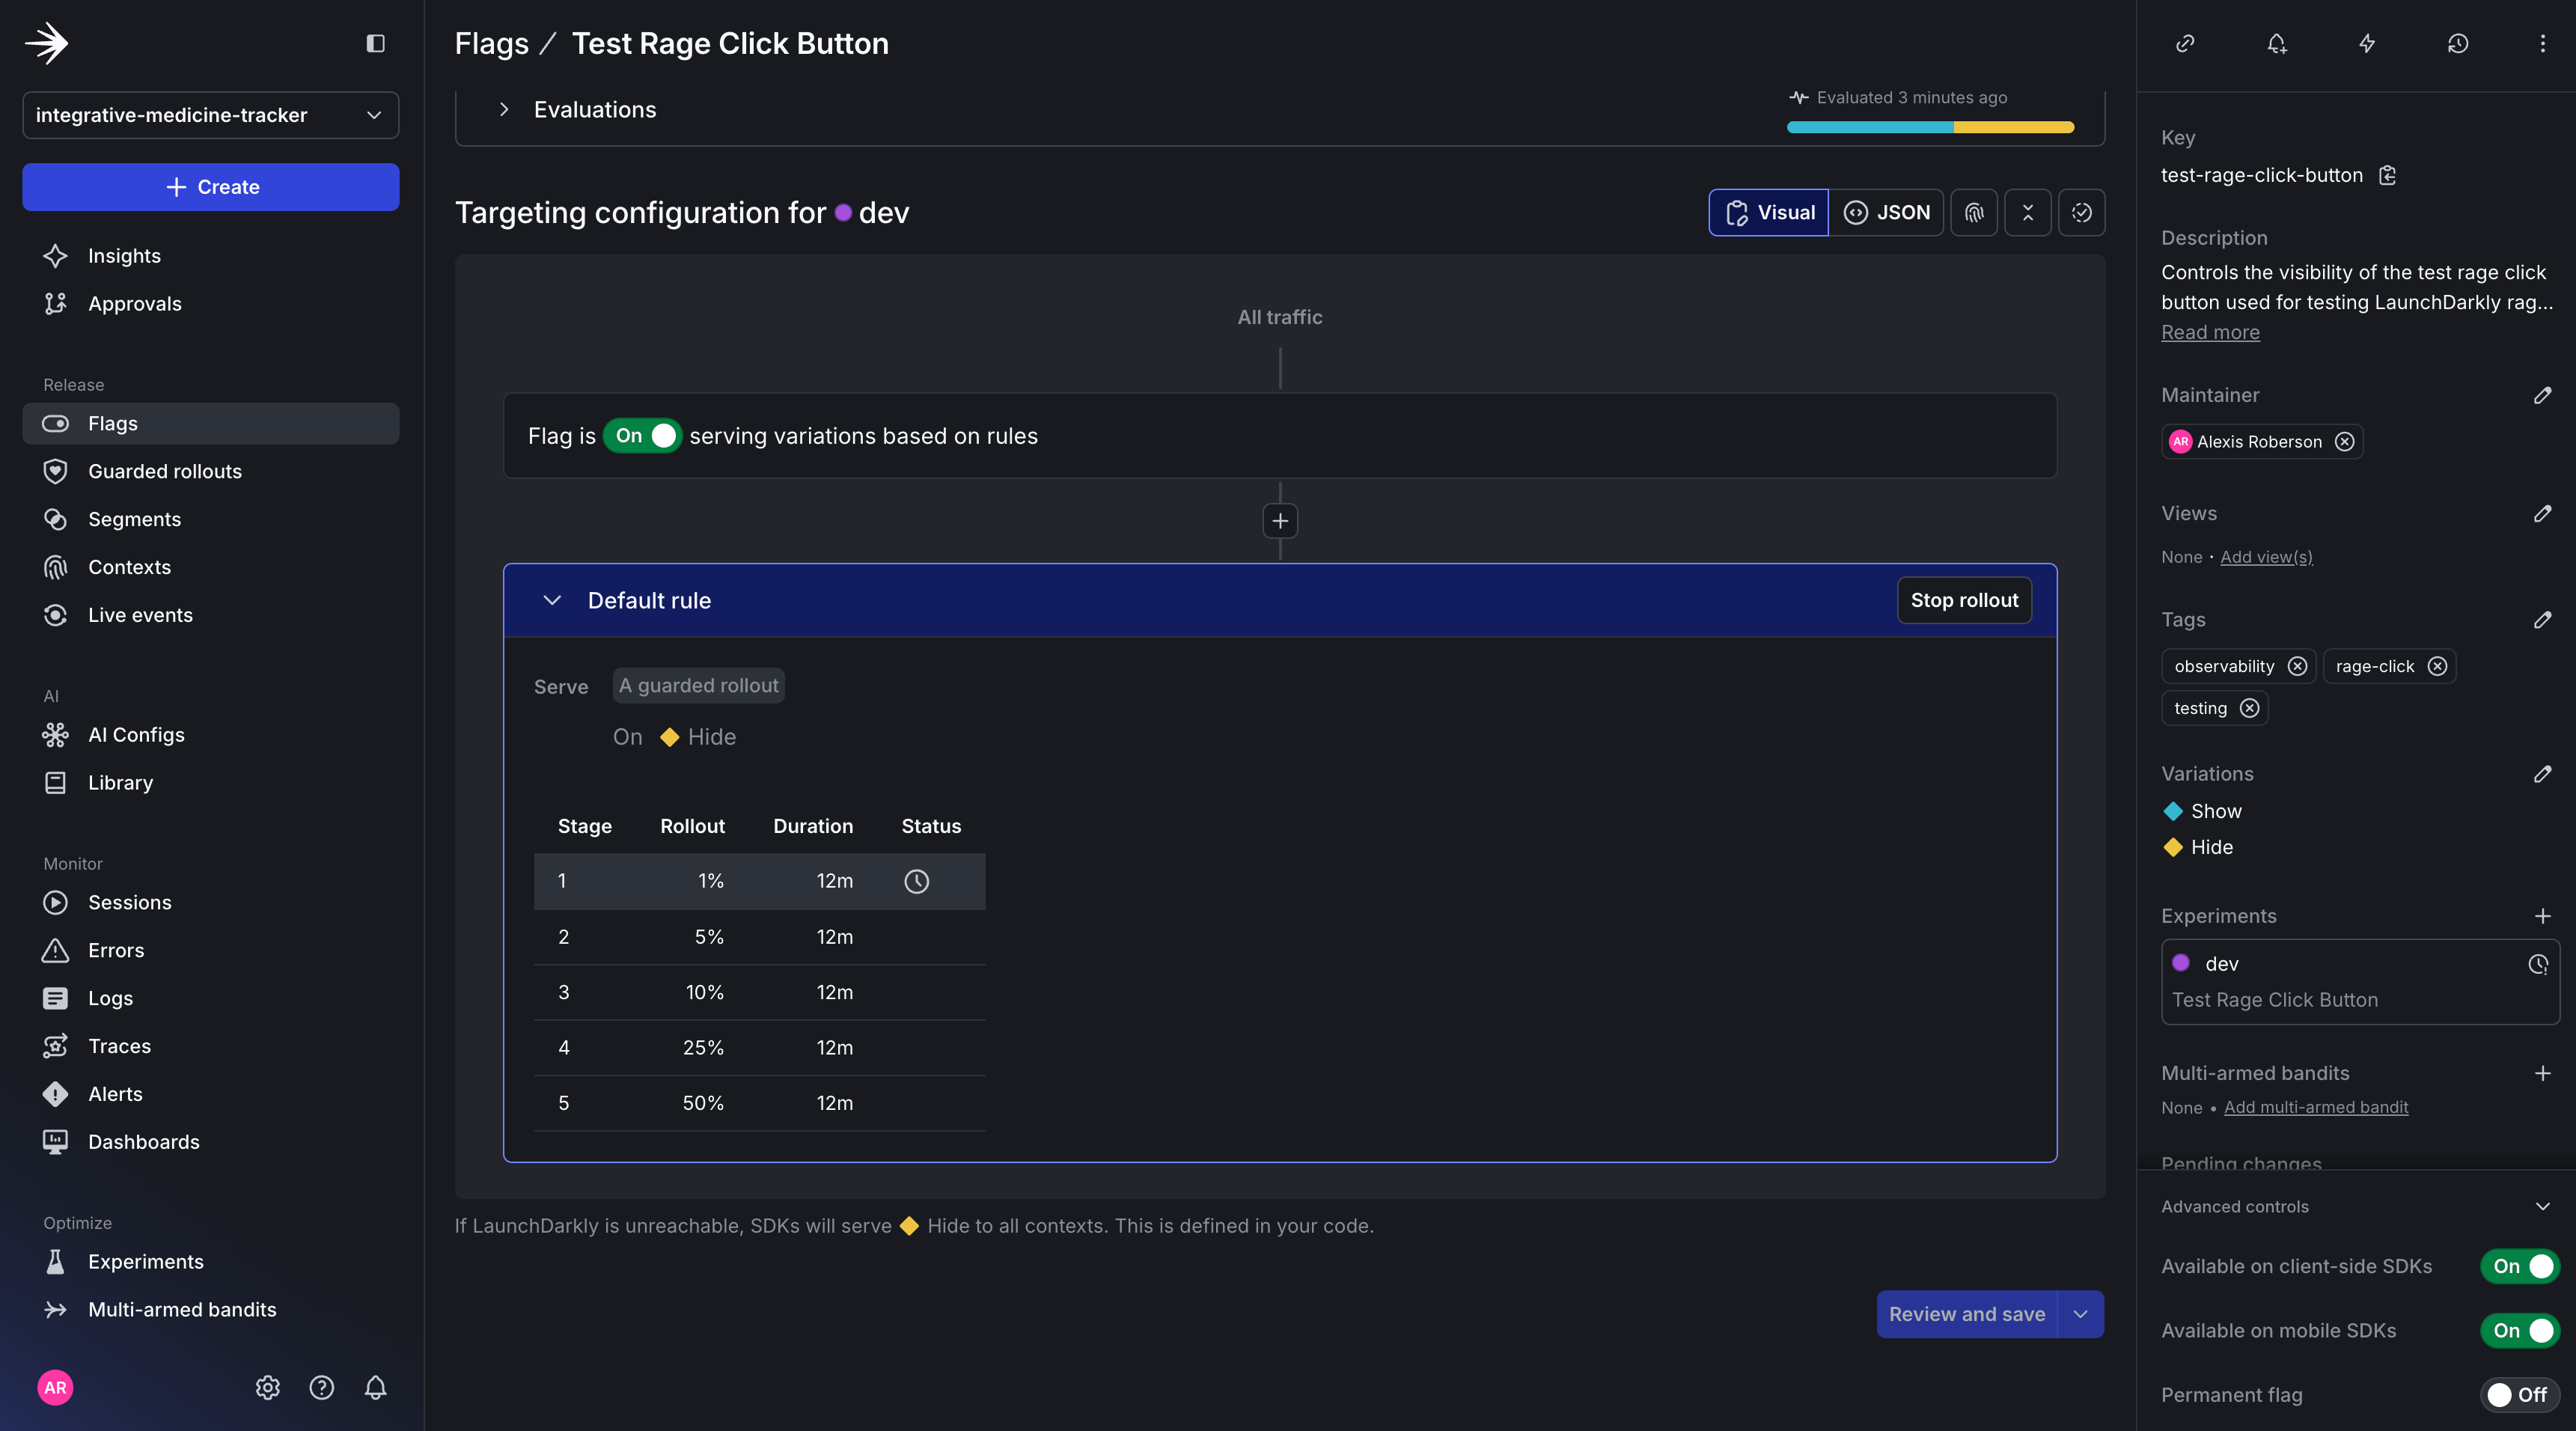
Fully set up Guarded rollout for Target Rage Click Button feature flag.
Testing Guarded rollout rage click detection in the JS application.
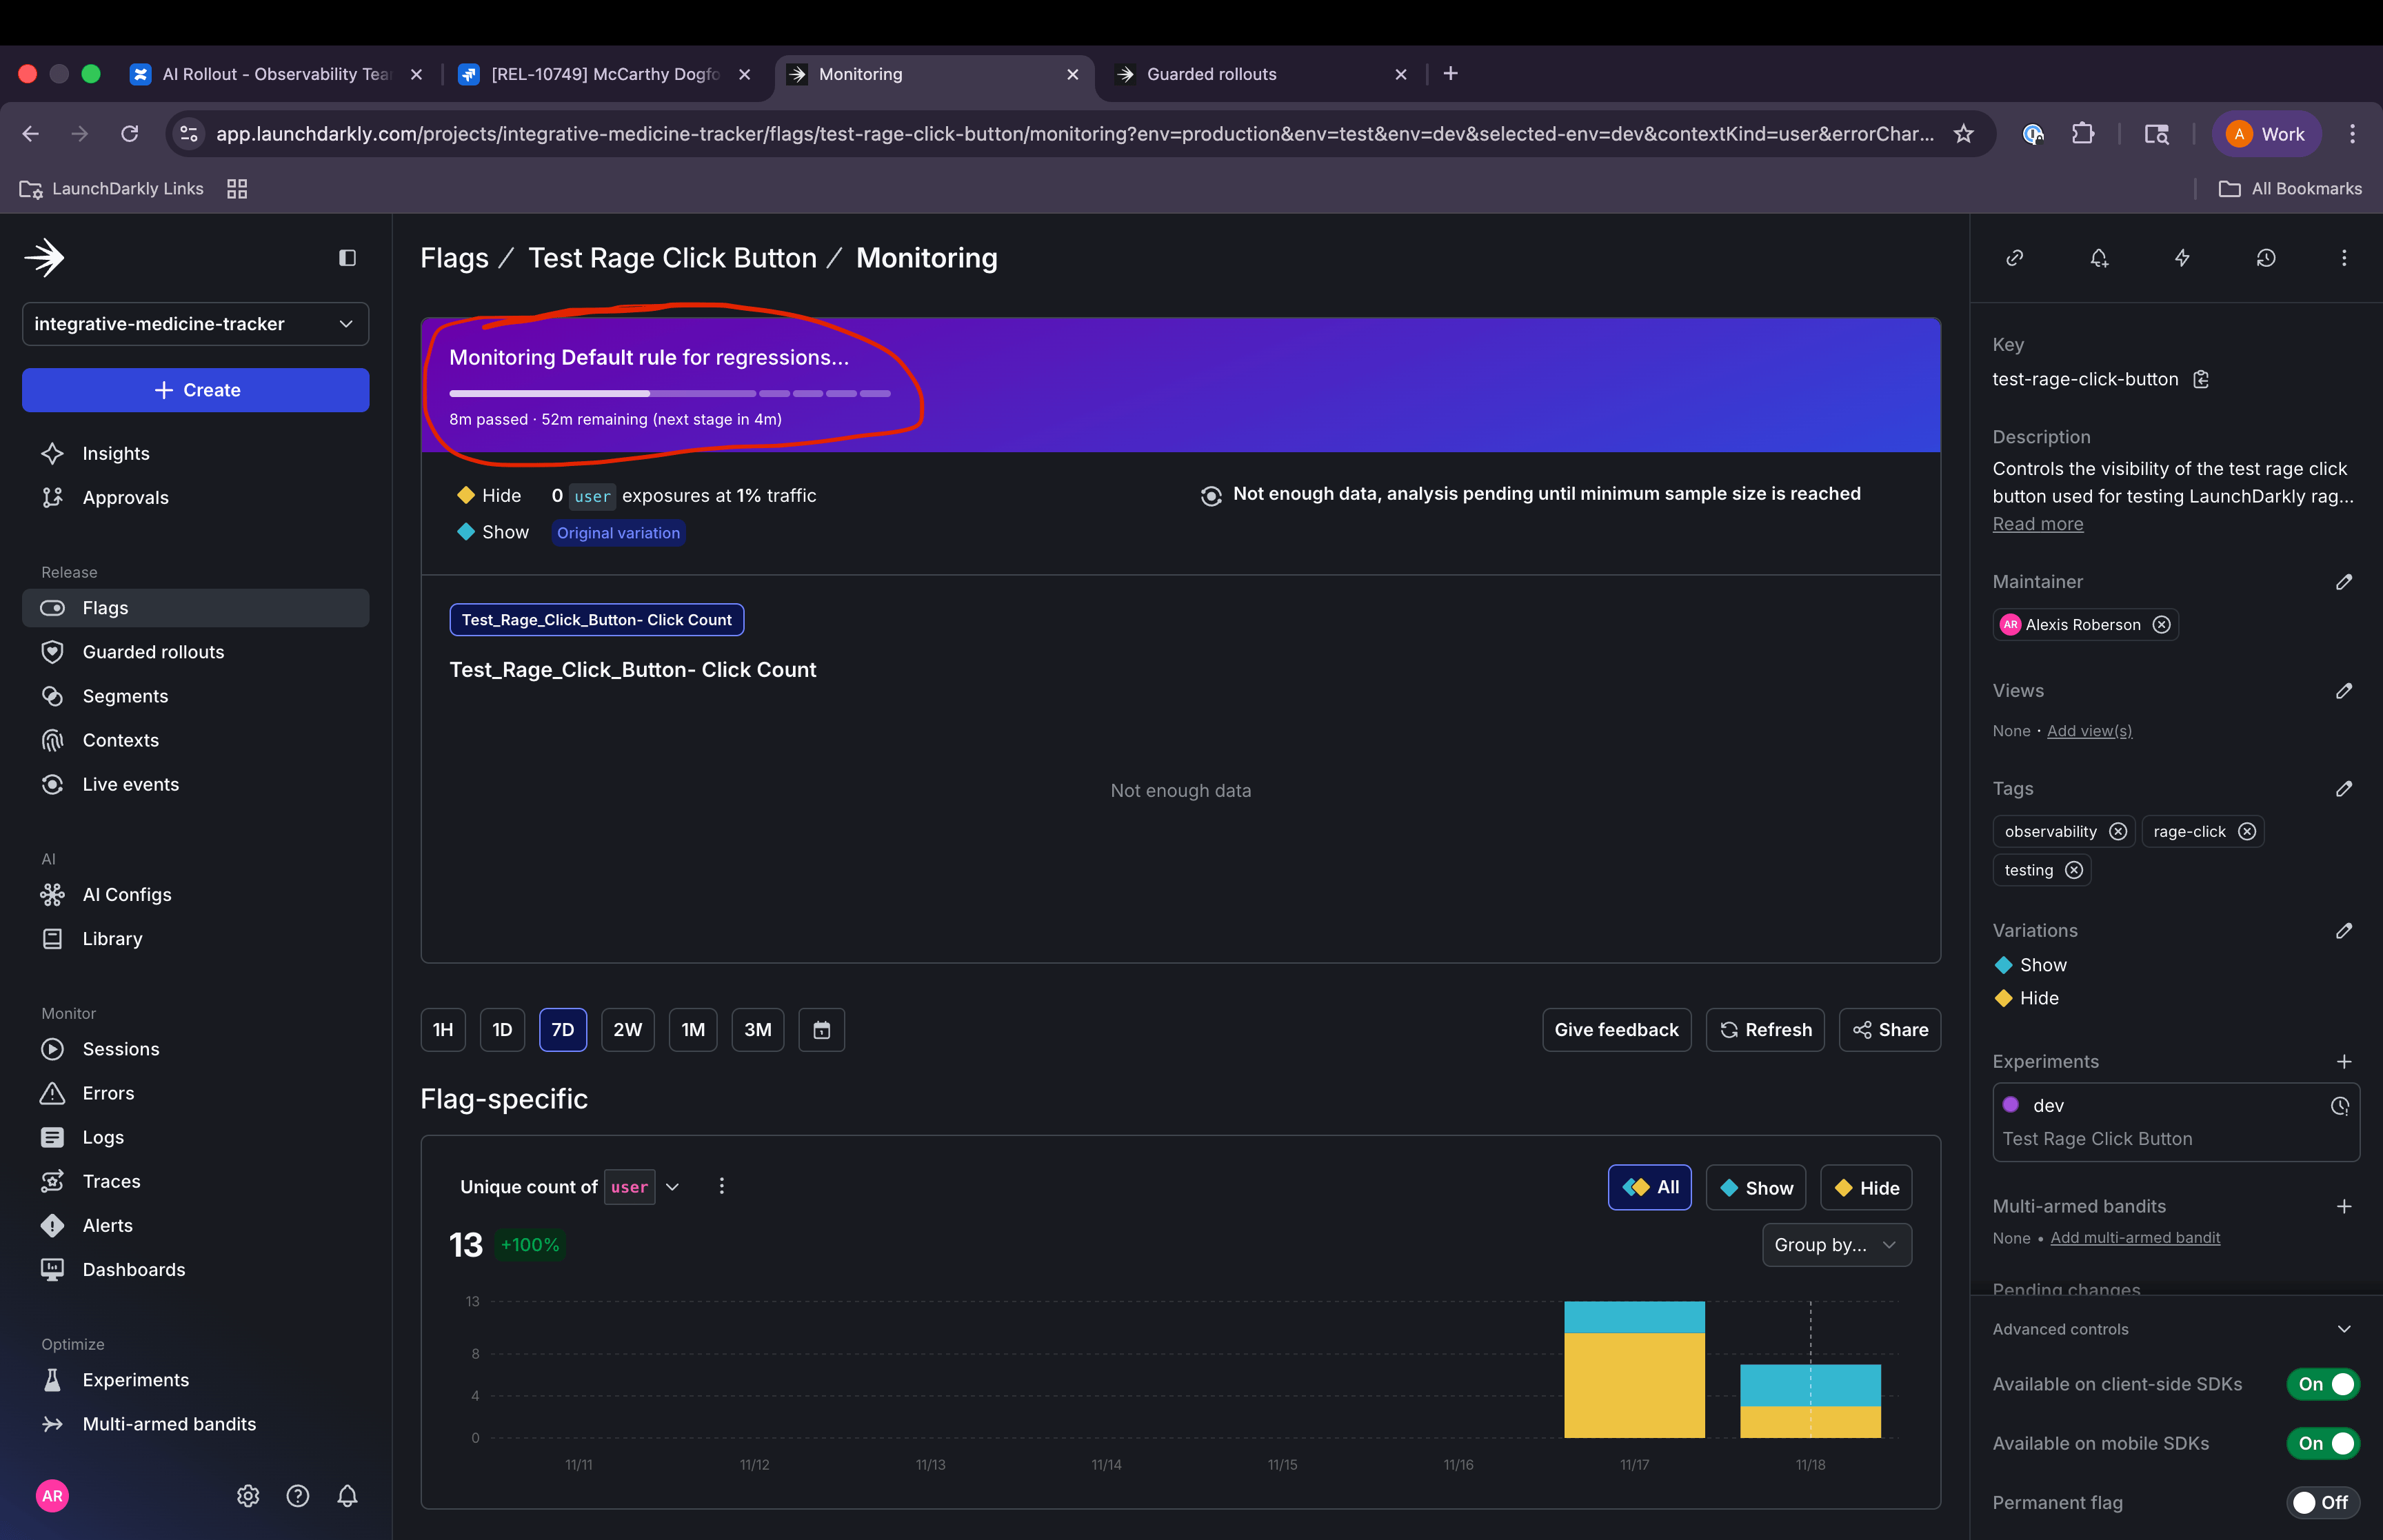
Dashboard of Guarded rollout monitoring tab.
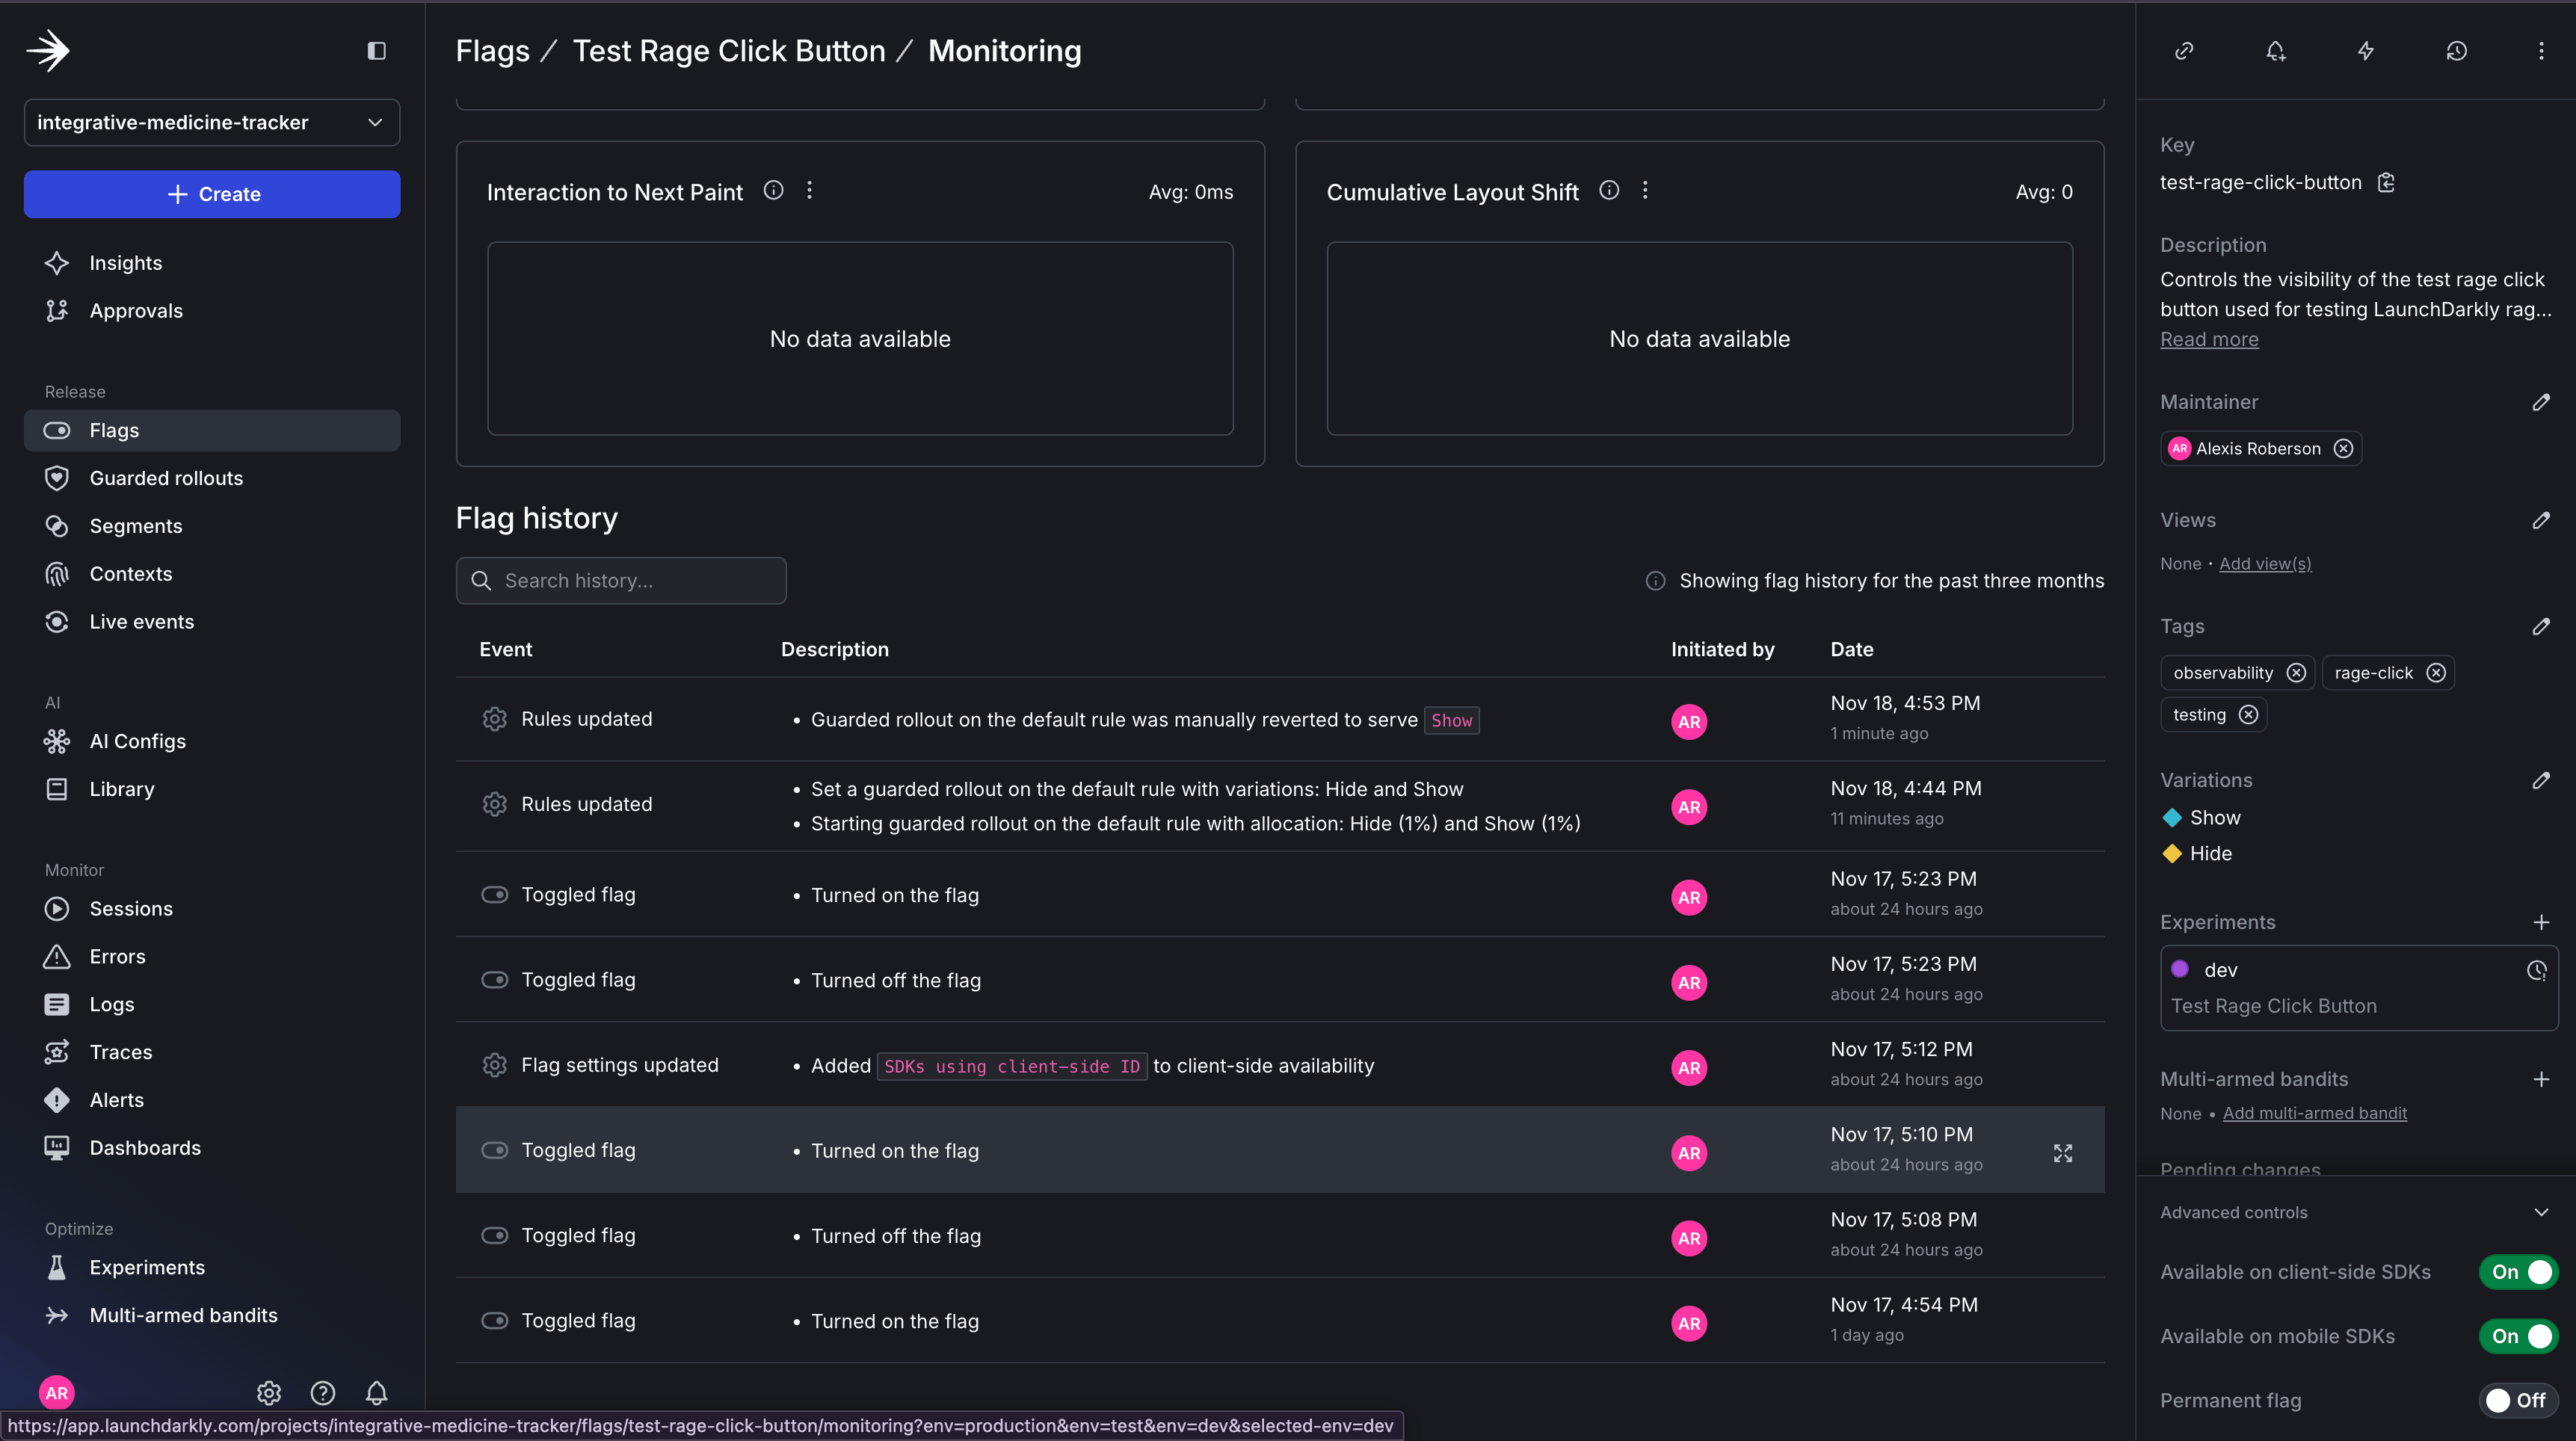
Guarded rollout monitoring tab with flag change history.
Understanding Thresholds: Testing vs. Production
When setting up your guarded rollout, it’s important to understand that testing thresholds differ significantly from production thresholds due to the volume of traffic and differing requirements. Since you’re testing on localhost with limited users, you can also adjust your settings:- Shorter duration (15 min) gives you faster feedback while following the tutorial
- 10% threshold is configured, but won’t trigger with only one user
- Focus is on validating that the flag → metric → rollout wiring works correctly
Configuring Automated Actions.
You can also configure other automated rollbacks in addition to automated rollbacks like sending alerts or pausing the rollback. Since we’re testing locally with minimal traffic, the automatic rollback won’t trigger based on our 10% threshold (LaunchDarkly requires sufficient sample size for statistical confidence). However, you can still test the rollback mechanism manually by clicking the rollback button in the UI. In production with real traffic, automatic rollbacks will work as designed. Decide what happens when thresholds are breached:- Alert only: Send notifications via Slack, PagerDuty, or email for team review.
- Pause rollout: Stop increasing the percentage but don’t roll back (team decides next step).
- Automatic rollback: Instantly revert to the control variation (recommended for critical metrics like errors).
What’s Next: Deep-Dive Debugging
You now understand how to connect rage click detection directly to feature releases using Guarded Releases. You can:- Create feature flags for your features and use them to control rollouts.
- Set up automated monitoring for rage clicks during progressive rollouts.
- Configure alerts and automatic rollbacks when thresholds are breached.
- Correlate user frustration with specific feature flag variations.
- Catch issues with 1% of traffic instead of 100%.