

Guarded releases are LaunchDarkly’s observability solution that encompasses application performance thresholds, release auto-remediation, and release monitoring, along with error monitoring and session replay.
The WorkLunch App
In order to see the full process of instrumenting an LLM application, I added a new feature in an app called WorkLunch where users were able to create/join office communities and swap lunches based on preference. Now they’re also able to improve the description field of their lunch post to make it more appealing to potential swappers and receive recommendations for compatible swaps.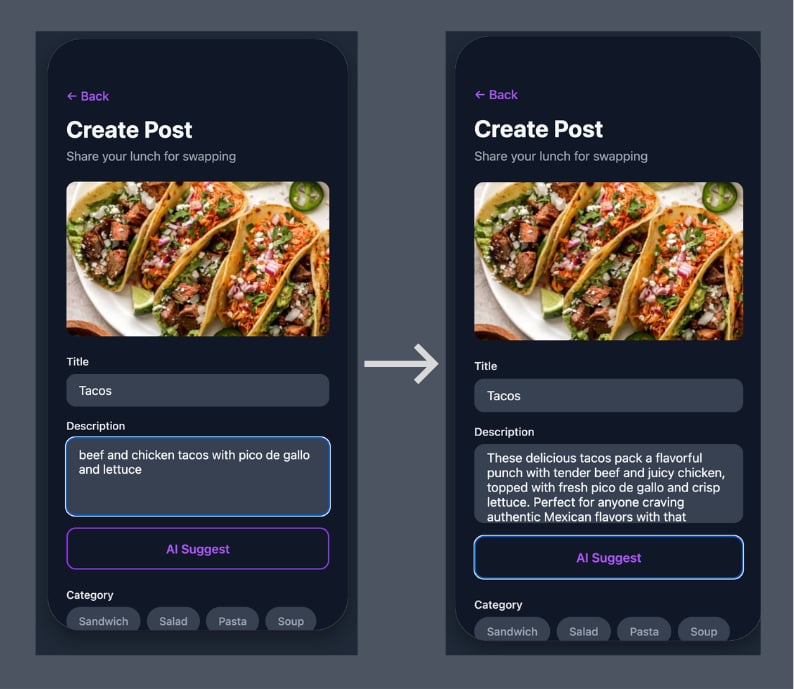
The WorkLunch AI Suggest feature in action.
Multi-Agent Architecture
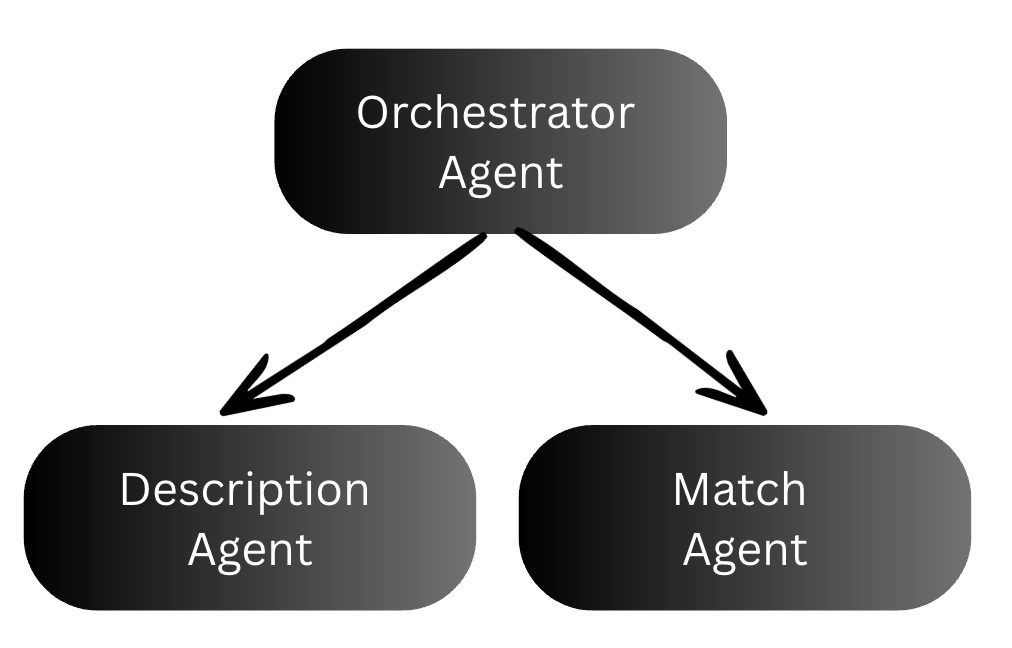
Multi-agent architecture diagram showing the orchestrator, description agent, and match agent.
- The orchestrator coordinates the other two agents. It receives the user’s request and the model type, calls the description agent first, then passes the generated description into the match agent. It acts as the parent span that ties the whole chain together.
- The description agent takes the user’s sparse lunch post input and calls Claude to generate an appealing 2-3 sentence description.
- The match agent takes the user’s lunch post (including the description just generated) plus a list of other active posts in the community, and uses AI to suggest 2-3 posts that would make good swaps.
Prerequisites
Before you start, you’ll need the following installed locally and accounts set up with the services below.- Docker Desktop
- Node.js / Npm
- An Anthropic account (or openai)
- A LaunchDarkly account (sdk key and access token)
- A Langfuse account (public and secret key)
- A Supabase account (database configuration)
Environment variables
Once you’re all setup, clone the WorkLunch repo. Copy the example.env file and fill in your values:
.env should contain:
Supabase setup
- Create a new Supabase project and grab your Project URL and Anon key from Dashboard → Settings → API
- Run the migration files in
supabase/migrations/to create the database schema. Execute them in order in the Supabase Dashboard → SQL Editor:
LaunchDarkly setup
Create two feature flags in your new LaunchDarklyworklunch project:
ai-suggest-enabled: Boolean flag, client-side. Gates visibility of the AI Suggest button in the frontend. Set it totruefor users you want to test with.llm-model-variant: String flag, server-side. Controls which Claude model the backend uses. Set the default value toclaude-sonnet-4-20250514. Add a variation forclaude-haiku-4-5-20251001if you want to experiment with a faster/cheaper model.
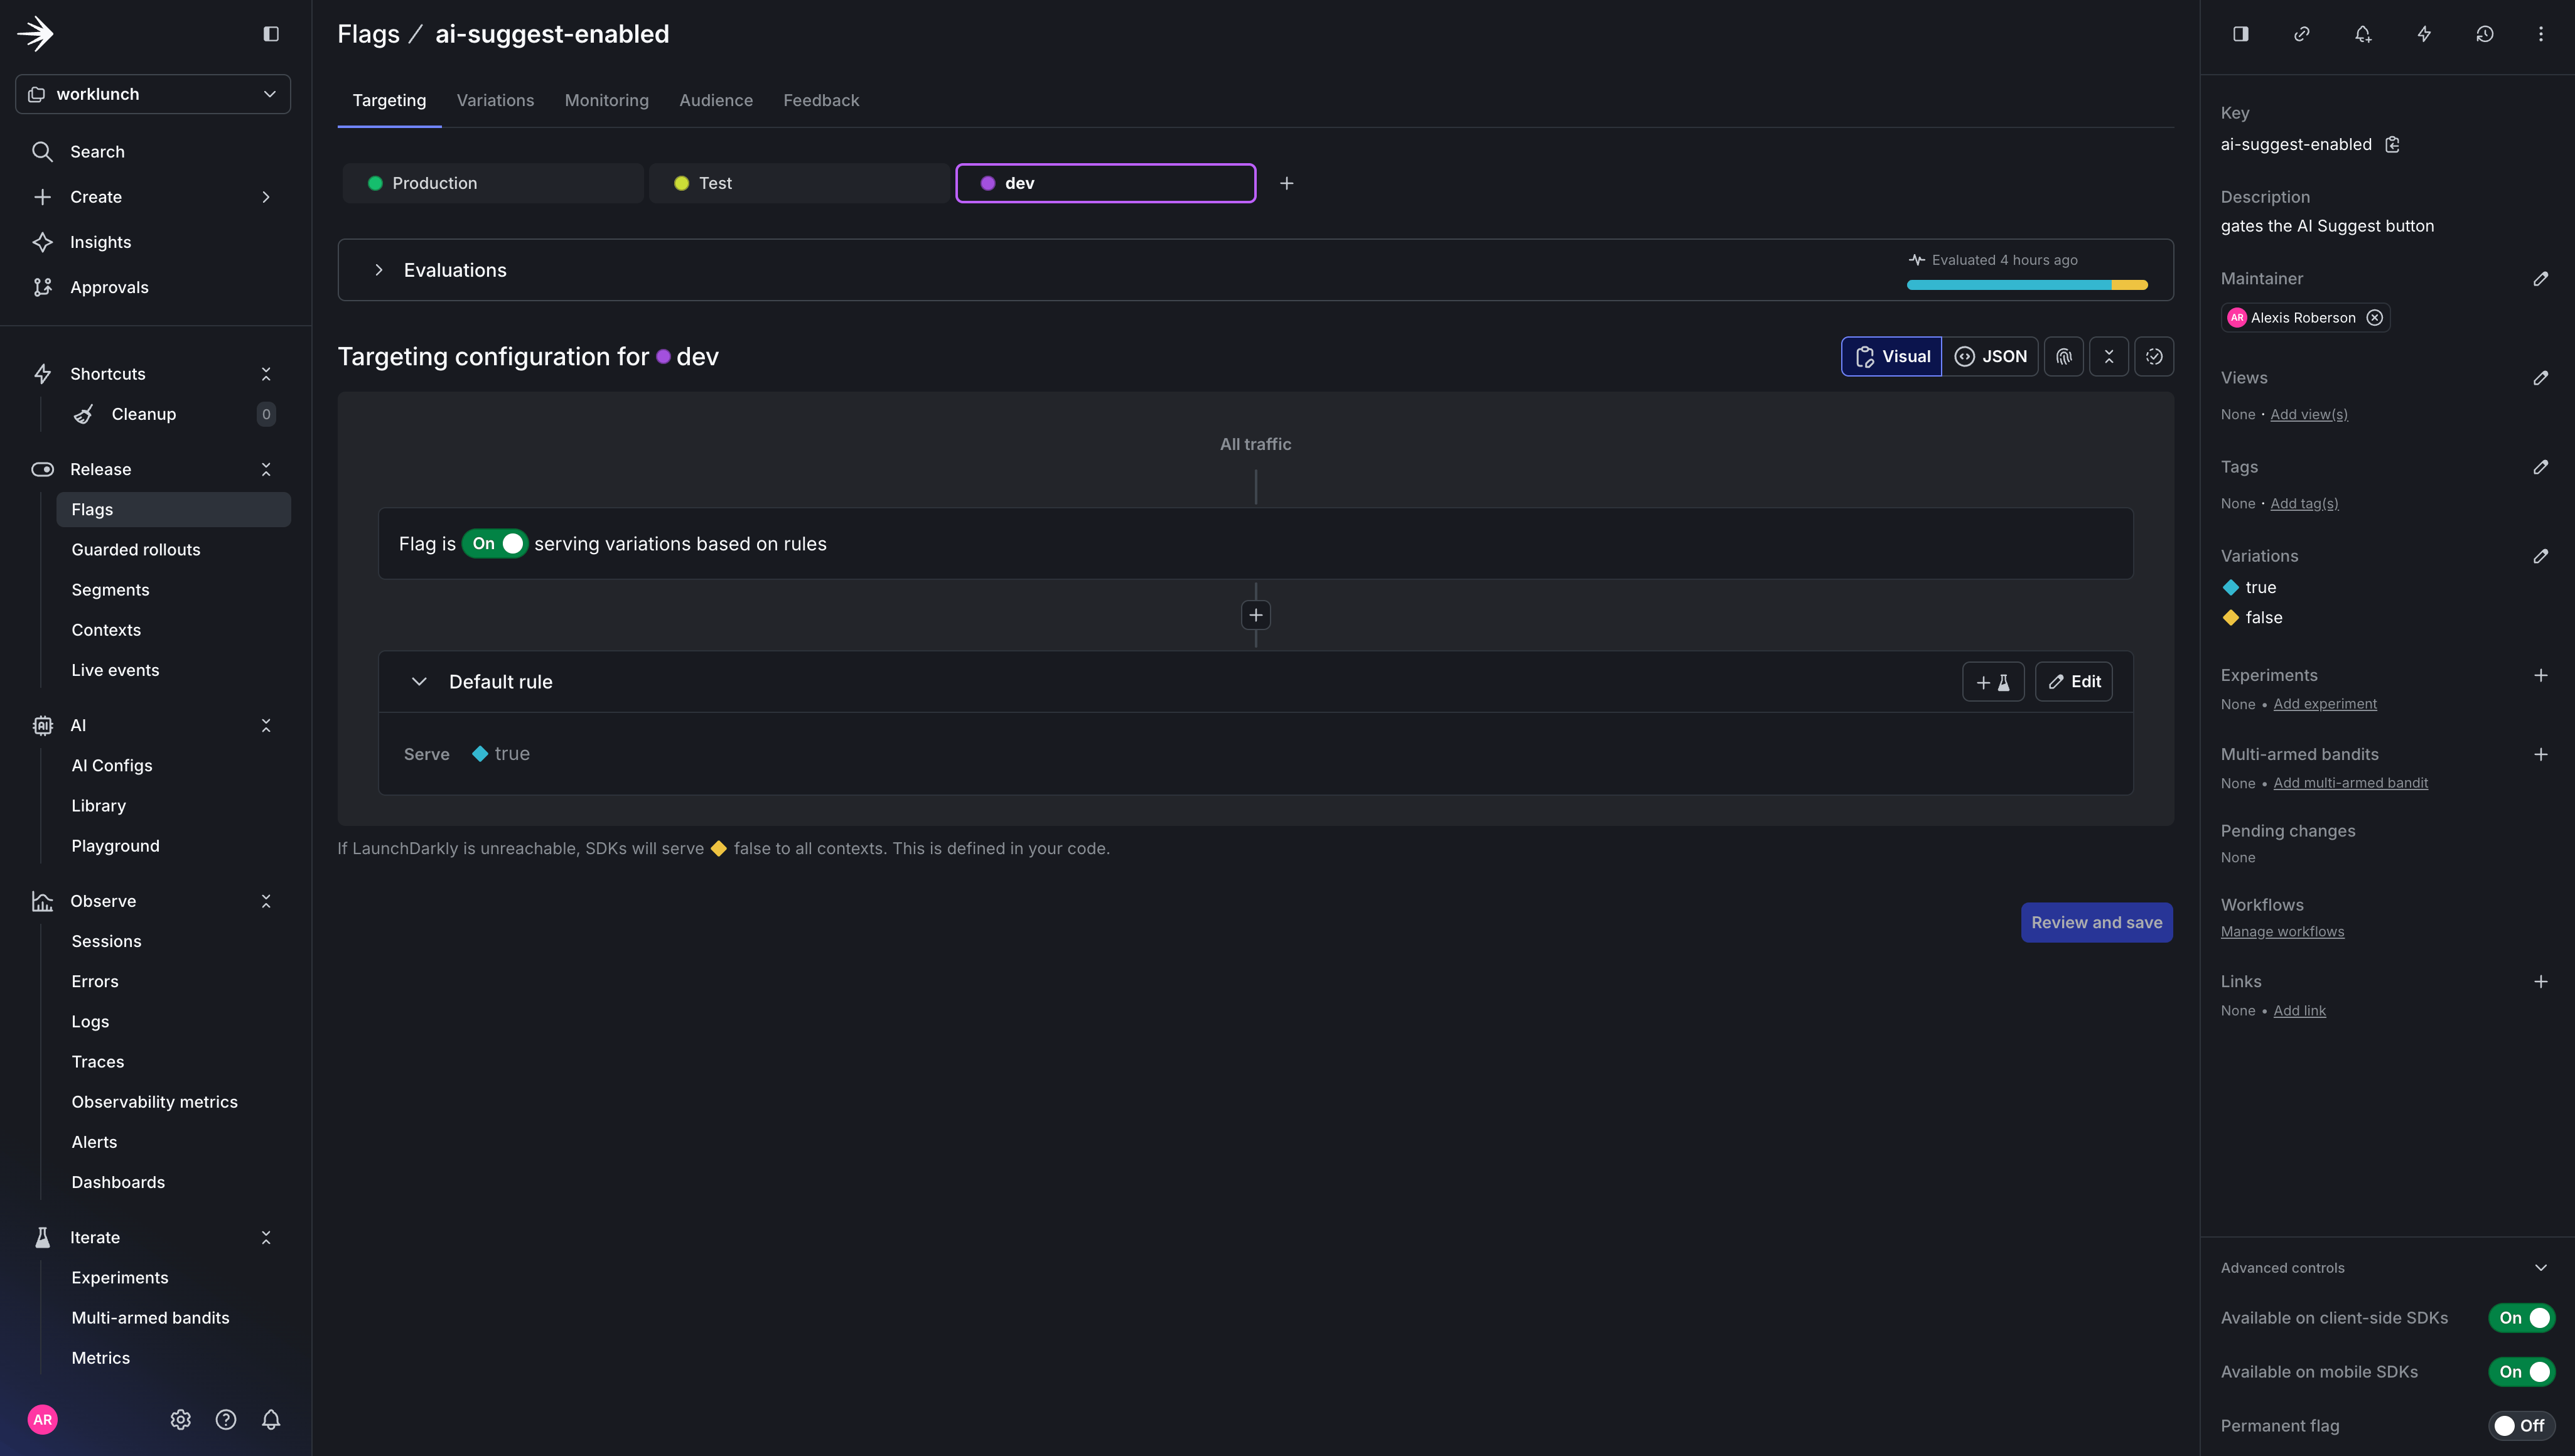
The ai-suggest-enabled feature flag configuration in LaunchDarkly.
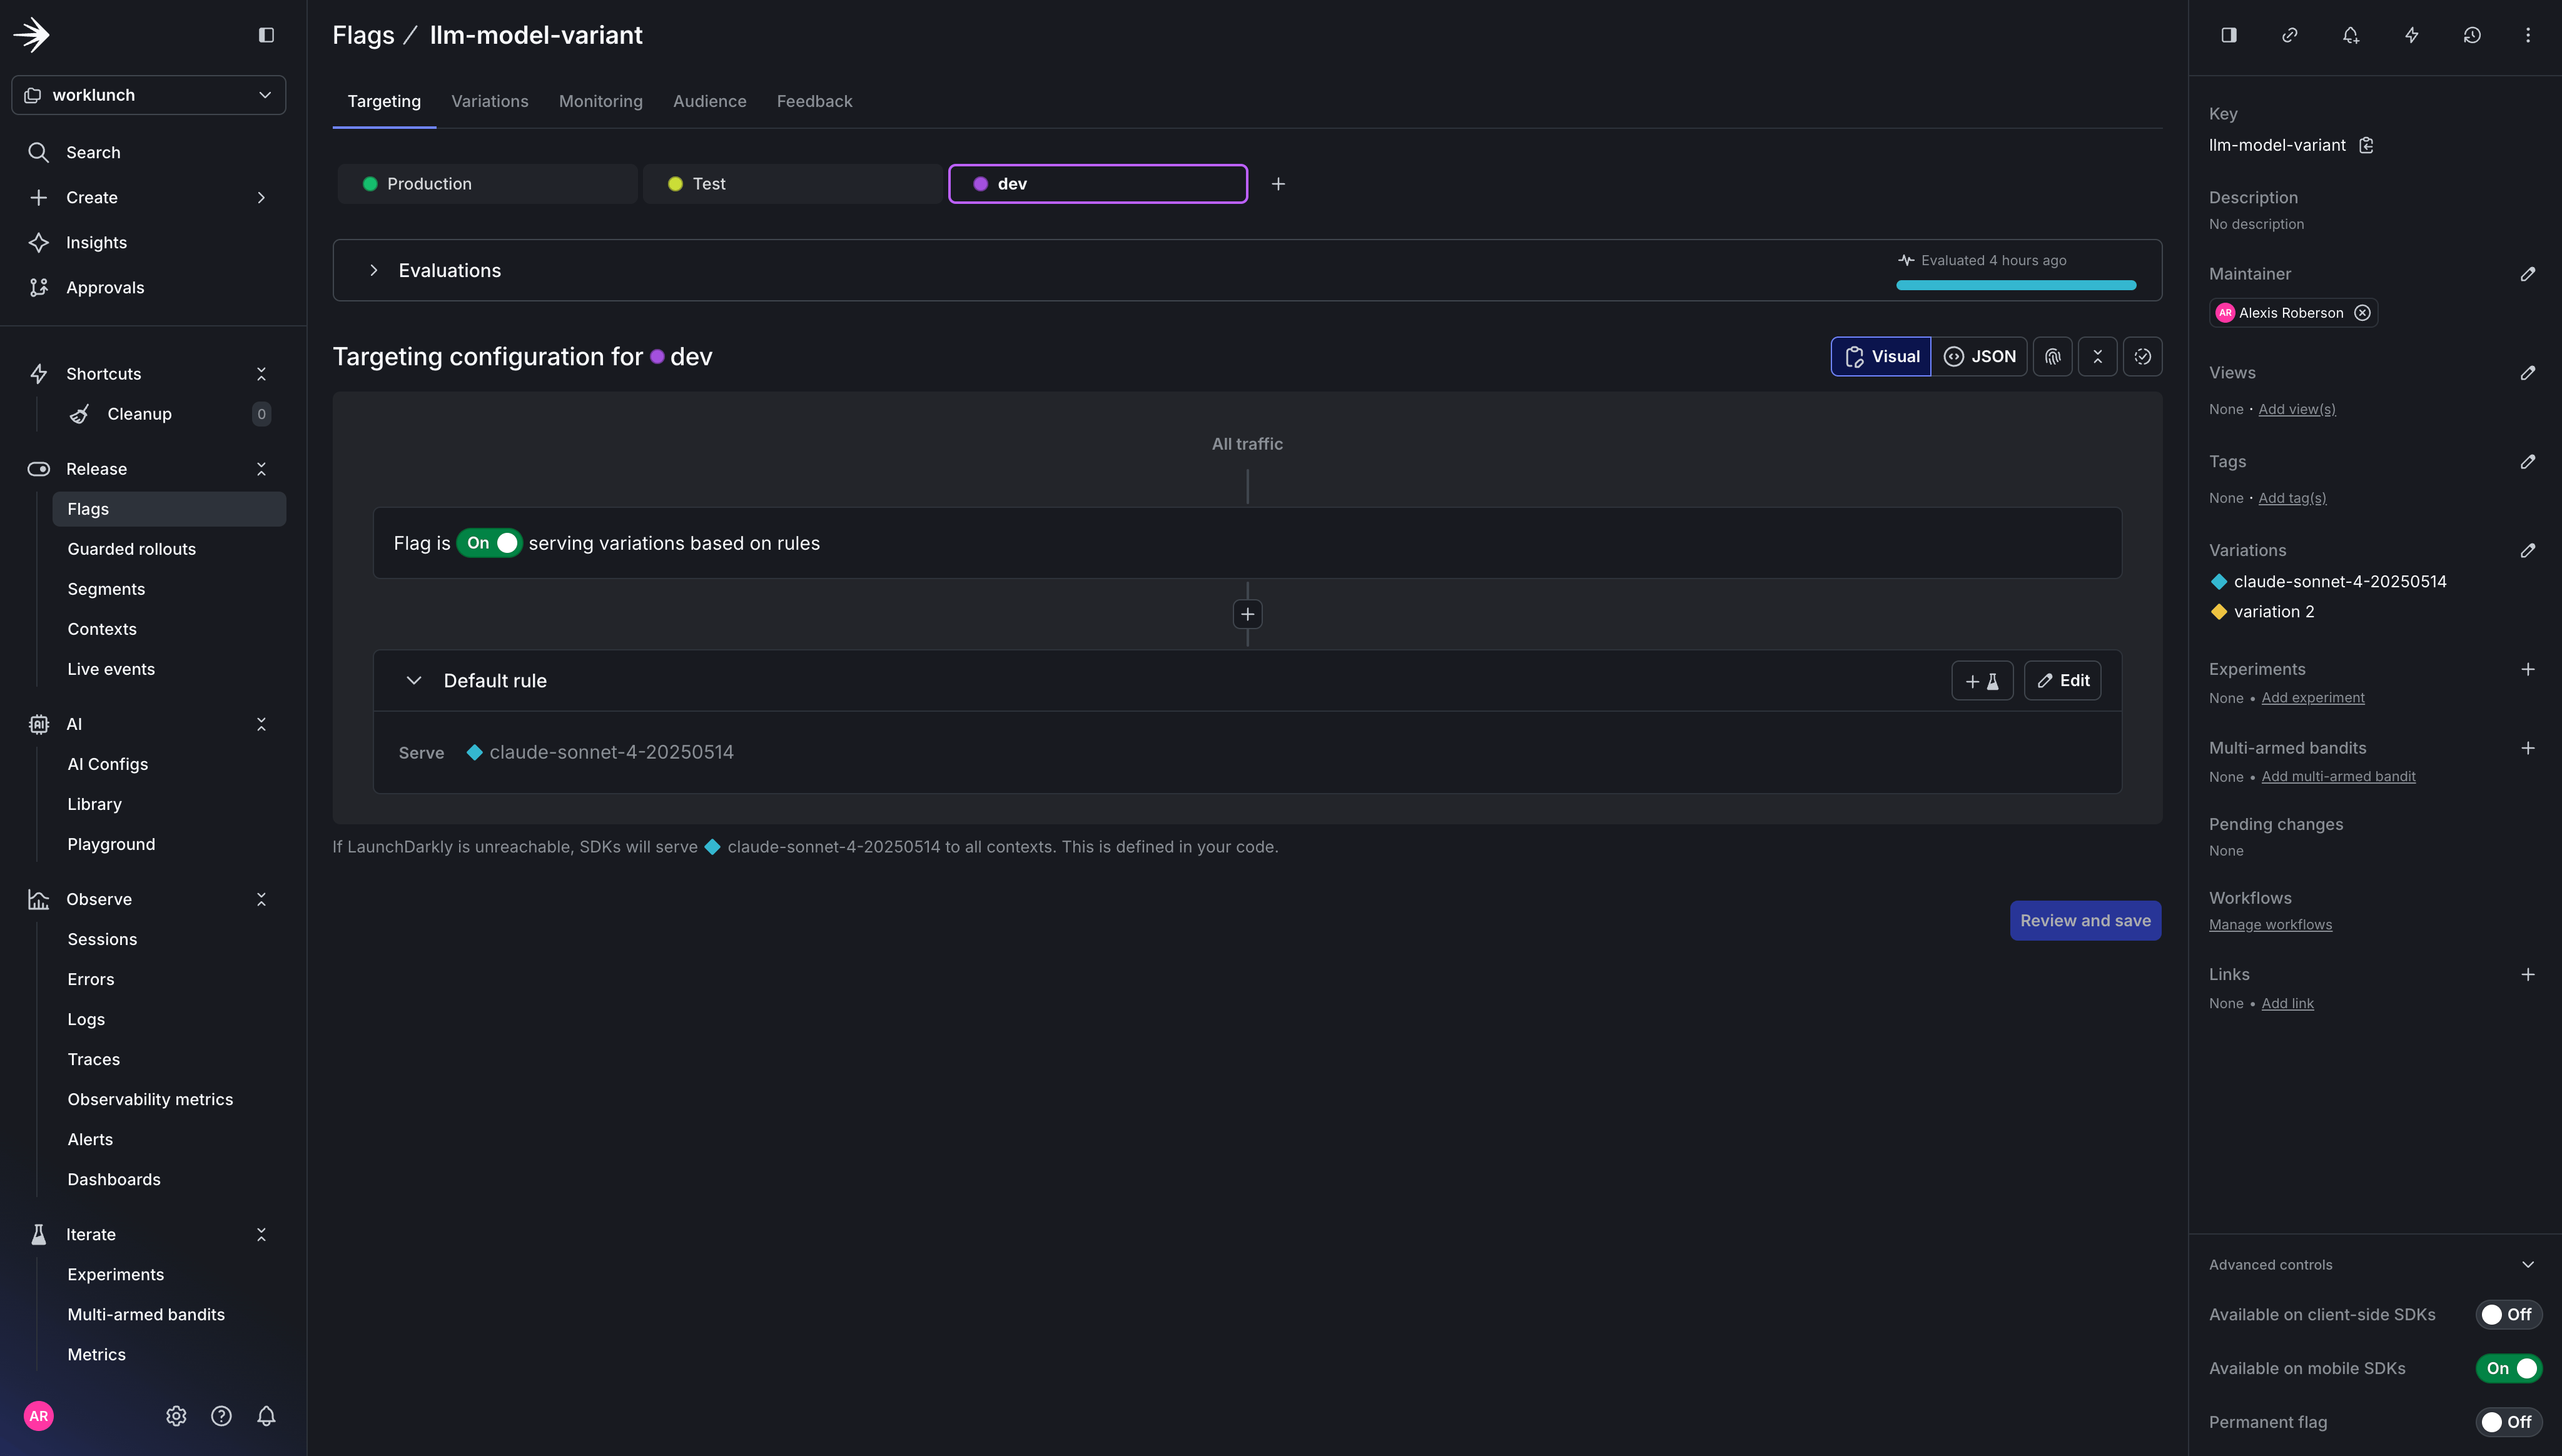
The llm-model-variant feature flag configuration in LaunchDarkly.
Langfuse setup
- Create a new project in Langfuse (note whether your project URL starts with
us.cloud.langfuse.comorcloud.langfuse.com— this determines your region) - Go to Project Settings → API Keys and create a new key pair
- Generate your Base64 auth header and place it inside your .env file:
Quick Start
Once your.env is configured:
gen_ai.* attributes and feature_flag events printed by the debug exporter.
Now, let’s take a look at how each agent is instrumented to send spans to LaunchDarkly.
Step 1: Instrument your LLM application
Initialize the Tracer and Application
The FastAPI app sets up OTel, LaunchDarkly, CORS, and auto-instrumentation in a single lifespan handler:The Route: Flag evaluation + feature flag span event
The FastAPI route is where the LaunchDarkly flag gets evaluated. Thefeature_flag span event on this span is what LaunchDarkly’s observability layer looks for when correlating traces with flag evaluations.
The Orchestrator: Parent span for the agent chain
The orchestrator creates a parent span and calls each sub-agent sequentially. Because the sub-agent spans are created while the orchestrator span is active, OTel automatically nests them as children.The Description Agent: LLM Call with genAI semantic conventions
This is where the OTel GenAI Semantic Conventions come in. The conventions define a standard schema for LLM spans —gen_ai.system, gen_ai.request.model, gen_ai.usage.*, and prompt/completion content as span events.
The Match Agent: Structured JSON output from an LLM
The match agent follows the same GenAI span pattern but with different parameters (lower temperature for more deterministic output, higher token budget for JSON) and post-processing to parse structured JSON from the LLM response.feature_flag event with the HTTP span for experimentation metrics.
Step 2: Configure the OTel collector
This is where the fan-out happens. The collector receives traces over OpenTelemetry Protocol (OTLP) and exports them to both backends simultaneously. Two pipelines from the same receiver is the key: you configure onereceivers block and reference it in multiple pipelines — no duplication of ingestion, no changes needed in application code.
otel-collector-config.yaml
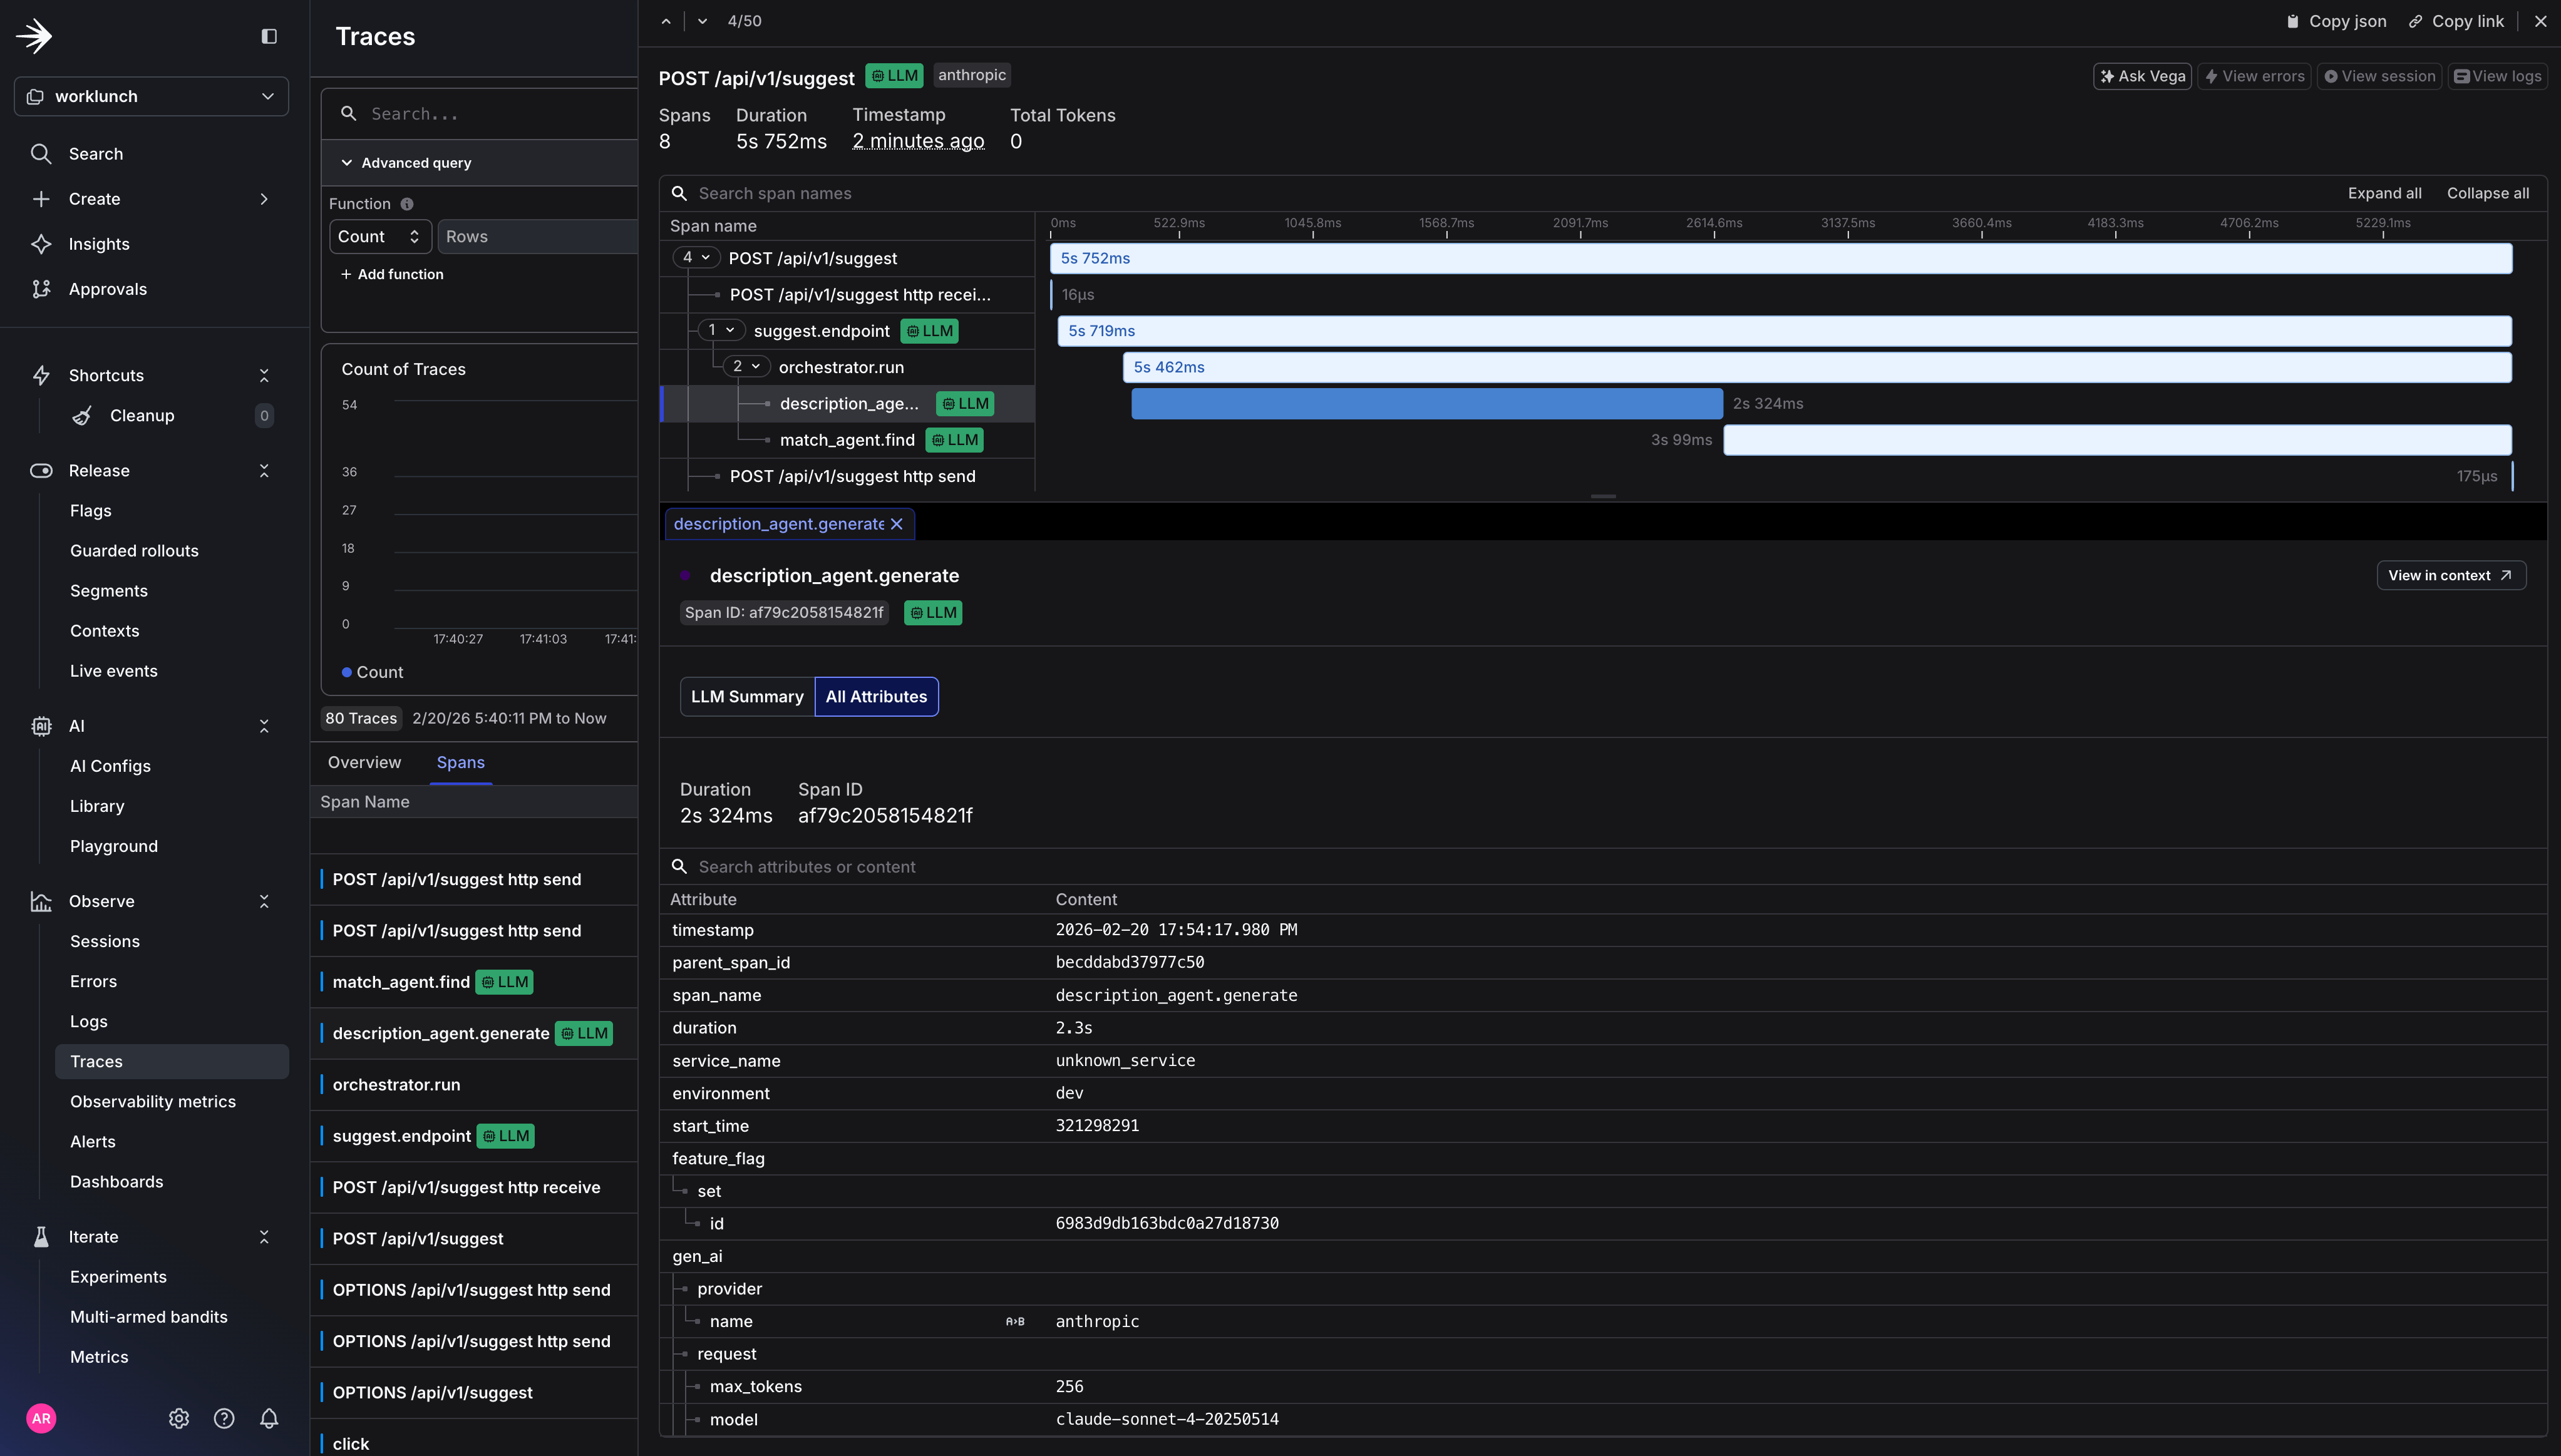
LaunchDarkly traces UI showing the instrumented spans.
How LaunchDarkly processes OTel traces
LaunchDarkly receives traces for logging and converts OTel span data into events for use with Experimentation and Guarded Rollouts. The process works like this:- Your application emits a span that covers an HTTP request (or LLM call). This span carries standard HTTP attributes:
http.response.status_code,http.route, latency derived from span duration. - On that same span (or a parent span in the same trace), you’ve emitted a
feature_flagspan event withfeature_flag.keyandfeature_flag.variant. - LaunchDarkly’s collector ingests the trace and looks for HTTP spans that overlap with spans containing at least one
feature_flagevent. When it finds a match, it produces a metric event associating the flag variant with the observed latency and error rate (5xx status codes). - Those metric events flow into Experimentation, where they become the outcome metrics for your flag-controlled A/B test — for example, comparing
claude-sonnet-4-20250514vsclaude-haiku-4-5-20251001on p95 latency and error rate without writing a single line of custom metric instrumentation.
Key attributes from gen_ai trace spans
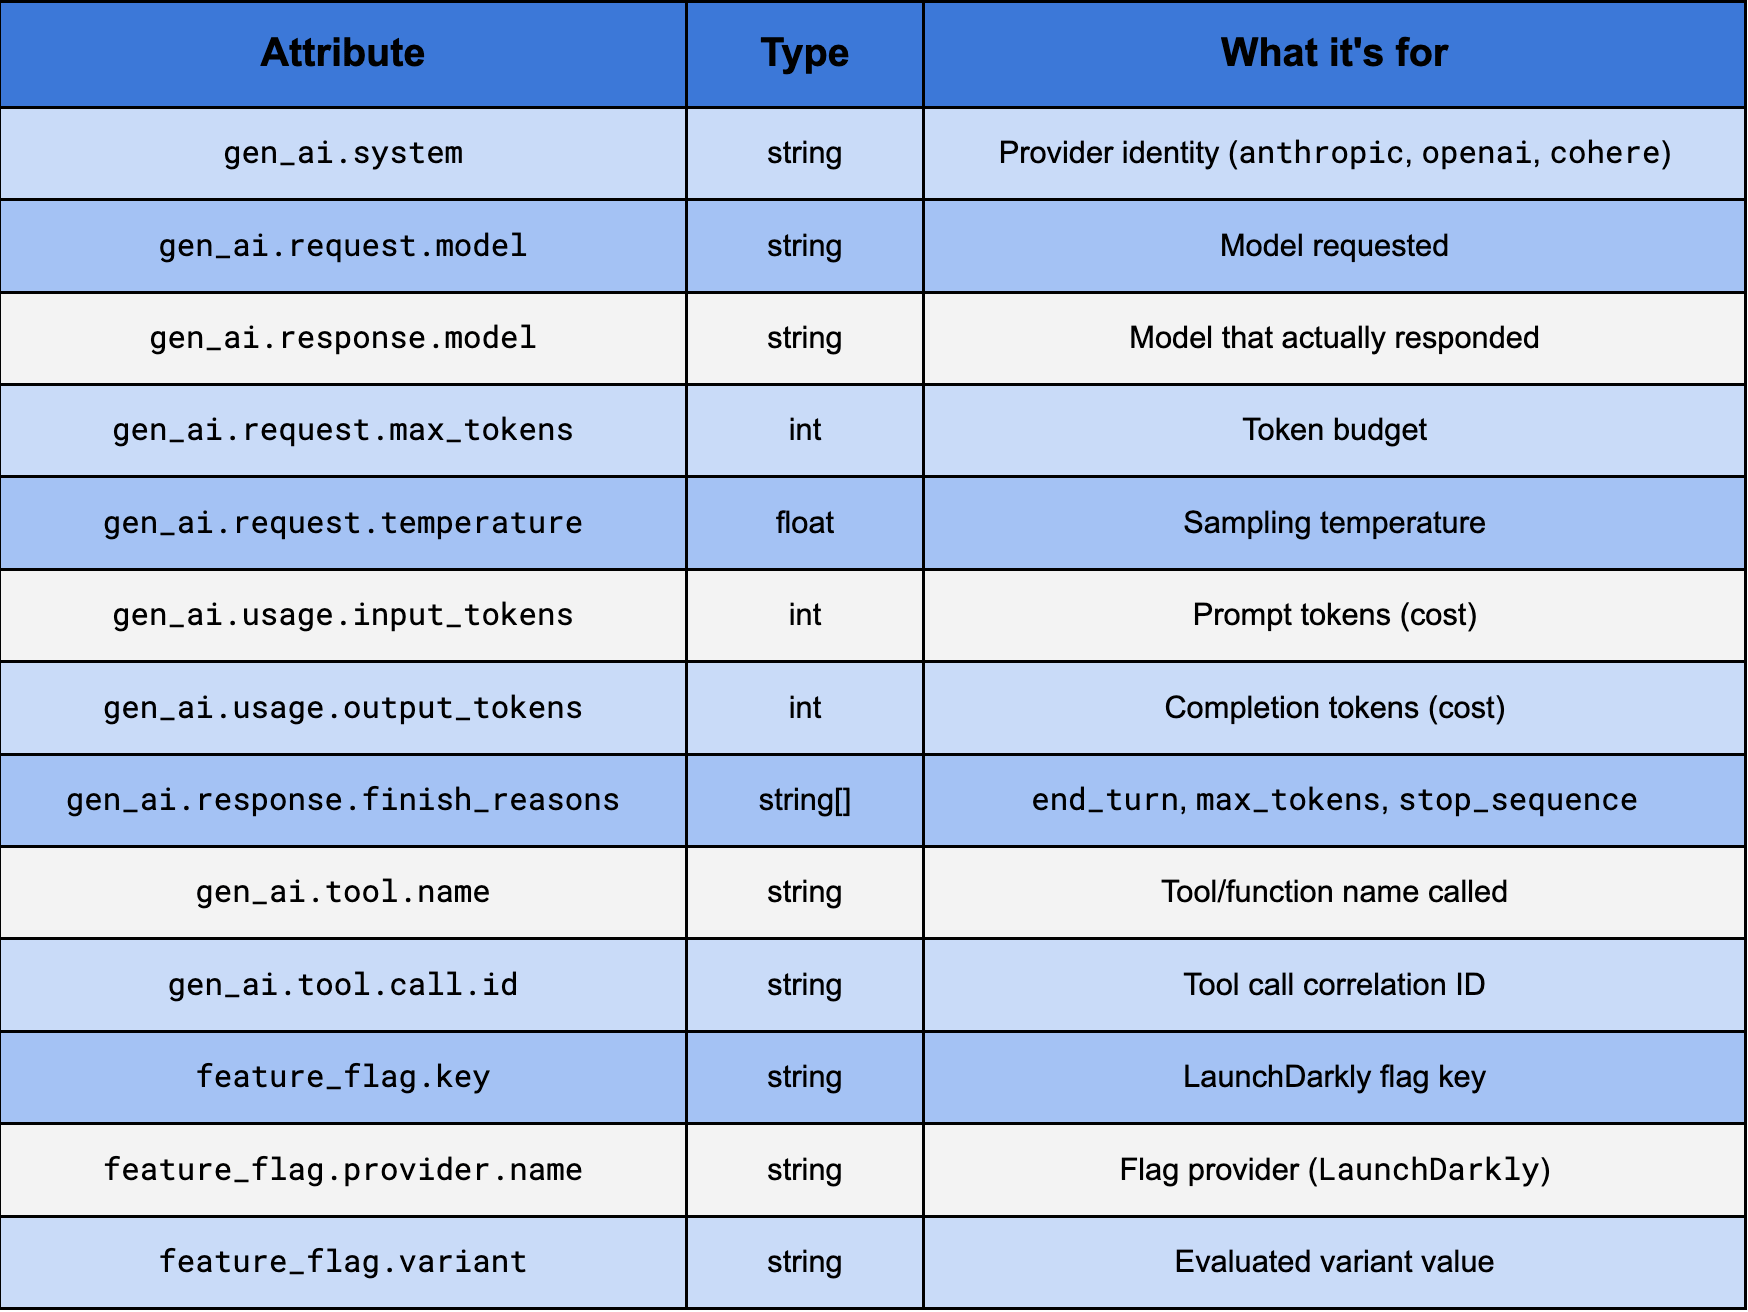
Key attributes from gen_ai trace spans.
Step 3: Trigger a guarded rollout
With traces flowing into LaunchDarkly and span events carrying your flag evaluations, you can now configure a Guarded Rollout that automatically rolls back the AI Suggest feature if token costs spike or response truncation increases as you increase the percentage of users who see it. In the LaunchDarkly UI, navigate to your flag (ai-suggest-enabled), under Default rule click Edit and select Guarded Rollout.
You’ll need to create two new custom metrics to attach to the guarded rollout. The first will is the AI tokens total rollout metric. This will measure cost-per-request as a gate for releasing the feature to a wider audience and alert if average tokens per request exceeds your baseline by more than 25%. And the second is AI completion truncated error metric, which will catch prompt truncation before users notice degraded output quality. This metric will halt the rollout if the rate climbs above your control baseline.
For ai.tokens.total:
- Event kind: Custom
- Event key:
ai.tokens.total - What do you want to measure?: Sum (Numeric) — you’re passing the actual token count as the magnitude
- Metric name: AI tokens total
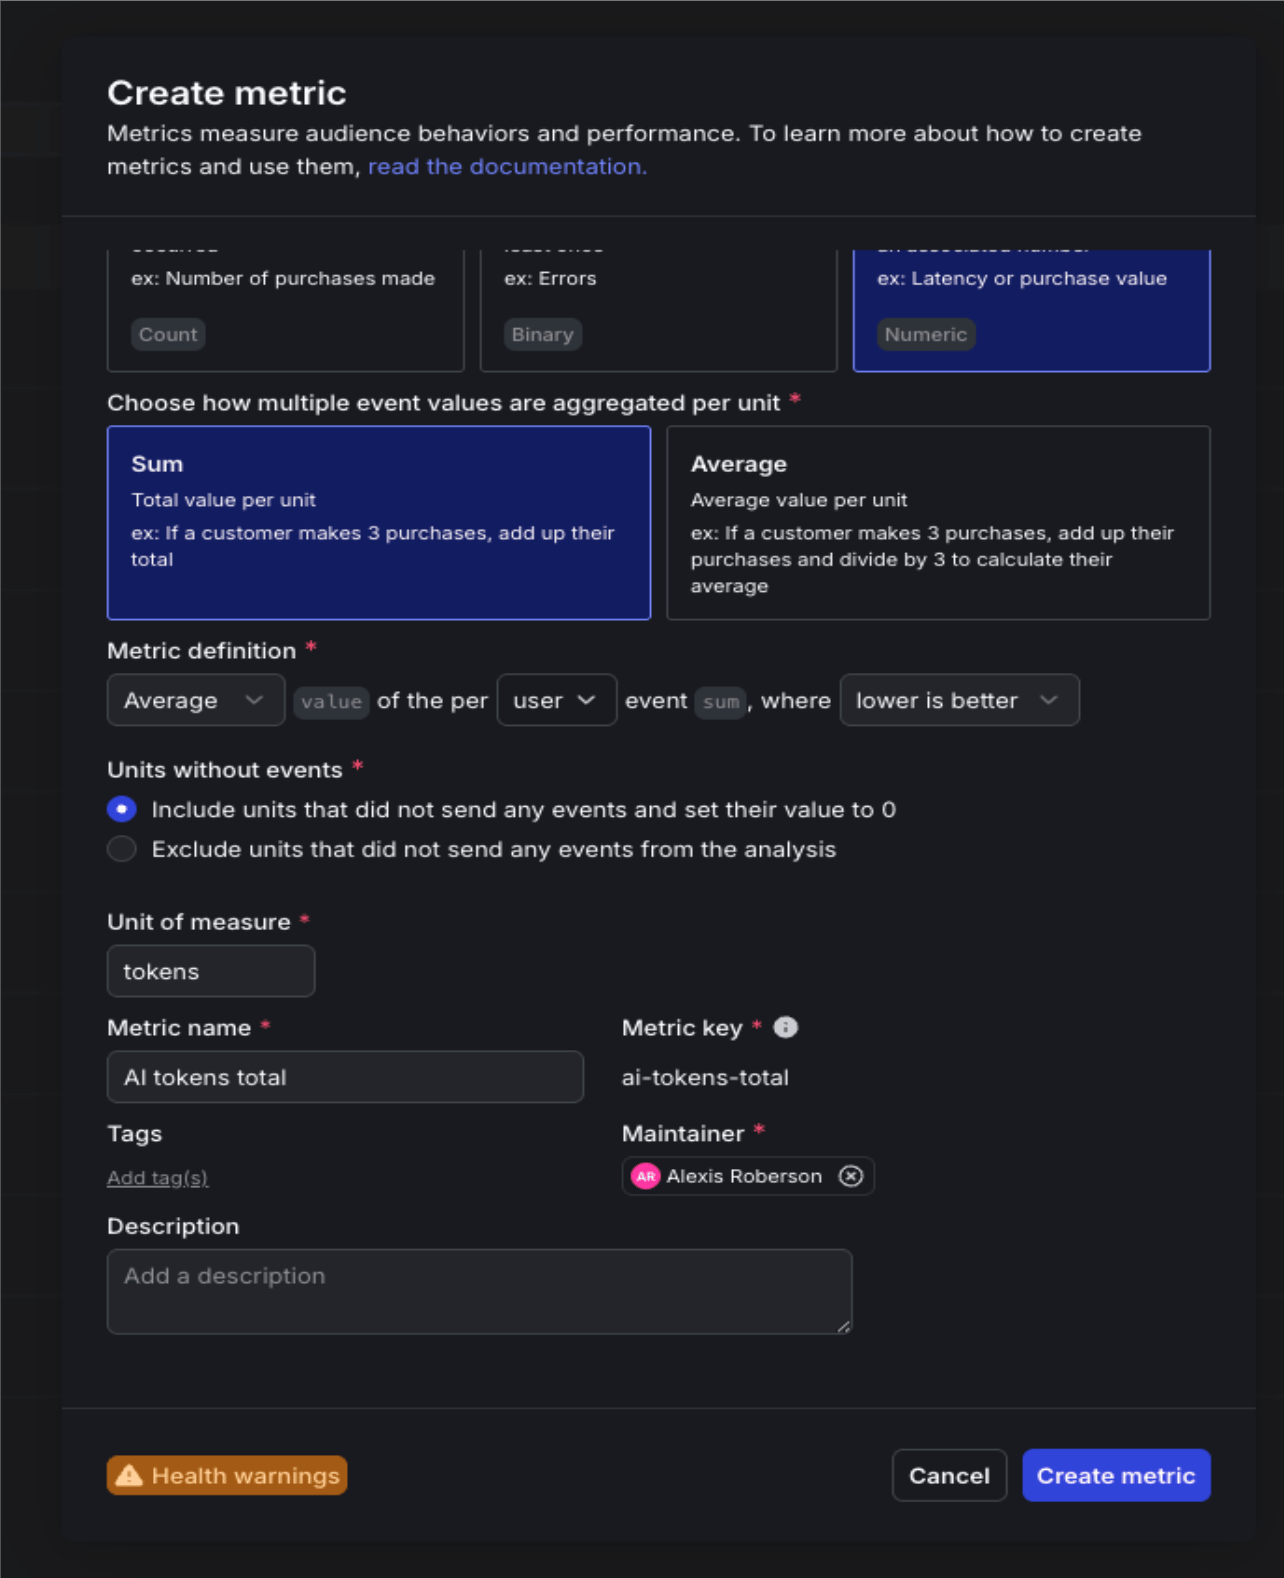
Creating the AI tokens total metric in LaunchDarkly.
ai.completion.truncated:
- Event kind: Custom
- Event key:
ai.completion.truncated - What do you want to measure?: Occurrence (Percent) — you’re tracking whether truncation happened at least once, not how many times
- Metric name: AI completion truncated
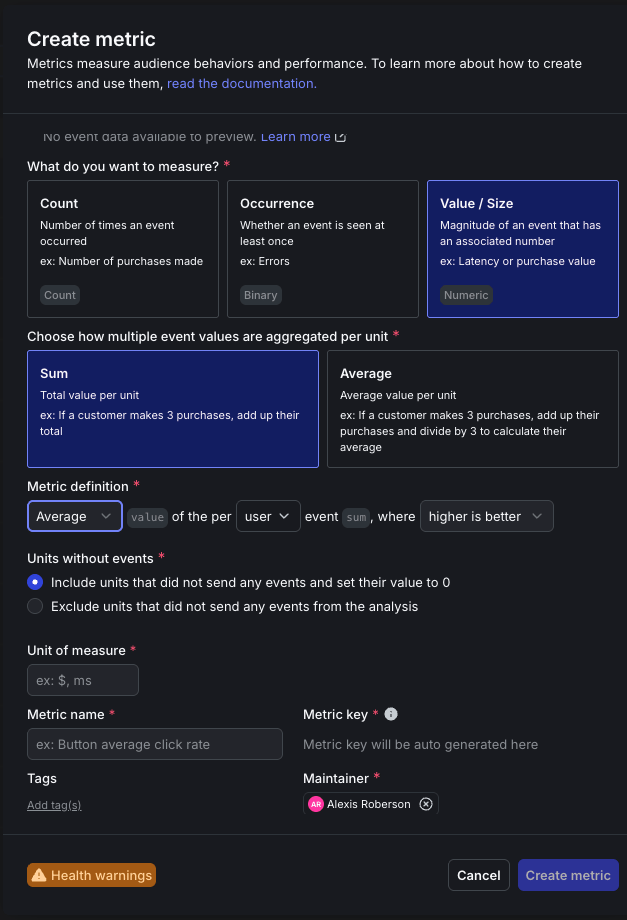
Creating the AI completion truncated metric in LaunchDarkly.
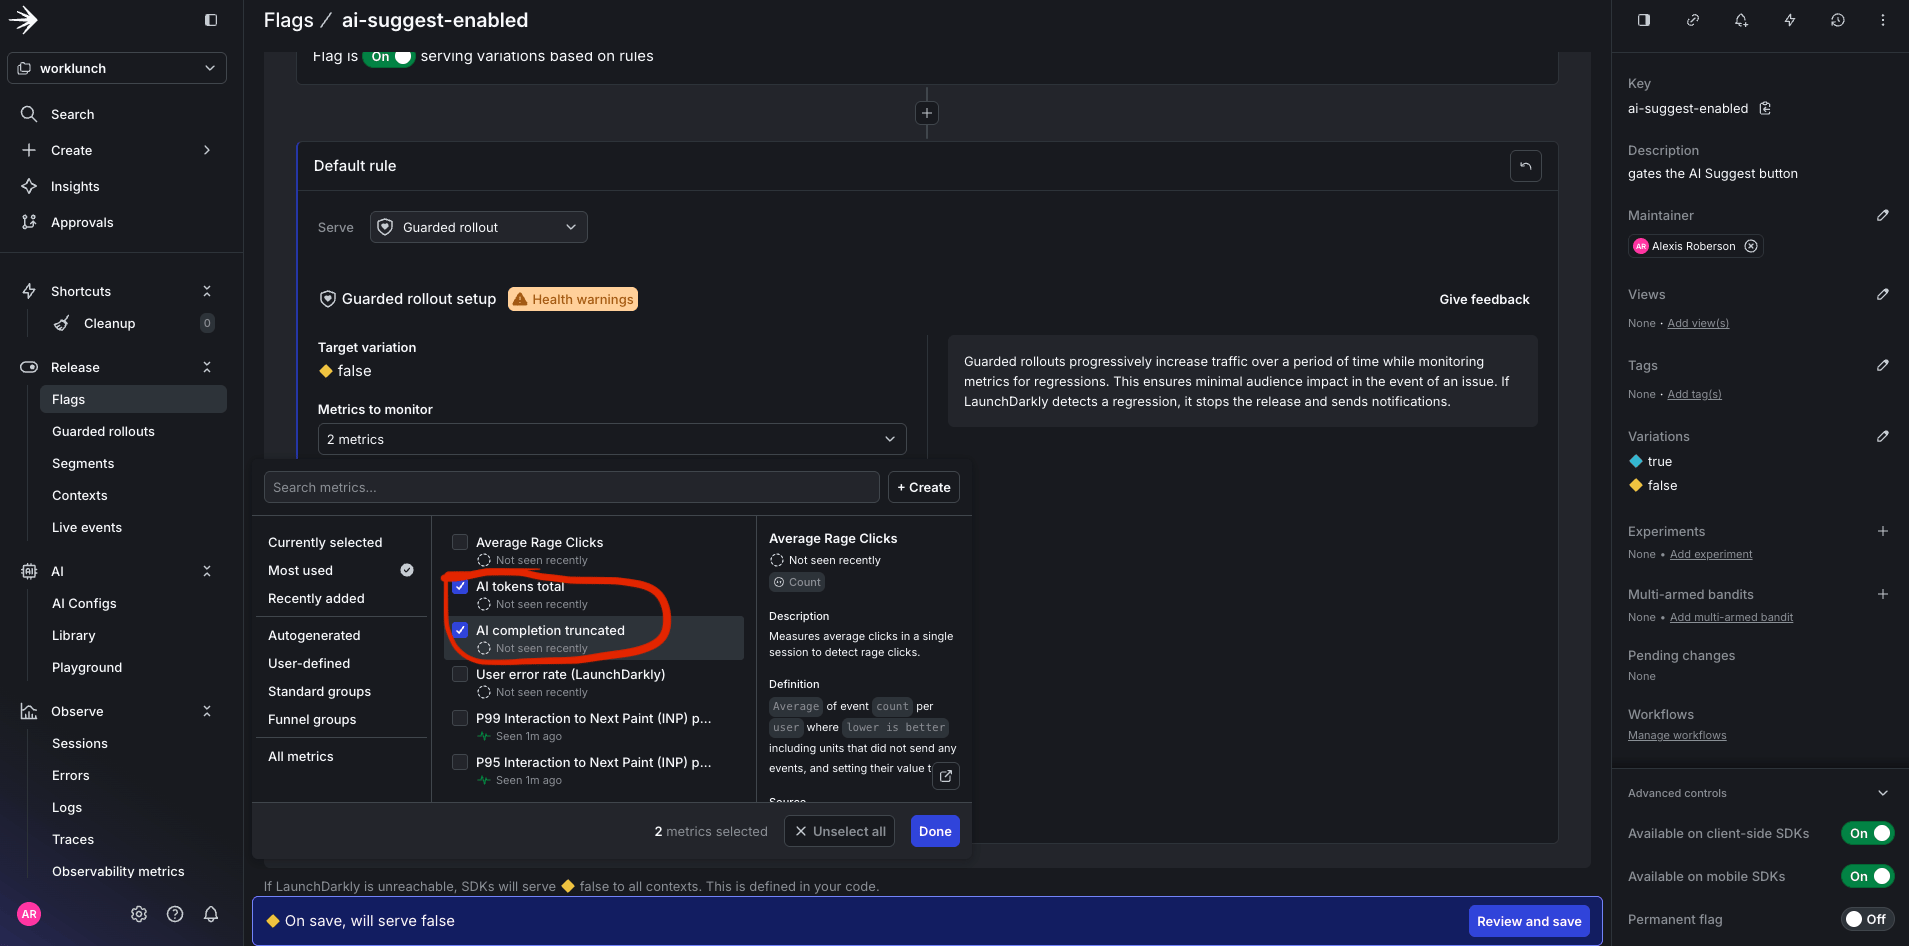
Selecting both Guarded Rollout metrics.
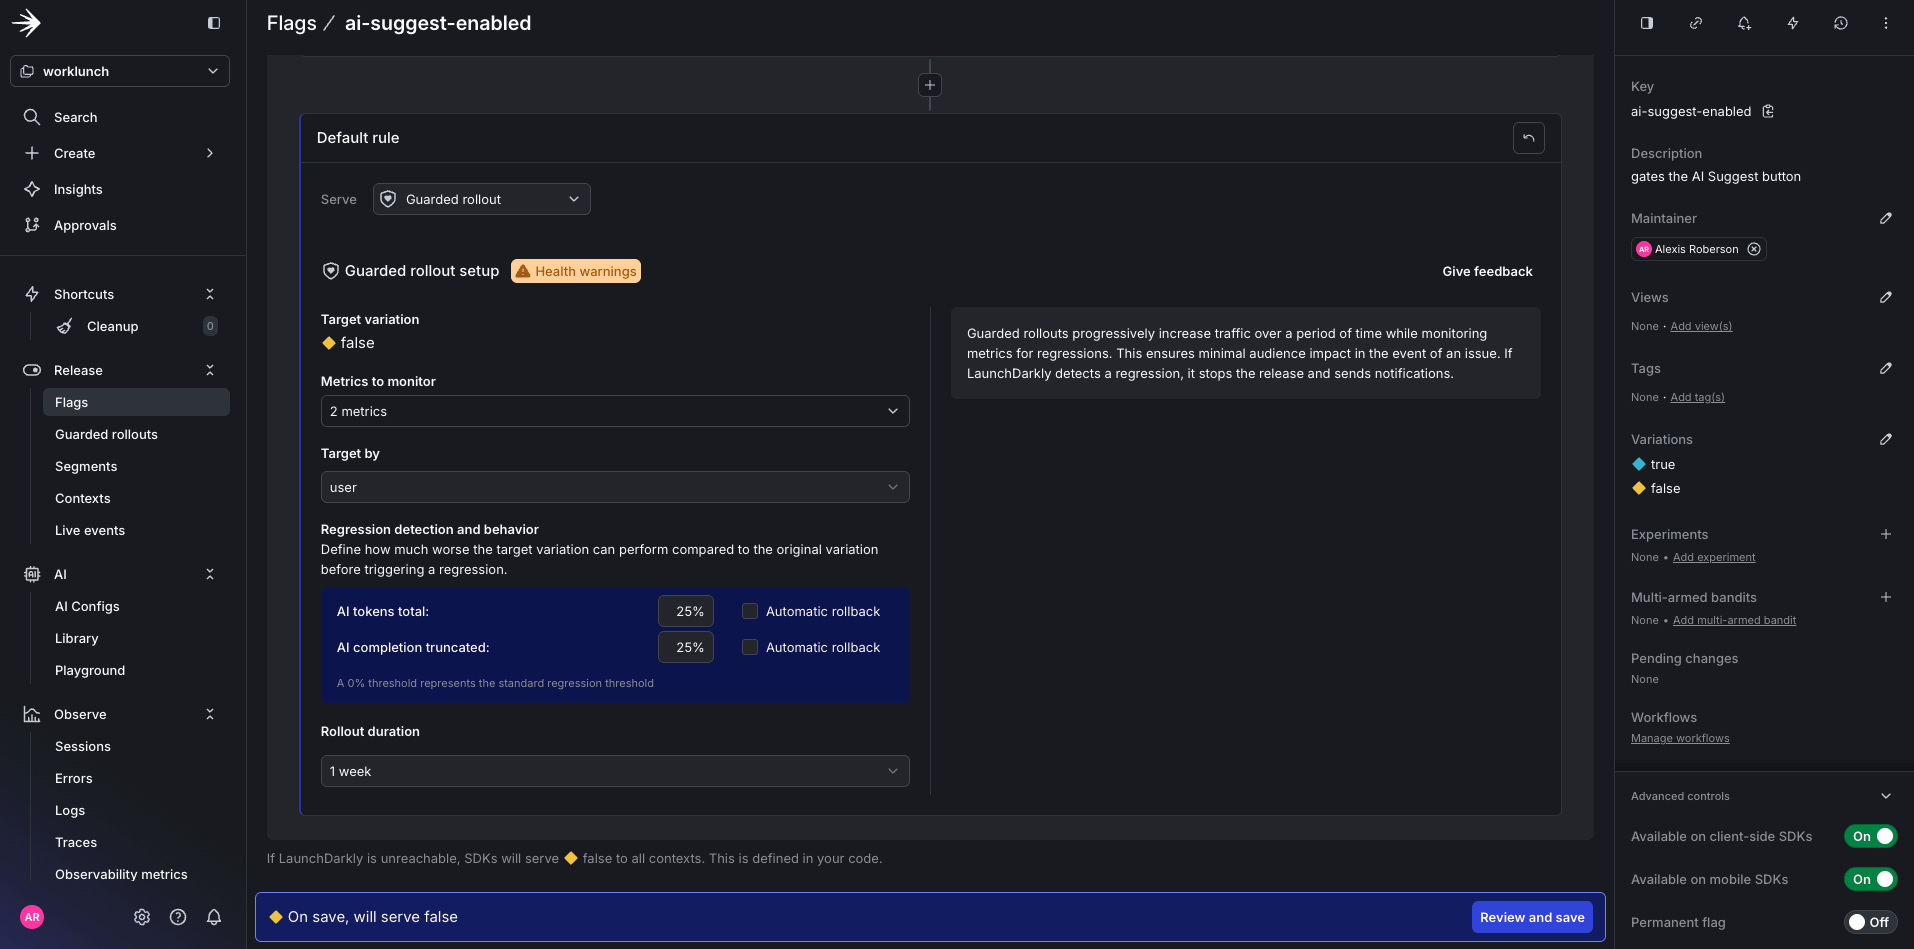
Setting the Guarded Rollout threshold and duration.
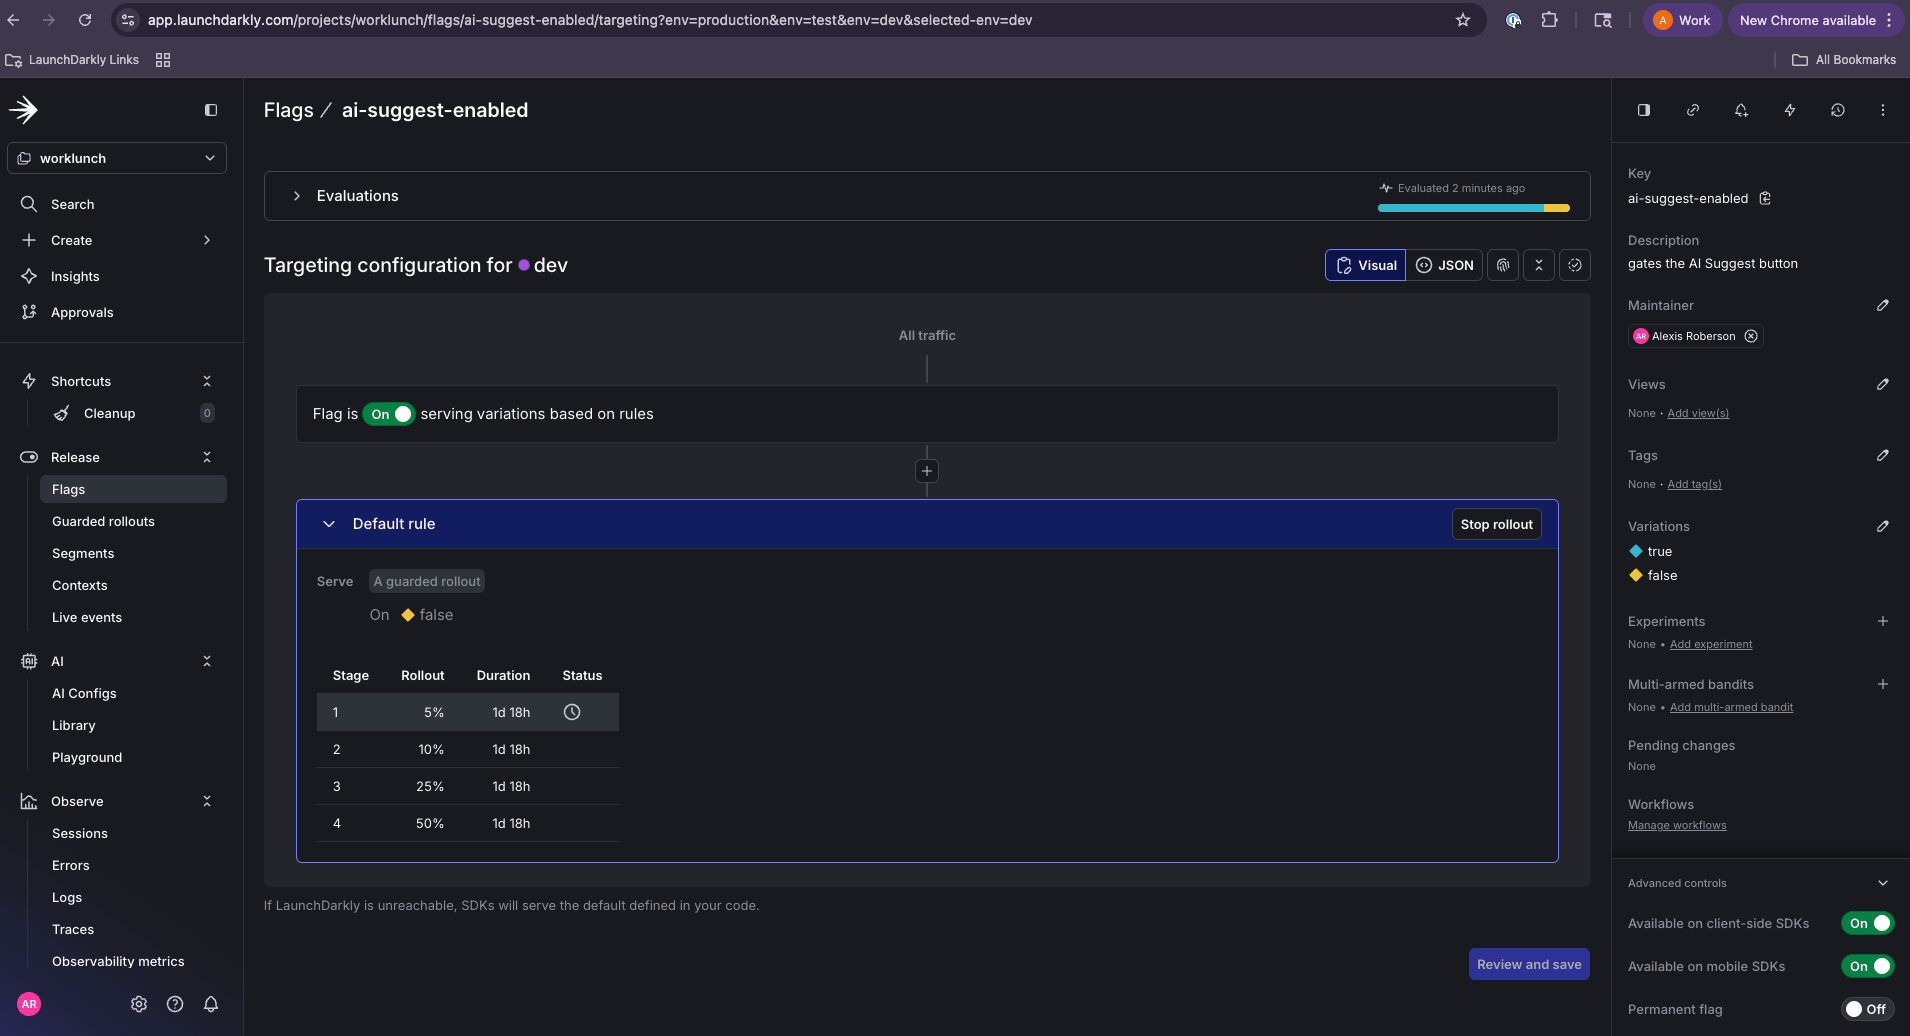
The running Guarded Rollout for the ai-suggest-enabled flag.
ai-suggest-enabled flag and trigger an automatic rollback if either threshold is breached.