

Contact us for help configuring Redshift native ExperimentationAccess to Redshift native Experimentation requires both Data Export and Experimentation. If you do not have access or need help getting started, contact your LaunchDarkly representative or start a Support ticket.
- Gathering your Redshift cluster information
- Configuring the LaunchDarkly integration
- Creating AWS resources
- Configuring network access
- Verifying the connection
Prerequisites
Before setting up Redshift native Experimentation, ensure that you have:- The Redshift Data Export integration set up in LaunchDarkly.
- Administrative access to your AWS account with permissions to create AWS Identity and Access Management (IAM) policies and roles
- An active Amazon Redshift cluster
- A LaunchDarkly role of Owner or Admin, or a custom role that allows the following actions:
- Metric event data in your Redshift database that you want to use for Experimentation
Step 1: Gather your Redshift cluster information
LaunchDarkly fills most cluster details from your Redshift Data Export destination. Collect the values LaunchDarkly cannot fill, and the location of your metric event data:- The name of the database that contains your metric event data.
- The name of the schema that contains your metric event tables, if you want to limit read access to one schema.
- The cluster region, such as
us-east-1, when LaunchDarkly does not fill Cluster region. - Your 12-digit AWS account ID, when LaunchDarkly does not fill AWS account ID.
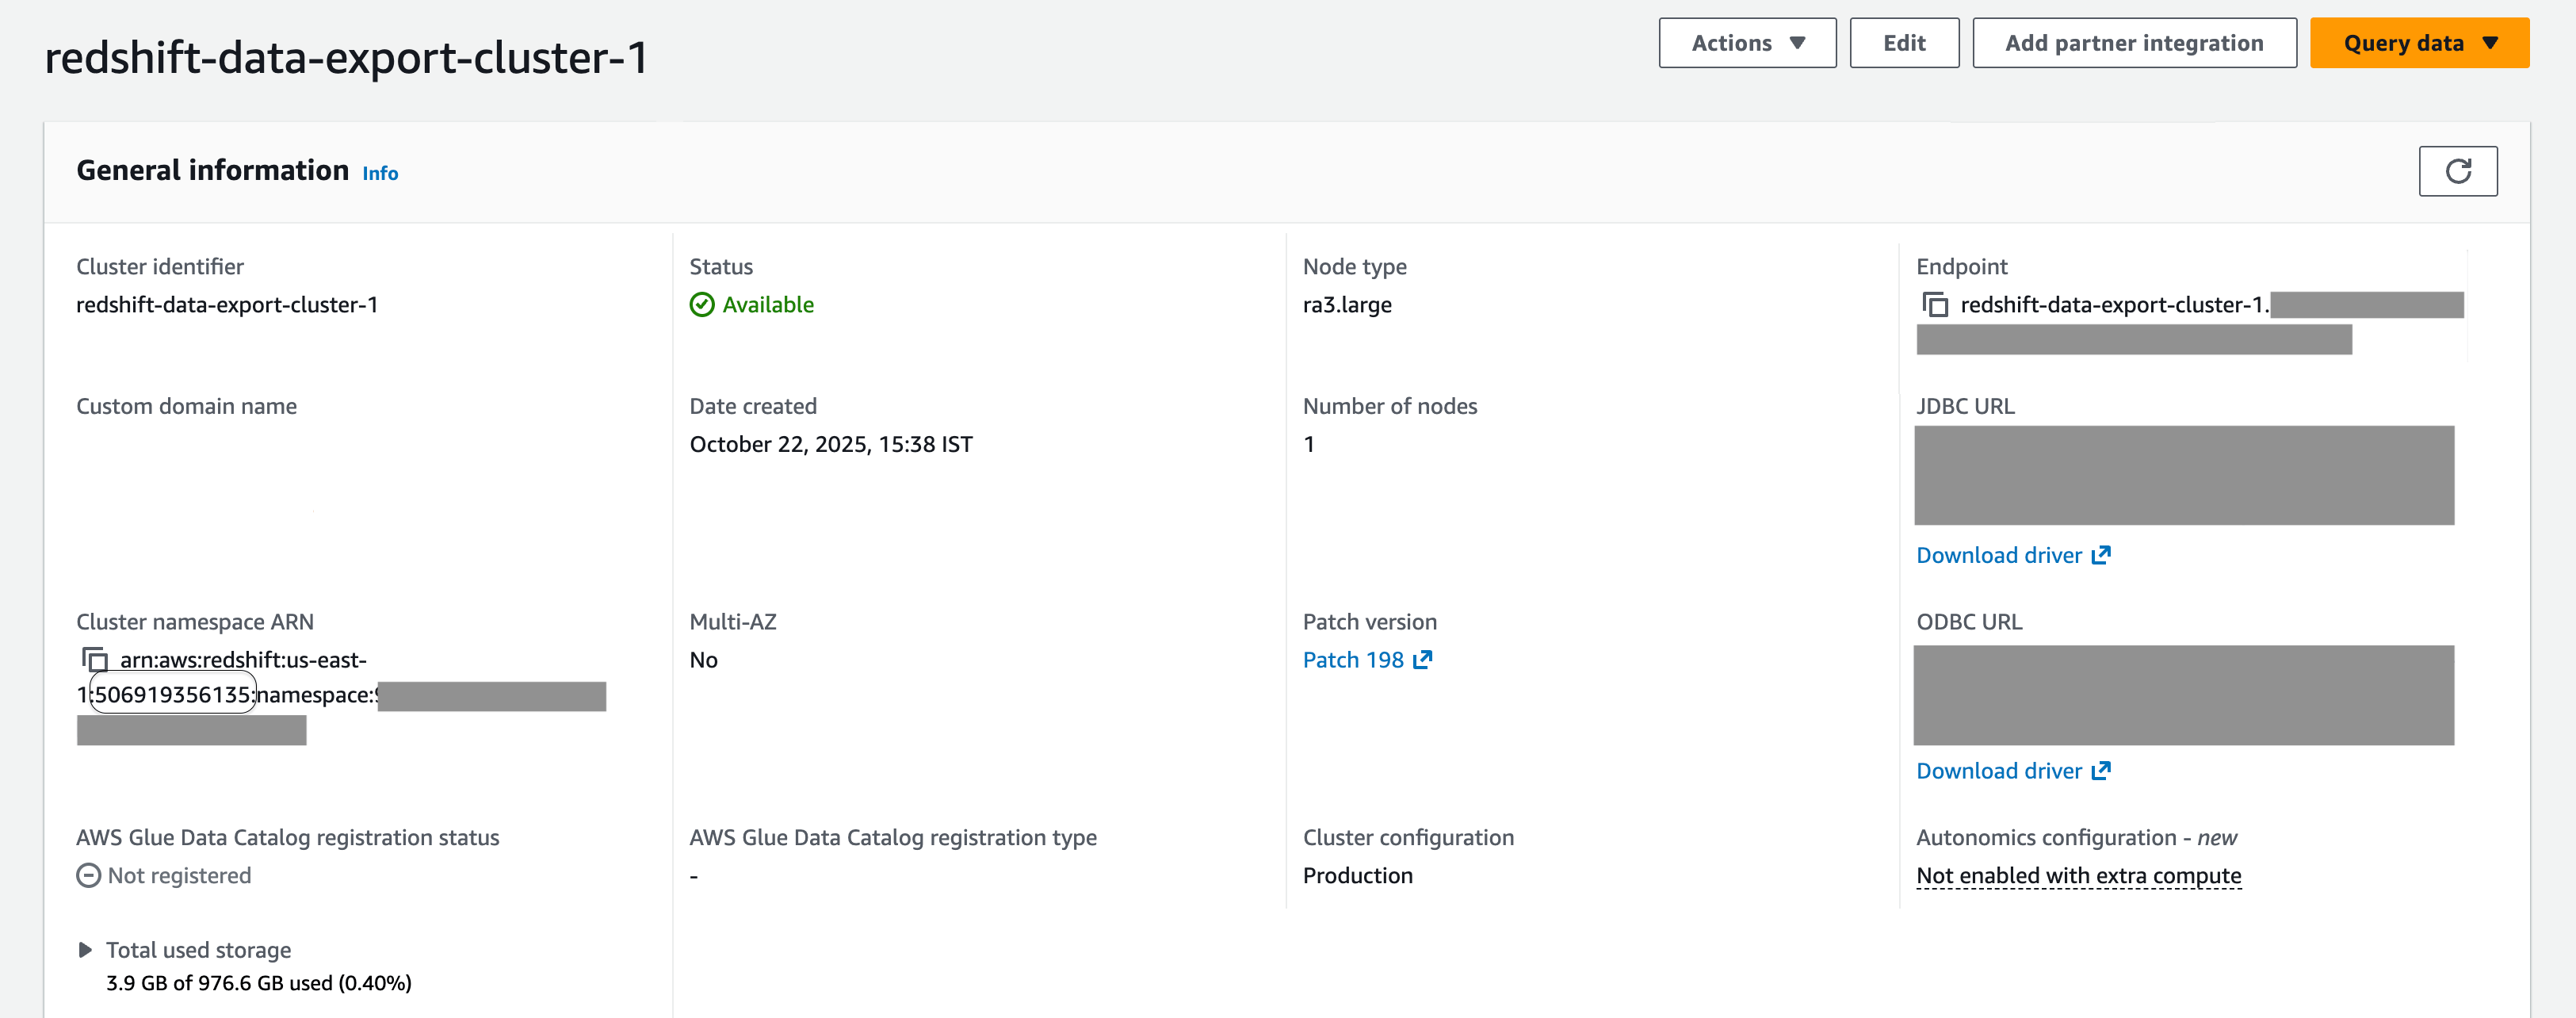
An AWS Redshift cluster general information screen.
Step 2: Configure the LaunchDarkly integration
This step records where your metric data lives, generates the IAM policies and SQL scripts, and saves the integration after LaunchDarkly verifies the connection. This integration is separate from the Redshift Data Export integration. To set up the integration:- Navigate to the Integrations page.
- Search for and select Redshift Native Experimentation.
- Click Add integration.
- Enter an integration Name.
- Select the LaunchDarkly project and environment. Only environments that already have a Redshift Data Export destination are available. You cannot change the project or environment after you save.
- Confirm the fields under “Step 1. Configure your Redshift cluster.” LaunchDarkly fills Cluster endpoint and Cluster identifier from the Data Export destination. You cannot edit those two fields. Cluster region and AWS account ID stay editable only when LaunchDarkly cannot derive them. The integration must use the same cluster and AWS account as that destination.
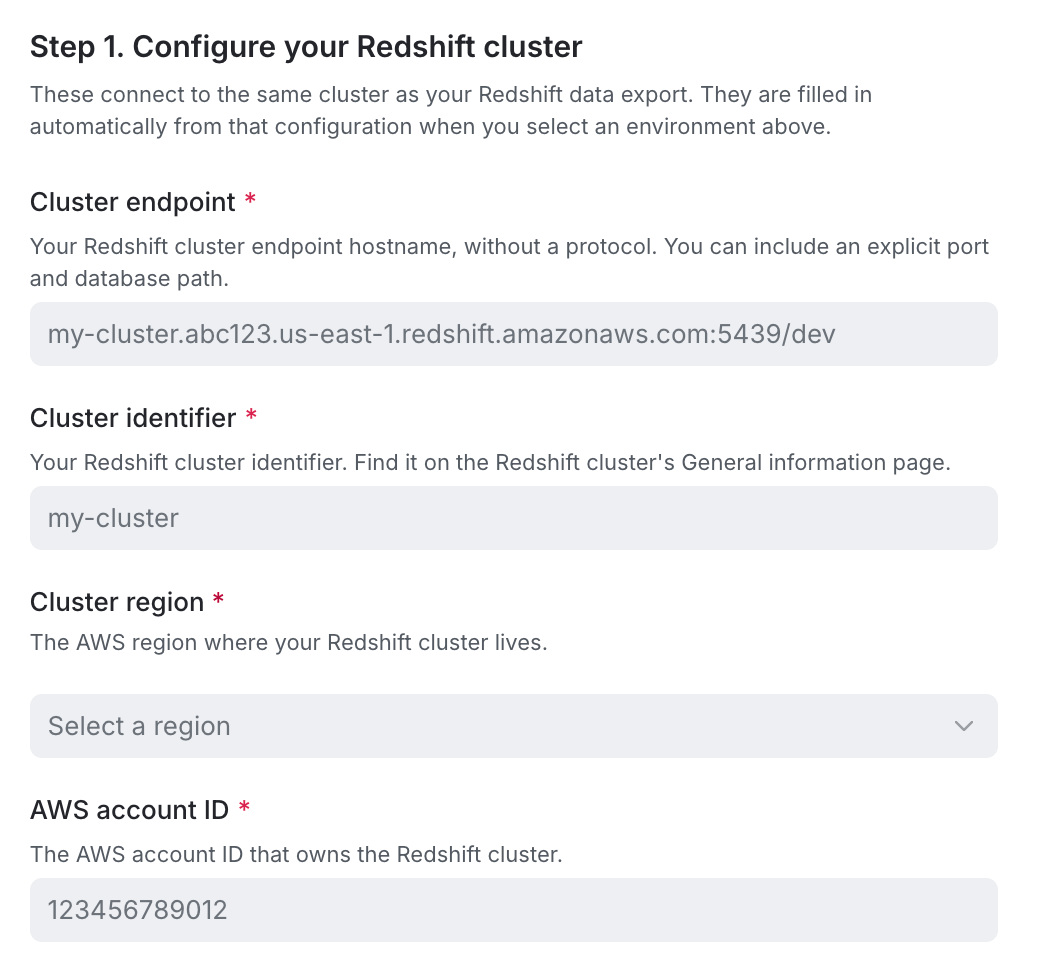
Step one of the LaunchDarkly integration setup.
- Under “Step 2. Configure resource names,” enter the Metrics database name. This is the database that contains your metric event data. LaunchDarkly is granted read access to this database.
- (Optional) Enter the Metrics schema name. Leave it blank to grant read access to every schema in the metrics database.
- (Optional) Expand Additional fields (optional) to rename the database, schema, permission groups, and service users that LaunchDarkly creates. Leave a field blank to keep its default name. To learn more, read Choosing custom object names.
- Under “Step 3. Generate policies and scripts,” click Generate policies and scripts. LaunchDarkly displays an IAM permissions policy, an IAM trust policy, and four SQL scripts. Copy and save them for the next section.
- Create the IAM policy and role, then run the SQL scripts. To learn more, read Step 3: Create AWS resources.
- Return to the configuration page. Under “Step 4. Set up AWS IAM access,” paste the role ARN into IAM role ARN.
- Select the “I have read and agree to the Integration Terms and Conditions” checkbox.
- Click Test connection and save.
Choose custom object names
Additional fields (optional) renames the objects the setup scripts create. Leave a field blank to use the default name. For a project keymy-project and an environment key staging, the default names are:
- Experimentation database name: The database LaunchDarkly creates and connects to. Defaults to
ld_experimentation. - Experimentation group name: The permission group LaunchDarkly uses to write experiment results. Defaults to
ld_experimentation_role. - Data source group name: The permission group LaunchDarkly uses to read your metrics. Defaults to
ld_data_source_role. - Experimentation user name: The service user LaunchDarkly authenticates as to write experiment results. Defaults to
ld_experimentation_user_my_project__staging. - Data source user name: The service user LaunchDarkly authenticates as to read your metrics. Defaults to
ld_data_source_user_my_project__staging. - Results schema name: The schema, inside the experimentation database, where LaunchDarkly writes computed experiment results. Defaults to
results_my_project__staging.
__.
A custom name must meet all of the following rules:
- Use lowercase letters, digits, and underscores.
- Start with a letter or an underscore.
- Use 127 characters or fewer.
- Do not use a Redshift reserved word, such as
user,group, ortable. - Use a different name for each permission group, and a different name for each service user.
- A service user name matches a service user on another Redshift native Experimentation integration on the same cluster.
- A service user name matches the user on a Redshift Data Export destination on the same cluster.
- The experimentation database is the database a Redshift Data Export destination uses on the same cluster, including the default database
ld_export. - Two integrations on the same cluster would write results to the same schema in the same experimentation database. They can share an experimentation database when each integration uses a different results schema.
Step 3: Create AWS resources
Use the IAM policies and SQL scripts from the configuration page to create the required resources in your AWS account.Create the IAM policy
To create the IAM policy:- Navigate to IAM > Policies in the AWS console.
- Click Create policy.
- Select the JSON tab.
- Paste the IAM permissions policy you copied from LaunchDarkly.
- Click Next.
- Enter a policy name, such as
LaunchDarklyRedshiftAccess. - Click Create policy.
Create the IAM role
To create the IAM role:- Navigate to IAM > Roles in the AWS console.
- Click Create role.
- Select Custom trust policy.
- Paste the IAM trust policy you copied from LaunchDarkly.
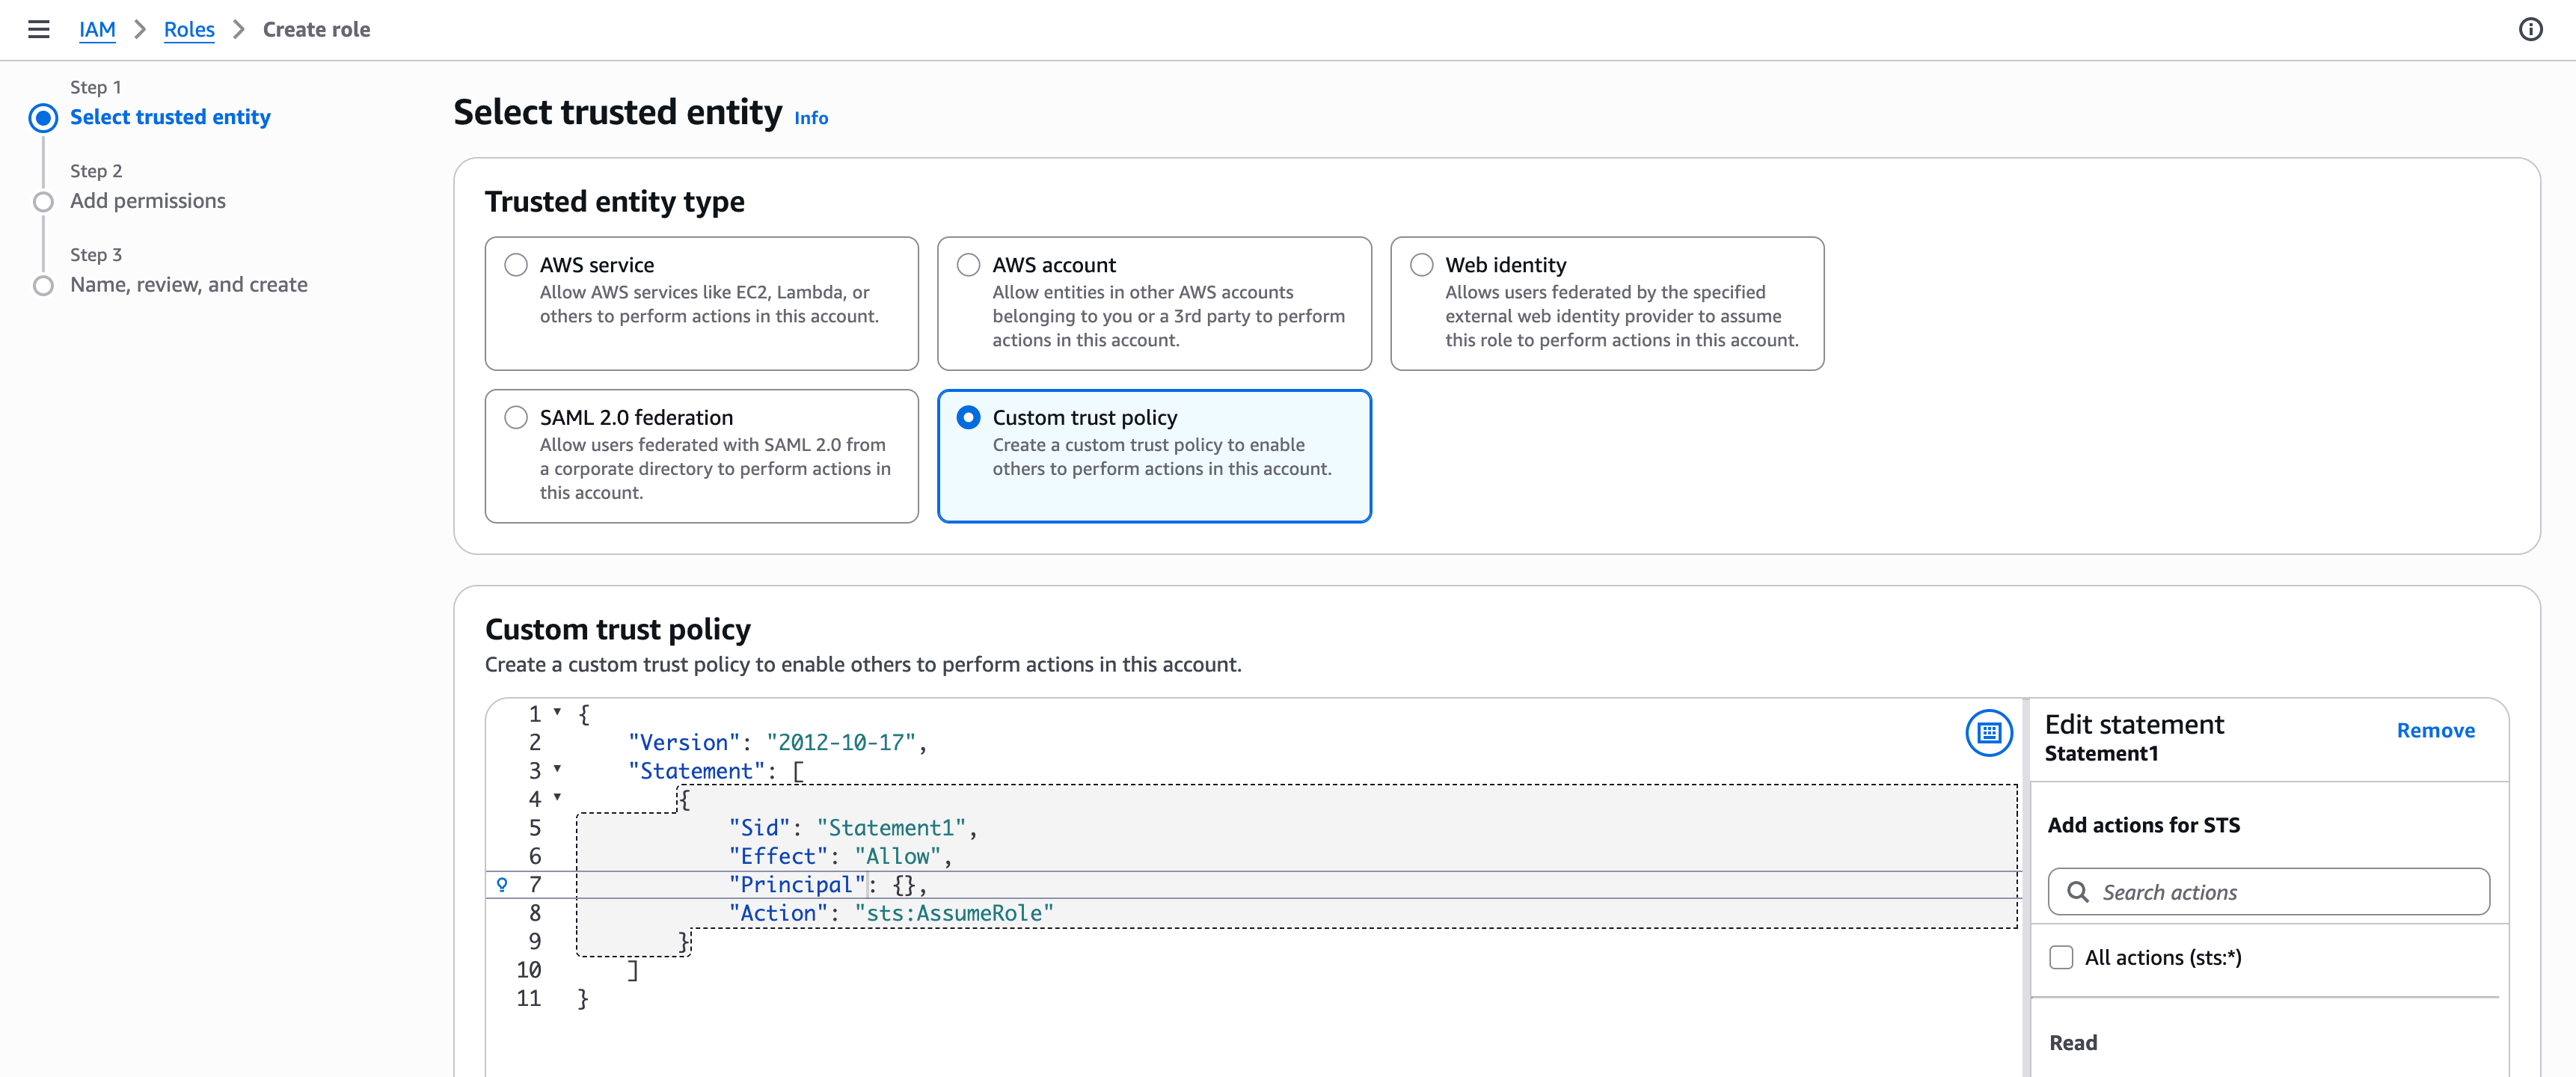
The custom trust policy in Redshift.
- Click Next.
- Search for and select the policy you created in the previous section, such as
LaunchDarklyRedshiftAccess. - Click Next.
- Provide a role name, such as
LaunchDarklyRedshiftRole. - Click Create role.
- Copy the Role ARN from the role summary page.
- Return to the LaunchDarkly configuration page and paste the role ARN into IAM role ARN.
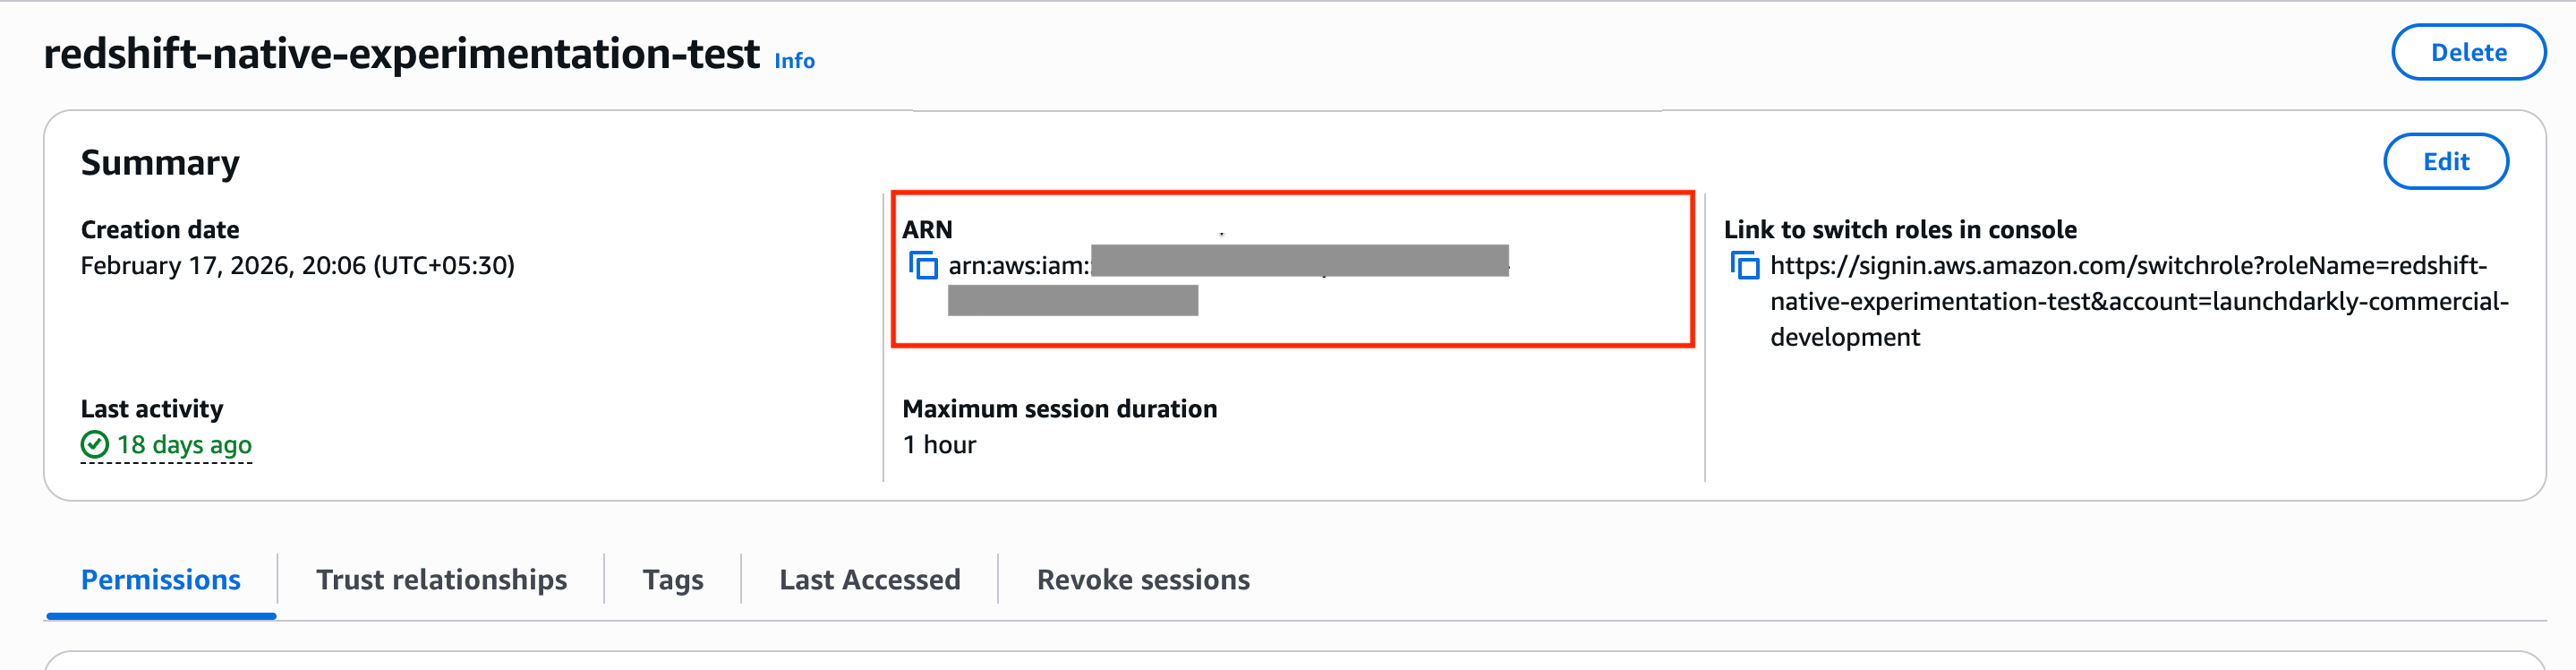
The IAM Role ARN in Redshift.
Run the SQL setup scripts
Run the four SQL scripts in order. Each script is labeled on the configuration page:- “Create the experimentation database, groups, and users”
- “Grant access to the results schema”
- “Grant access to the Data Export schema”
- “Grant LaunchDarkly read access to your metrics”
Step 4: Configure network access
Configure your Redshift cluster to accept connections from the following LaunchDarkly IP addresses:- Navigate to your Redshift cluster in the AWS console.
- Go to Properties > Network and security.
- Edit the VPC security group.
- Add inbound rules for each of the following IPs. Set the Type to “Custom TCP” and the Port to “5439”:
52.21.152.96/3252.200.35.24/3252.200.50.23/3254.144.218.89/3254.221.221.197/3234.236.6.43/32
Step 5: Verify the connection
Test connection and save checks that LaunchDarkly can connect to the cluster and that the experimentation permission group can use the Data Export schema. If the check fails, LaunchDarkly does not activate the integration. The draft remains, which means you can correct the setup and try again. If you just created the IAM role, wait a minute for the role to propagate, then click Test connection and save again. After LaunchDarkly activates the integration, the configuration page shows “Connection status.” A green Healthy status confirms LaunchDarkly can connect to Redshift and has the correct permissions. If you encounter issues with your setup, you can take the following actions:- Check the integration status in LaunchDarkly for error messages
- Review your AWS CloudTrail logs for IAM role assumption attempts
- Check your Redshift system tables for connection and query logs
- Your integration configuration ID
- Any error messages from the connection status
- Your AWS CloudTrail logs, if available
- Your Redshift cluster configuration details, including endpoint, region, and version