

Prerequisites
To use Okta with LaunchDarkly, you must meet the following prerequisites:- You must have Administrator privileges in LaunchDarkly
- You must have Administrator privileges in Okta
- You must have your Assertion consumer service URL and Entity ID from LaunchDarkly’s SAML configuration page
- You must have access to the email addresses of the account members you wish to configure
Supported features
The Okta integration for LaunchDarkly supports the following features: SSO:- Service provider-initiated (SP-initiated) SSO
- Identity provider-initiated (IdP-initiated) SSO
- JIT (Just-In-Time) provisioning
- Import users
- Import groups
- Create users
- Update user attributes
- Deactivate users
- Group push (also called team sync)
Configure Okta SAML SSO for LaunchDarkly
To authorize Okta to manage your LaunchDarkly account members:- Log in to Okta as an administrator.
- Navigate to Applications and click Browse App Integration Catalog.
- In the search bar, type “LaunchDarkly.” The LaunchDarkly app appears in the search results:
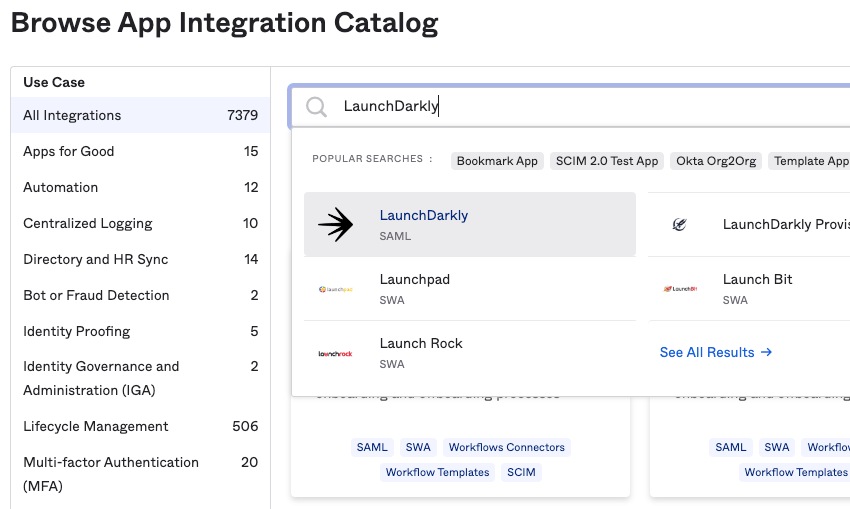
The "Browse App Integration Catalog" screen in Okta, with search results populating.
- Click Add. The General Settings page for the LaunchDarkly app appears.
- (Optional) Give the app a custom name by modifying the Application Label.
- (Optional) Configure the Application Visibility checkboxes however you prefer.
- Click Done. The LaunchDarkly Application page appears.
Use Okta to manage LaunchDarkly members with SCIM
- Navigate to the LaunchDarkly app in Okta.
- Click the Provisioning tab. The Integration page appears.
-
Click Configure API Integration:
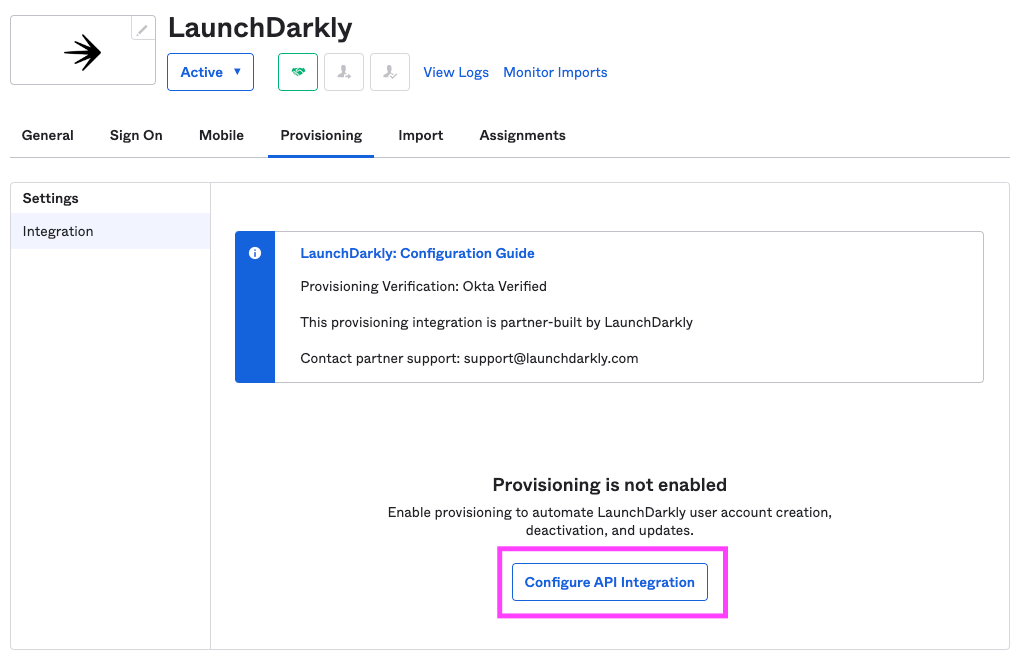
The "Integration" page in Okta, with the "Configure API integration" button called out.
- Check the Enable API Integration checkbox.
- Check the Import Groups checkbox.
- Click Save. An authorization window appears.
- Click Authenticate with LaunchDarkly. A new browser window appears describing what permissions Okta requires to integrate with LaunchDarkly.
- Click Authorize. You return to the Integration page.
- Click Save. The To App page appears.
-
In the Provisioning to App section, click Edit. Fields on the screen become configurable. Set the following fields to Enable:
- Create Users
- Update User Attributes
- Deactivate Users
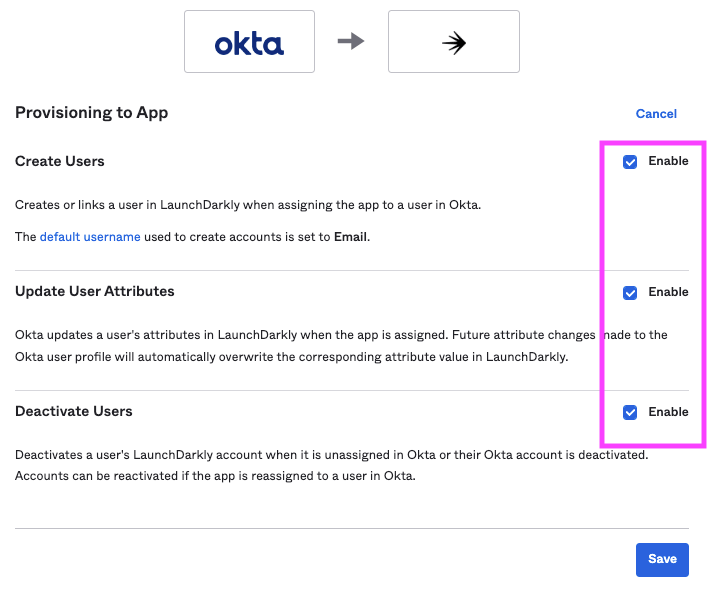
The "Provisioning to App" page in Okta, with the "Create Users," "Update User Attributes," and "Deactivate Users" options enabled.
- Click Save.
Set email addresses as the username
Next, you must configure Okta to recognize email addresses as the usernames for individual account members.- Navigate to the LaunchDarkly app in Okta.
- Click the Sign On tab. The Settings page appears.
- Click the Edit button in the top right corner of the Settings page.
- Scroll to the “Advanced Sign-on Settings” section and enter your Assertion consumer service URL.
- Enter your Entity ID.
-
In the “Credential Details” section, set the Application username format to “Email”:
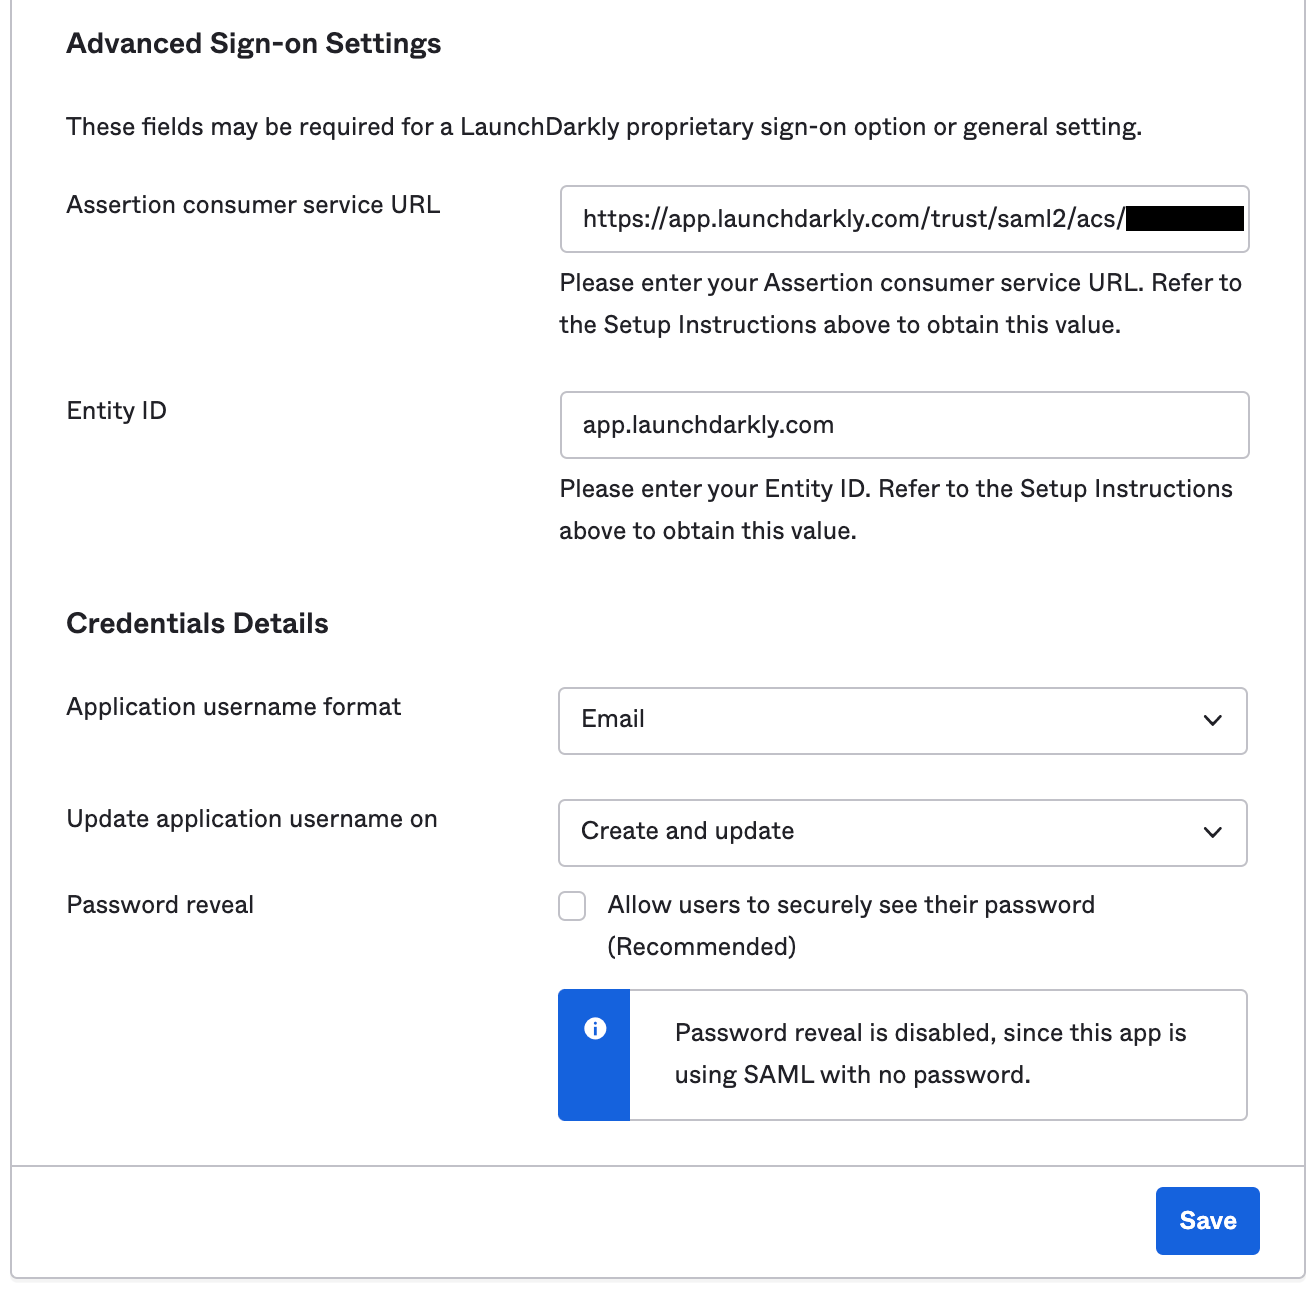
The "Credentials Details" screen, with username format set to "Email."
- Click Save.
Deactivate and delete members
If you have enabled SCIM and you deactivate a user in Okta, then Okta will deactivate the member and remove them from your LaunchDarkly account. If you have configured Okta SAML SSO but have not enabled SCIM, then deactivating a user in Okta will not automatically remove them from your LaunchDarkly account. In that case, you will need to remove the member from LaunchDarkly manually.Assign custom roles in Okta
You can assign custom roles that you created in LaunchDarkly to account members through the Okta UI. Use Okta’s Group Assignment feature to set up custom roles for a LaunchDarkly account member or group of members. The roles you set up in Okta are passed to LaunchDarkly as member roles.- Navigate to the LaunchDarkly app in Okta.
- Navigate to the LaunchDarkly app’s General Settings page.
- Navigate to the Assignments tab.
-
In the Assign menu, choose “Assign to Groups”:
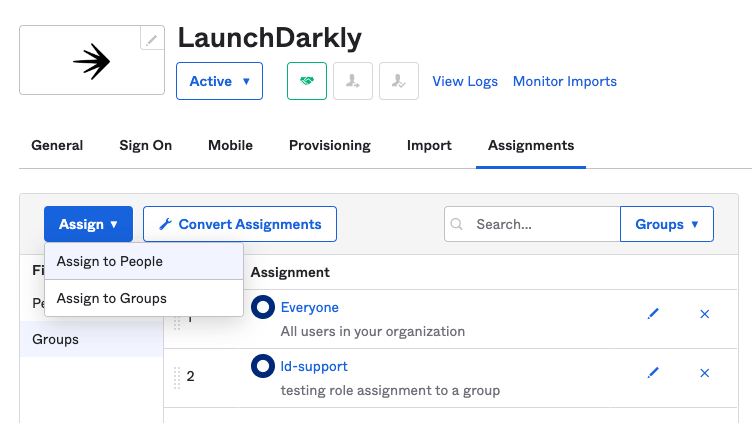
The "Assign" menu.
-
Find the groups you want to assign custom roles to and click Assign:
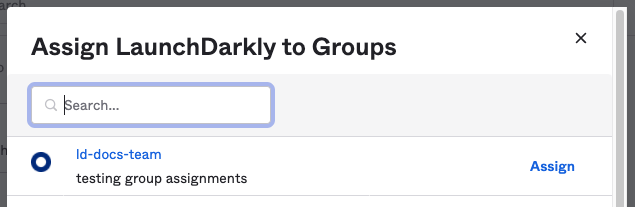
The "Assign LaunchDarkly to Groups" screen.
-
Enter the key for the custom role you wish to assign to this group. This connects one role to the selected group.
You cannot assign roles and custom roles at the same timeYou can assign either a role or a custom role in this step, but not both. If you enter values in both the Role and customRole fields, LaunchDarkly will ignore the Role field. If you want to assign a custom role, leave the Role field set to its default value.
-
Add more custom roles by entering additional keys in the customRole field separated by commas, with no spaces:
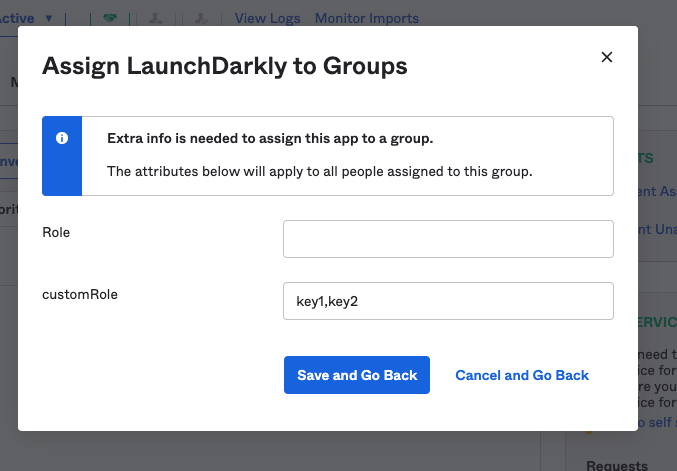
The "Add Another Role" screen.
- Click Save and Go Back.
Add custom roles to new users
If you have custom roles already configured in Okta, you can set up custom roles in Attribute Mapping when you first set up a user in Okta: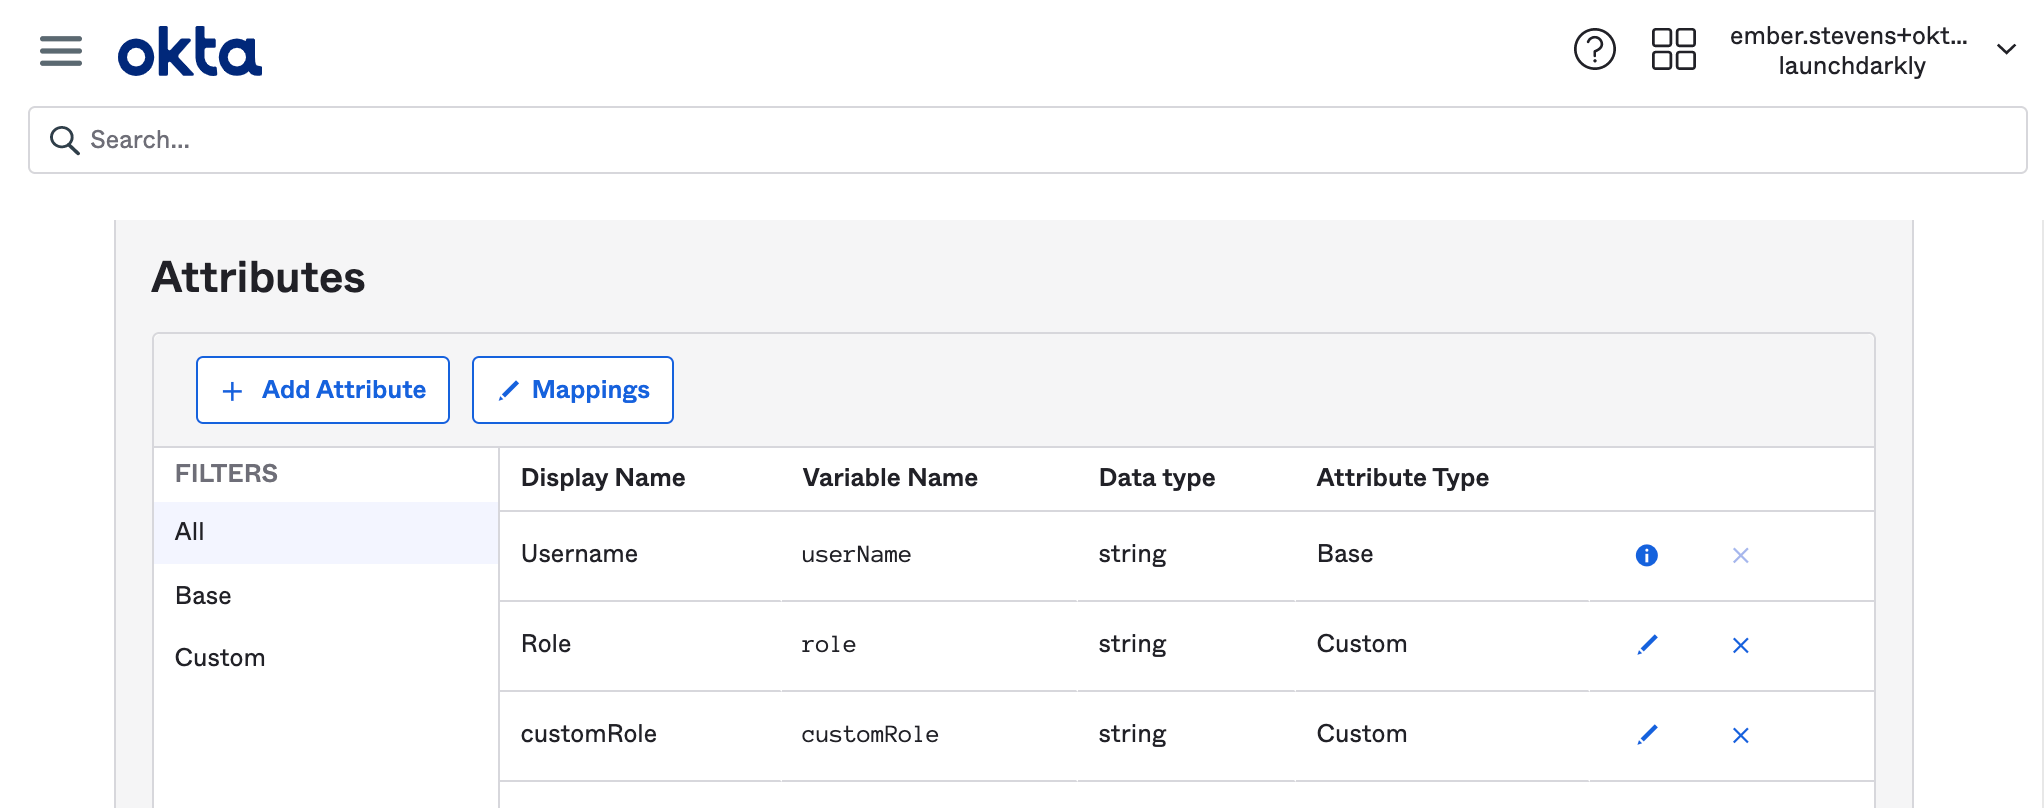
The Okta LaunchDarkly "Attributes" mapping screen with custom roles available.
Use Okta to manage LaunchDarkly teams with SCIM
You can use Okta to create new teams in LaunchDarkly, or link an Okta group to an existing team, to maintain team memberships within Okta. Prerequisites:- You must configure SCIM provisioning in the LaunchDarkly Okta app.
- You must have turned on team sync with SCIM.
- Any group members that you want to push to a team in LaunchDarkly must already be provisioned and assigned to the LaunchDarkly application in Okta. After you sync an Okta group with a LaunchDarkly team, you will no longer be able to make team membership changes in the LaunchDarkly UI.
Push an Okta group to create a new team
To push an Okta group to create a new team in LaunchDarkly:- Navigate to the “Applications” page within Okta and open the LaunchDarkly app.
- On the “Push Groups” tab, click Push Groups. Select whether to search for a group by name or by rule.
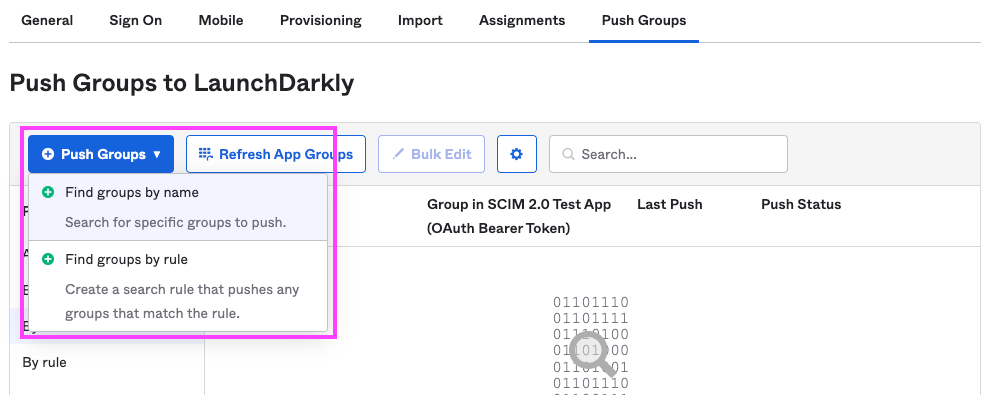
The "Push Groups" tab within the LaunchDarkly Okta application.
- Search for the name of the group you wish you to push, then click save.
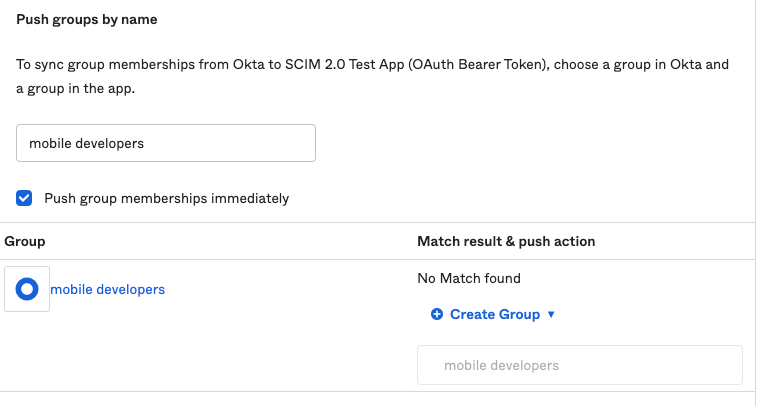
The "Push groups by name" screen in Okta.
- The group now appears in the LaunchDarkly app’s group list. It may take a moment for the “Push Status” column to change from “Pushing” to “Active.”
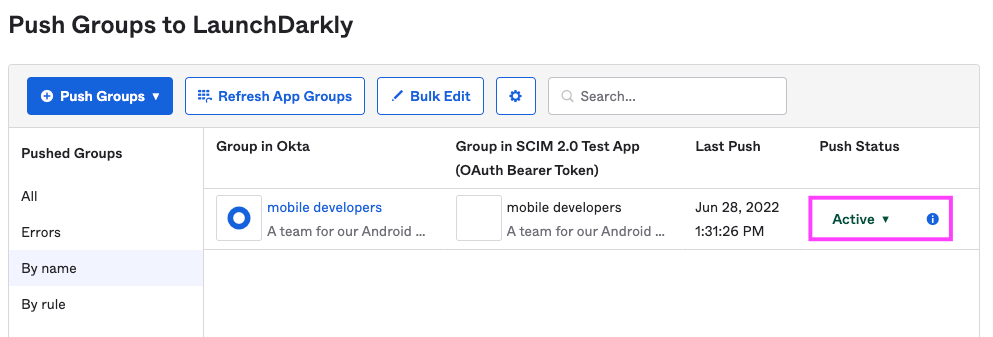
An active group push in Okta.
Link an Okta group to an existing team
LaunchDarkly also supports Group Linking with Okta, which adds the ability to push a group name that already exists within the LaunchDarkly application and link it to that team. To link an Okta group to an existing LaunchDarkly team:- Navigate to the “Applications” page within Okta and open the LaunchDarkly app.
- On the “Push Groups” tab, click Push Groups. Select whether to search for a group by name or by rule.
The "Push Groups" tab within the LaunchDarkly Okta application.
- Find the group you wish to link by searching for its name. Okta will attempt to find a matching team based on the group name.
- If Okta doesn’t automatically select a group based on the team name, click the “Create Group” menu and select “Link Group,” then search for the team you wish to link.
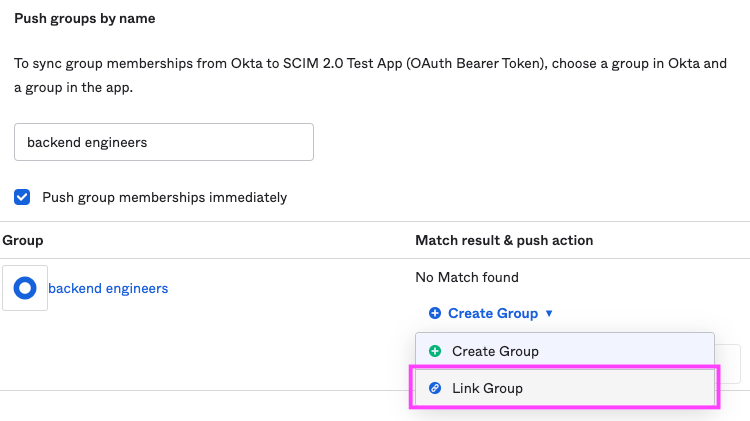
Linking a group to an existing LaunchDarkly team in Okta.
- The group now appears in the LaunchDarkly application’s group list. It may take a moment for the “Push Status” column to change from “Pushing” to “Active.”
An active group push.
Unlink pushed groups in Okta
After you have synced a team with an Okta group, you cannot unsync it. The only way to remove the team is to unlink the pushed group in Okta.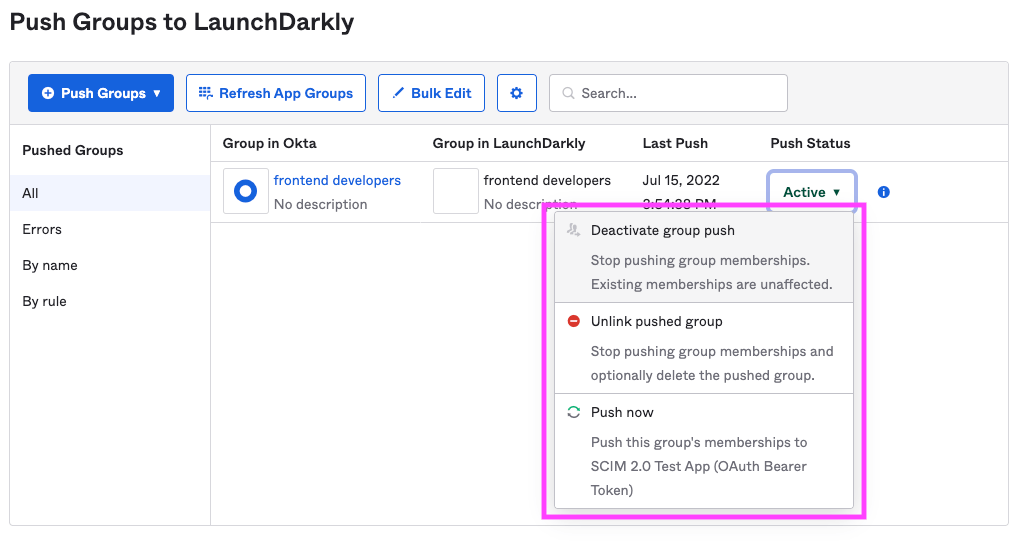
Unlink and deactivate group push in Okta.
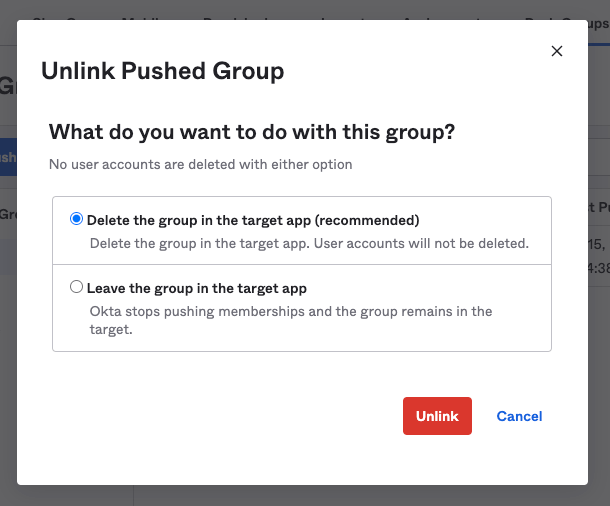
Unlink pushed group in Okta.