The kind of experiment you build is determined by the type of metric you attach to the experiment. You can use LaunchDarkly hosted metrics or metrics from an external warehouse you specify.You can run A/B experiments and A/A tests using any metric or standard metric group. You can also run A/B experiments using funnel metric groups or warehouse native metrics.You can also choose to use Data Export to export data from your experiments to a third-party analysis tool, which doesn’t require you to select any metrics when you create the experiment.
After you decide on an experiment type, you can create a new metric or reuse an existing metric in your experiment. To learn how, read Metrics.LaunchDarkly automatically creates metrics from AI SDKs, which you can use in experiments on configs. To learn more, read AgentControl config autogenerated metrics.
Percentile analysis and sequential testingIf you are using a percentile analysis metric in a frequentist experiment, the experiment must use sequential testing.
Before you begin an experiment, create a flag or config with the variations you plan to test. Configs are on by default, but flags are not. You do not need to toggle on the flag to create the experiment, but you must toggle it on before you start an experiment iteration.When you create the experiment, you will select this flag and one of its rules to run the experiment on. The context kind that your flag rule targets should match the randomization unit of your experiment. We recommend running the experiment on a rule that targets a subsection of your contexts rather than the default rule. This helps ensure consistent experiment results.To learn more, read Creating new flags, Creating flag variations, Create configs, and Create and manage config variations.If you are creating a warehouse native experiment using custom assignment sources, you do not need to choose a flag or config.
You can build and run multiple experiments on the same flag or config as long as there is only one running experiment per rule. You cannot run multiple experiments on the same rule at the same time.
Choose LaunchDarkly flag or config to run your experiment on a flag or config.
Alternatively, if you are building a warehouse native experiment using a custom assignment source, choose Warehouse assignment source and expand the procedure below.
Expand assignment source procedure
Choose your data source from the Assignment source menu.
Enter your Experiment ID.
Choose the context kind you want to analyze results by from the Randomize by menu. This must match the randomization unit your metrics use.
Enter the Variants you want to experiment on.
(Optional) Enter a Display name for each variant to give it a friendlier label in your results.
Select which variant is the Control.
Enter the percentage of traffic you expect each variant to receive in the Expected split section, or click Split equally.
Choose a Flag or config to use in the experiment.
(Optional) If you want to create a new flag or config, click Create flag or Create config.
(Optional) Check the Run as A/A test checkbox if you plan to compare two different, but identical, variations. You must define these variations in your codebase in the exact same way.
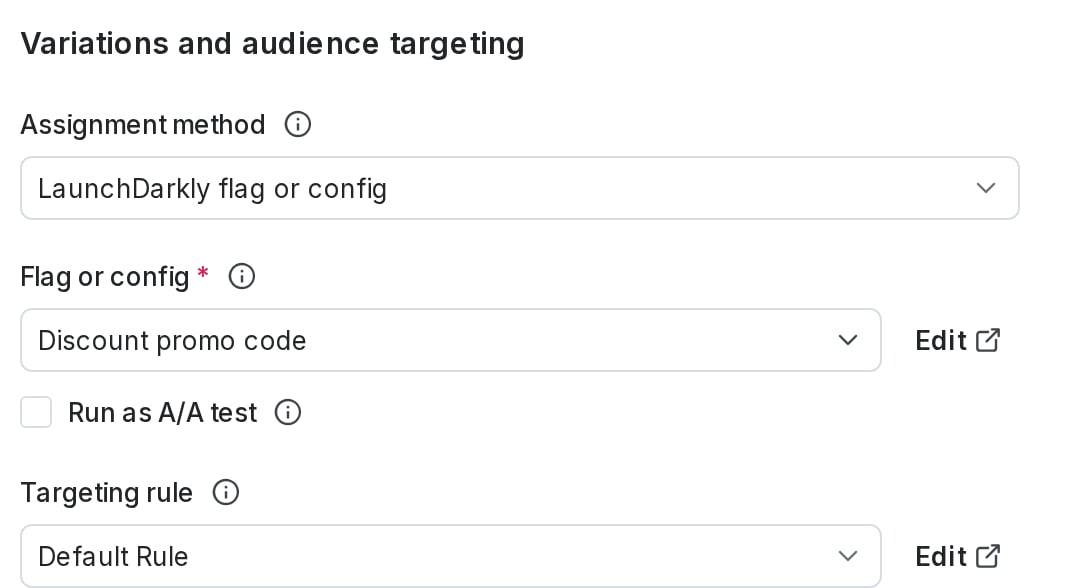
Choose a Targeting rule for the experiment audience.
If you want to restrict your experiment audience to only contexts with certain attributes, create a targeting rule on the flag or config you include in the experiment and run the experiment on that rule. The context kind that the flag rule targets should match the randomization unit of your experiment.
If the flag or config doesn’t have any targeting rules, the default rule is the only option.
The "Variations and audience targeting" section with the flag default rule chosen.
(Optional) If you want to exclude contexts in this experiment from other experiments you specify, click Add experiment to mutual exclusion layer and select a layer.
Expand layer options
A layer is a set of experiments that cannot share traffic with each other. All of the experiments within a layer are mutually exclusive, which means that if a context is included in one experiment, LaunchDarkly will exclude it from any other experiments in the same layer. All of the experiments within a layer must randomize by the same context kind, such as “user.”To add the experiment to an existing layer:
Click Select layer.
Search for and choose the layer you want to add the experiment to.
Enter a Reservation amount. This is the percentage of the contexts within this layer you want LaunchDarkly to include in this experiment.
Click Save layer.
If you need to create a new layer:
Click Create layer.
Add a Name and Description.
Click Create layer.
Enter a Reservation amount. This is the percentage of the contexts within this layer you want LaunchDarkly to include in this experiment.
Click Save layer.
Choose the Variation served to contexts outside this experiment. Contexts that match the selected targeting rule but are not in the experiment will receive this variation.
Select the percentage of contexts that match the experiment’s targeting rule to include in the experiment.
(Optional) Uncheck Disable reshuffling to allow traffic reshuffling. To learn more, read Traffic reshuffling.
(Optional) Click Apply stratified sampling to reduce covariate imbalance. Expand the procedure below for instructions on how to add covariate values.
Expand stratified sampling instructions
You can use stratified sampling to re-randomize the contexts in your experiment treatments. Re-randomization helps eliminate covariate imbalance and reduce false positives and false negatives in your experiment results.Here’s how:
Avoid PII in CSV filesLaunchDarkly stores the information you upload in your CSV files. For this reason, we recommend that you do not upload any personally identifying information (PII). If you have PII in LaunchDarkly that you want to delete, contact Support.
If this experiment is a Data Export experiment, click the Data Export only checkbox. Data Export experiments do not require a metric or statistical approach, and don’t allow attribute selection.To add metrics to the experiment:
Select a Metric source.
If you are creating an experiment using warehouse native metrics, select your external warehouse. Otherwise, select “LaunchDarkly.”
Select one or more Metrics or metric groups.
(Optional) If you want to create a new metric, click Create to create and use a new metric or new metric group.
You can add only one funnel metric group per experiment.
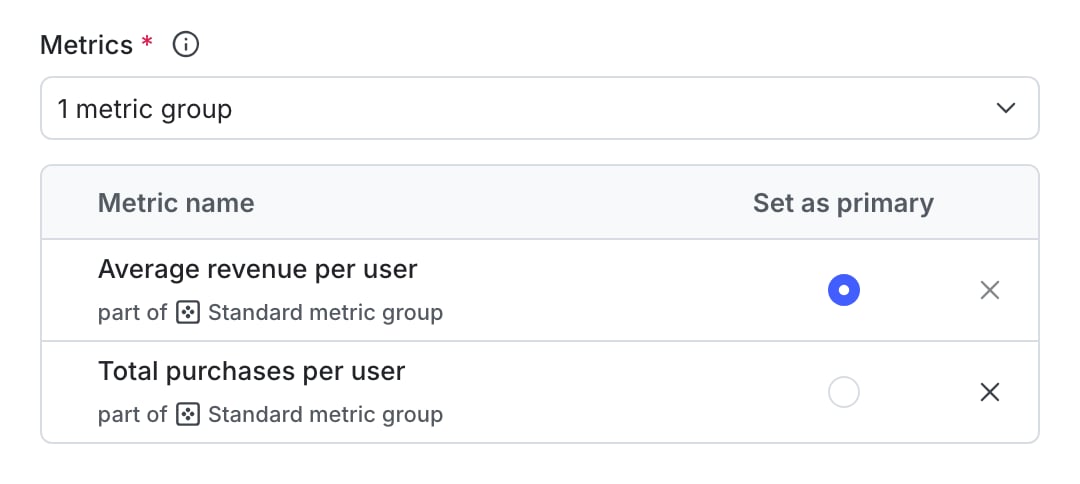
(Optional) If you have added multiple metrics or a standard metric group and want to change the primary metric, click the metric’s Set as primary radio button.
A metric group with the primary metric indicated.
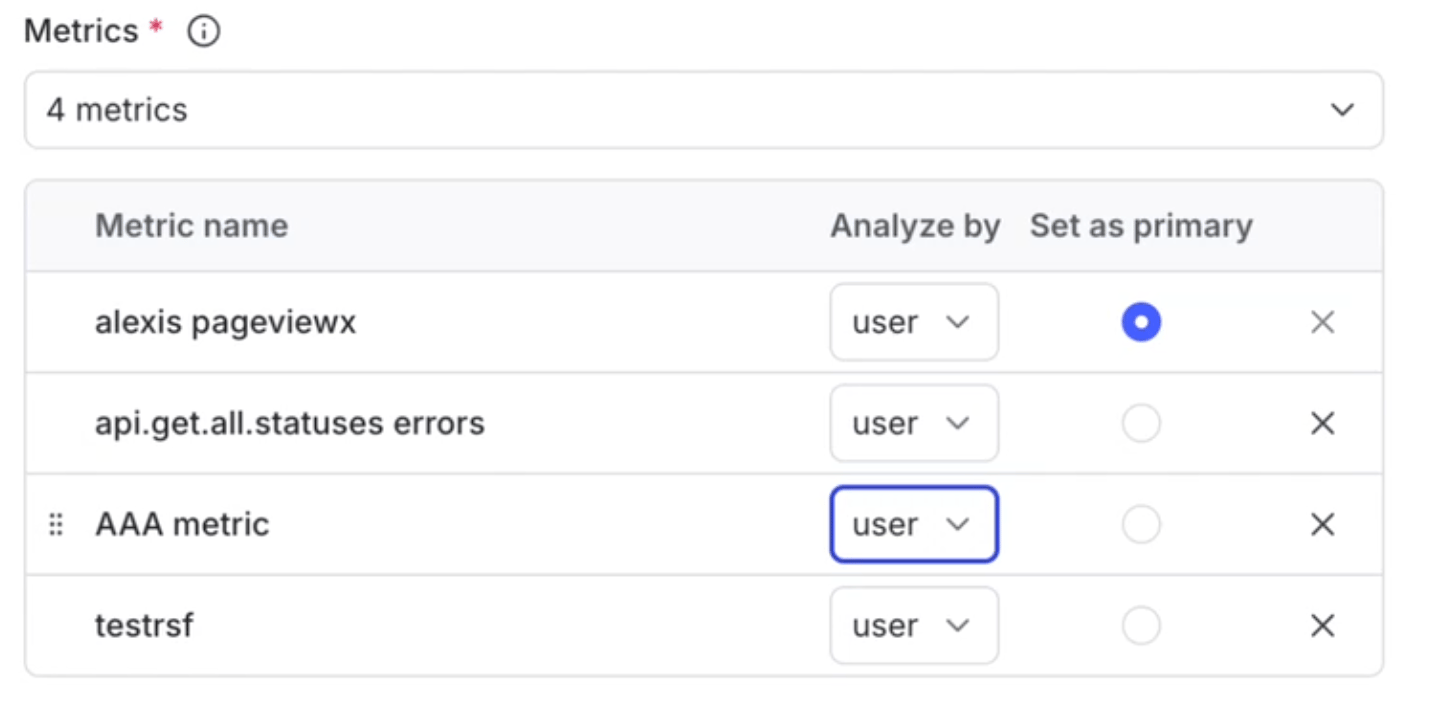
(Optional) For Snowflake native experiments that use frequentist statistics, use the Analyze by menu to choose the context kind to use for analyzing each metric.
Expand metric analysis unit options
By default, each metric’s analysis unit matches the context kind of the experiment’s randomization unit. If you choose a different metric analysis unit, you must ensure that the selected context kind belongs to exactly one randomization unit. To learn more, read Randomization units and metric analysis units.
Selecting the analysis unit for Snowflake warehouse metric.
Analysis unit selection is not available for metric groupsThe Analyze by menu appears only for individual Snowflake metrics that you add to an experiment. Snowflake metrics that were added as part of a metric group always use the experiment’s randomization unit for analysis.
To choose a statistical method of analysis for the experiment:
Select a Statistical approach of Bayesian or frequentist. Expand the section below to read about the options for each.
Expand statistical approach options
You can select a statistical approach of Bayesian or Frequentist. Each approach includes one or more analysis options.We recommend Bayesian when you have a small sample size of less than a thousand contexts, and we recommend Frequentist when you have a larger sample size of a thousand or more. Frequentist is the default statistical approach in LaunchDarkly.The Bayesian options include:
Select a preset or custom success Threshold:
90% probability to beat control is the standard success threshold, but you can raise the threshold to 95% or 99% if you want to be more confident in your experiment results.
You can lower the threshold to less than 90% using the Custom option. We recommend a lower threshold only when you are experimenting on non-critical parts of your app and are less concerned with determining a clear winning variation.
(Optional) Check Enable sequential testing: Sequential testing lets you act on the results of your experiment at any time, instead of waiting for a specific sample size. To learn more, read Fixed-horizon versus sequential.
Select a Significance level:
0.05 p-value is the standard significance level, but you can lower the level to 0.01 or raise the level to 0.10, depending on whether you need to be more or less confident in your results. A lower significance level means that you can be more confident in your winning variation.
You can raise the significance level to more than 0.10 using the Custom option. We recommend a higher significance level only when you are experimenting on non-critical parts of your app and are less concerned with determining a clear winning variation.
Choose a Direction of hypothesis test:
Two-sided: We recommend two-sided when you’re unsure about whether the difference between the control and the treatment variations will be negative or positive, and want to look for indications of statistical significance in both directions.
One-sided: We recommend one-sided when you feel confident that the difference between the control and treatment variations will be either negative or positive, and want to look for indications of statistical significance only in one direction.
(Optional) If you want to include the experiment in a holdout, scroll to the “Advanced” section and select a Holdout name.
Experiments cannot be in a holdout and in a layer at the same timeExperiments can either be in a holdout or in a layer, but not both. If you add the experiment to a layer, you cannot add it to a holdout as well.
(Optional) If you want to be able to filter your experiment results by attribute, scroll to the “Advanced” section and select up to 20 context Attributes to filter results by.
Scroll to the top of the page and click Save.
If needed, you can save your in-progress experiment design to finish later. To save your design, click Save at the top of the creation screen. LaunchDarkly saves your in-progress experiment design and displays it on the Experiments list. To finish building the experiment, click the experiment’s name and continue editing.After you have created your experiment, the next step is to toggle on the flag. Configs are on by default. Then, you can start an iteration.
After you create an experiment and toggle on the flag, you can start an experiment iteration in one or more environments. To learn how, read Starting and stopping experiment iterations.Experiment iterations allow you to record experiments in individual blocks of time. To ensure accurate experiment results, when you make changes that impact an experiment, LaunchDarkly starts a new iteration of the experiment.