

Edit experiments
Some edits to an existing experiment trigger a new experiment iteration when you save your changes. When LaunchDarkly starts a new experiment iteration, it will reshuffle traffic into new variations unless you prevent traffic reshuffling. Here are the changes you can make to an existing experiment:- You can make changes to the name of an experiment or add new metrics to an existing experiment at any time. LaunchDarkly will not start a new iteration of the experiment when you make these changes.
- You can make changes to the hypothesis, randomization unit, existing metrics, and audience of a running experiment. However, LaunchDarkly will start a new iteration of the experiment when you save your changes, and may reshuffle traffic in the new iteration.
- If you don’t want LaunchDarkly to reshuffle traffic when you edit an experiment, check the Disable reshuffling box. To learn more, read Traffic reshuffling.
- You cannot make changes to the flag used in an existing experiment. If you want to use a different flag, you must create a new experiment.
Change an experiment name
To change an experiment’s name:- Navigate to the Design tab of your experiment.
- Click Edit design.
- Edit the Name as needed.
- Click the checkmark icon.
Add additional metrics
To add additional metrics to a running experiment, without removing any existing metrics:- Navigate to the Results tab of your experiment.
- Scroll to the results table and click Add.
- Select Metrics:
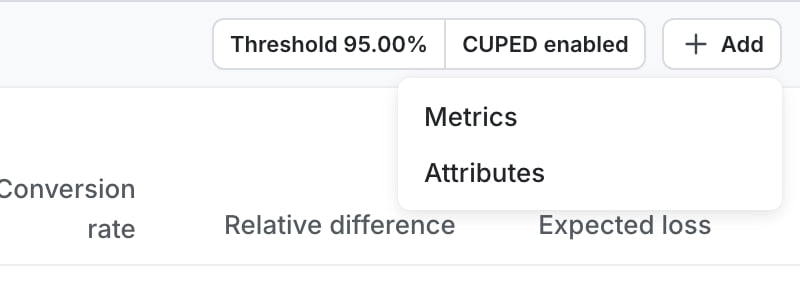
The add metric option on a running experiment.
- Select additional metrics or metric groups.
- Click Add metrics.
- LaunchDarkly hosted metrics retroactively display results from the last 100 days or from the start of the experiment’s current iteration, whichever is more recent.
- Warehouse native metrics retroactively display results from the start of the experiment’s current iteration.
Metric event update timing
After you add metrics to an existing experiment, the time it takes for LaunchDarkly to begin sending events for those metrics depends on the metric type and age of the experiment iteration:| Metric type | Iteration age | Time to update |
|---|---|---|
| LaunchDarkly hosted | Less than one day | Approximately five minutes |
| LaunchDarkly hosted | 1-60 days | Approximately one hour |
| LaunchDarkly hosted | More than 60 days | Approximately one day |
| Warehouse native | Any | 15-20 minutes |
Change an experiment’s hypothesis, randomization unit or existing metrics
To change an experiment’s hypothesis or randomization unit, or to remove and replace existing metrics:- Navigate to the Design tab of your experiment.
- Click Edit design.
- (Optional) Edit the Hypothesis as needed.
- (Optional) Choose a different randomization unit from the Randomize by menu as needed.
- (Optional) Choose different Metrics as needed.
- Scroll to the top of the page and click Save, or if your environment requires approvals, click Request approval.
- If the experiment was running when you made edits, a “Save experiment design?” dialog appears. Enter a reason for the change and click Save & start new iteration, or if your environment requires approvals, click Continue and then Request to start new iteration.
How metric versions affect experiments
When you make certain edits to a metric, LaunchDarkly creates a new version of the metric and increments the metric version number. You then have the option to update any experiments using that metric to the new metric version. To update an experiment to the newest version of a metric, navigate to the experiment’s Results tab. Click Update above the results table.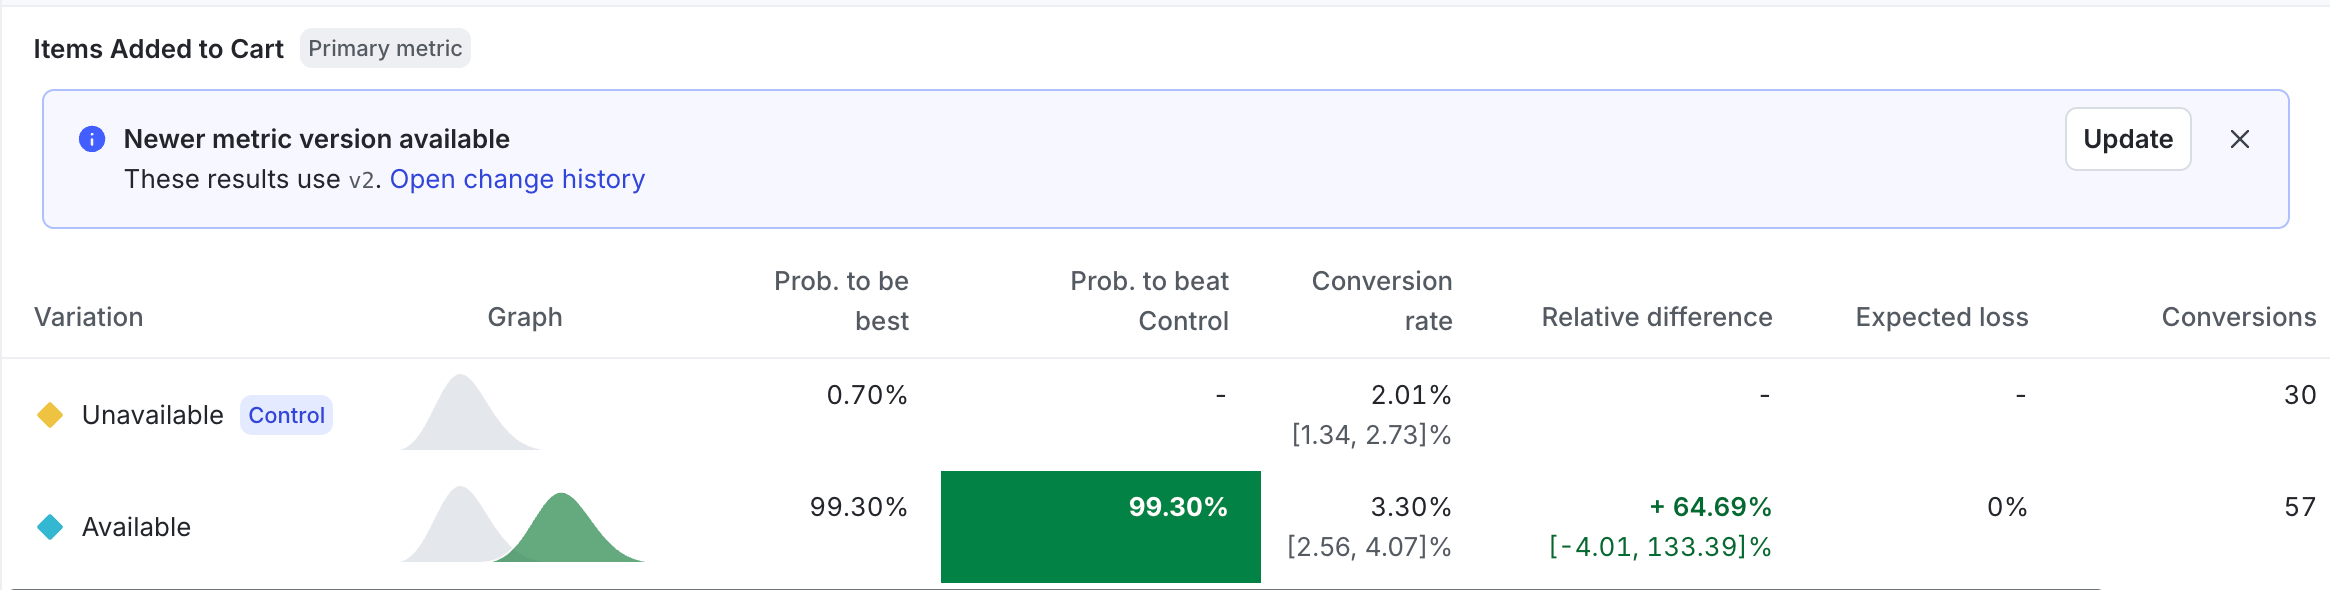
The "Newer metric version available" message the Results tab.
Change an experiment’s audience allocation
To edit the audience allocation of an experiment:- Navigate to the Design tab of your experiment.
- Click Edit design.
- Navigate to the “Audience allocation” section and update the percentage of contexts to include in the experiment as needed.
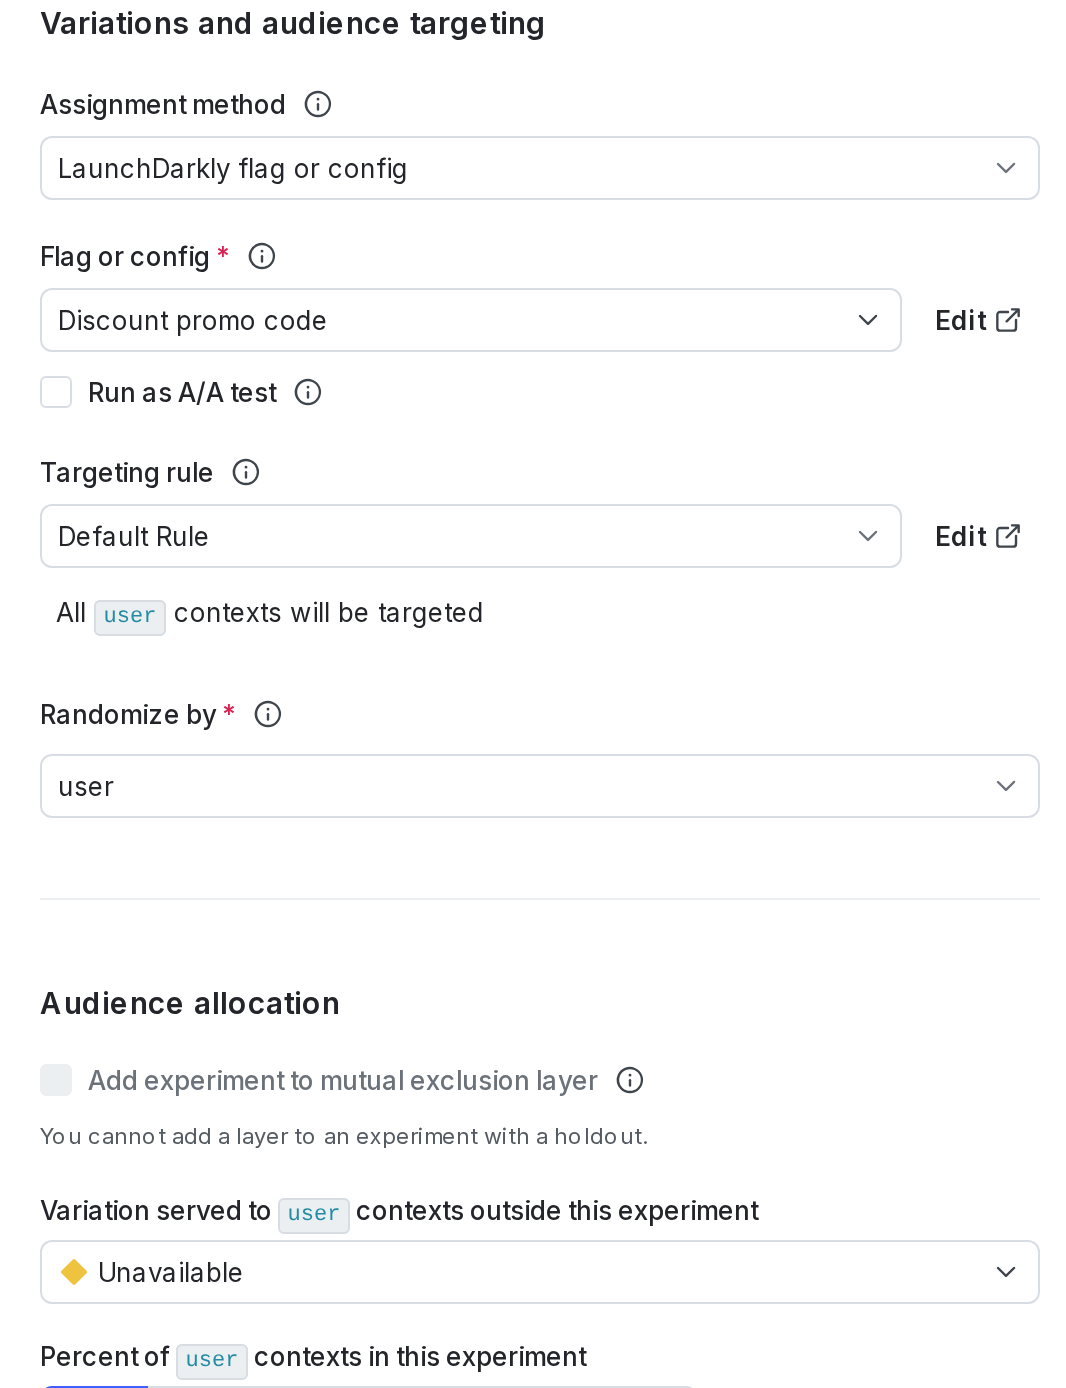
The "Audience targeting" section of an experiment.
- Scroll to the top of the page and click Save & start new iteration, or if your environment requires approvals, Save & request approval for new iteration.
- Enter a Reason for changes.
- If your environment requires approvals, click Continue.
- Choose one or more reviewers from the Reviewer(s) menu.
- Enter a Comment.
- If your environment requires approvals, click Continue.
- Click Save changes and start new iteration or Request to start new iteration.
Change an experiment’s variations split or images
To change the percentage of contexts assigned to each variation, or to change or upload images associated with variations:- Navigate to the Design tab of your experiment.
- Click Edit design.
- Navigate to the “Variations split” section.
- (Optional) Click Edit to change the percentage of contexts assigned to each variation. The “Variation split” dialog appears.
- Click Split equally to evenly divide contexts between variations, or use the input fields to assign a percentage of contexts to each variation.
- Click Save audience split.
- (Optional) Click the image icon next to a variation to upload an image associated with that variation.
- Click Upload image next to a variation you want to associate an image with.
- Select a PNG, JPEG, or WebP file from your machine.
- Click Save.
- Scroll to the top of the page and click Save & start new iteration, or if your environment requires approvals, Save & request approval for new iteration.
- Enter a Reason for changes.
- If your environment requires approvals, click Continue.
- Choose one or more reviewers from the Reviewer(s) menu.
- Enter a Comment.
- If your environment requires approvals, click Continue.
- Click Save changes and start new iteration or Request to start new iteration.
Change an experiment’s flag rule
To change the flag rule an experiment is running on, you must stop the experiment iteration, change the rule, and start a new iteration. This lets you select a flag variation to serve to any contexts that will no longer be included in the experiment. To change the flag rule:- Navigate to the Design tab of your experiment.
- Click Stop experiment. The “Stop experiment” dialog appears.
- Select a winning variation to serve while the experiment is stopped.
- Enter a Reason for stopping.
- Click Stop experiment.
- Click Edit design.
- Navigate to the “Variations and audience targeting” section and update the Targeting rule as needed.
- You can also update the percentage of contexts to include in the experiment.
- Scroll to the top of the page and click Save, or if your environment requires approvals, Save & request approval for new iteration.
- If the experiment was running when you made edits, a “Save experiment design?” dialog appears. Enter a reason for the change and click Save & start new iteration, or if your environment requires approvals, click Continue and then Request to start new iteration.
Clone experiments
You can clone an existing experiment into a new environment and make edits to the new experiment’s configuration. To clone an experiment:- Navigate to the Experiments list.
- Click on the three-dot overflow menu for the experiment you want to clone.
- Select Clone experiment. The “Clone experiment” dialog opens.
- Select a destination environment for the new experiment.
- Click Clone experiment.
Archive experiments
You can archive experiments that have concluded, as well as the flags and metrics attached to them, but you cannot permanently delete experiments. Archiving experiments preserves the results so you can refer to them in the future. Before you can archive an experiment:- The experiment must not be running. To learn how to stop an experiment, read Stop experiment iterations.
- The experiment must not be included in a layer. To learn how to remove an experiment from a layer, read Remove experiments from layers.
- Navigate to the Experiments list in the environment you want to archive an experiment in.
- Click on the three-dot overflow menu of the experiment you want to archive.
- Select Archive.
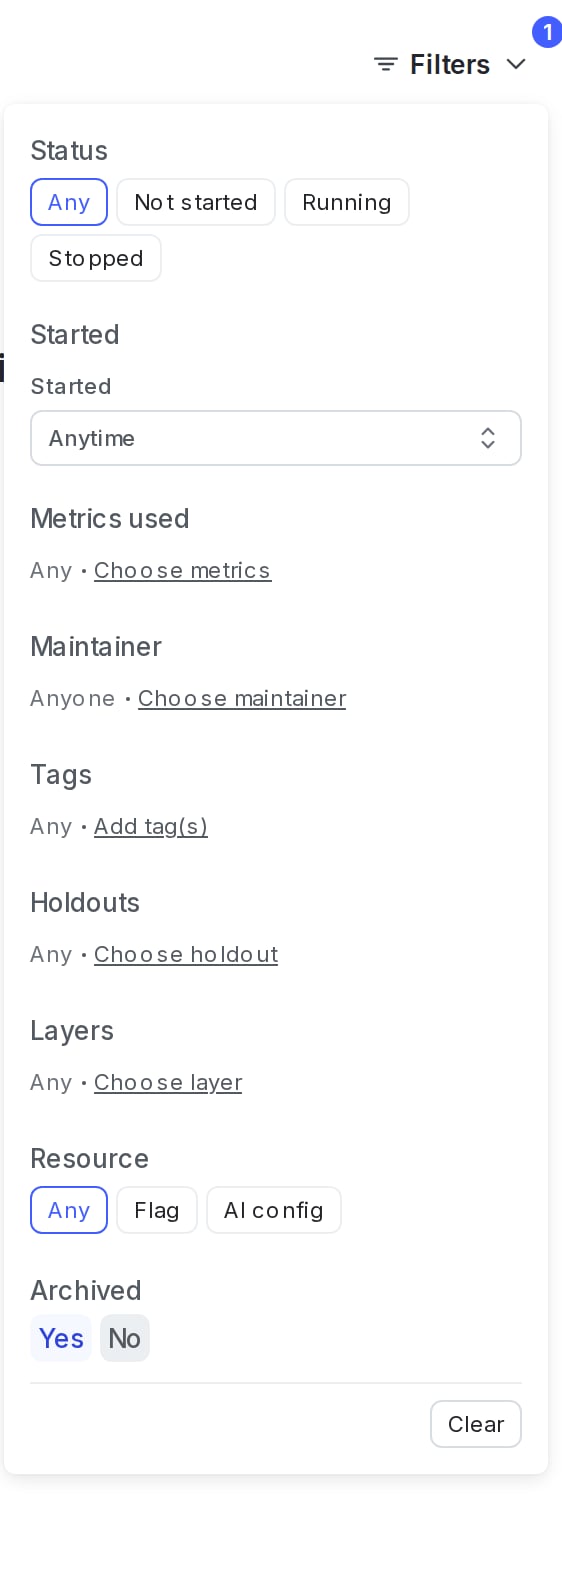
The "View archived experiments" option on the Experiments list.
Experiment settings are environment-specificExperiments and experiment settings are specific to single environments. If you want to run the same experiment in different environments, you must create and run the experiment in each environment individually.

You can also use the REST API: Patch experiment